Here is a detailed tutorial for painting Silver Skulls Primaris Space Marines in 34 easy to follow steps. An economic and effective paint scheme for all sorts of dark metallic (power) armour.
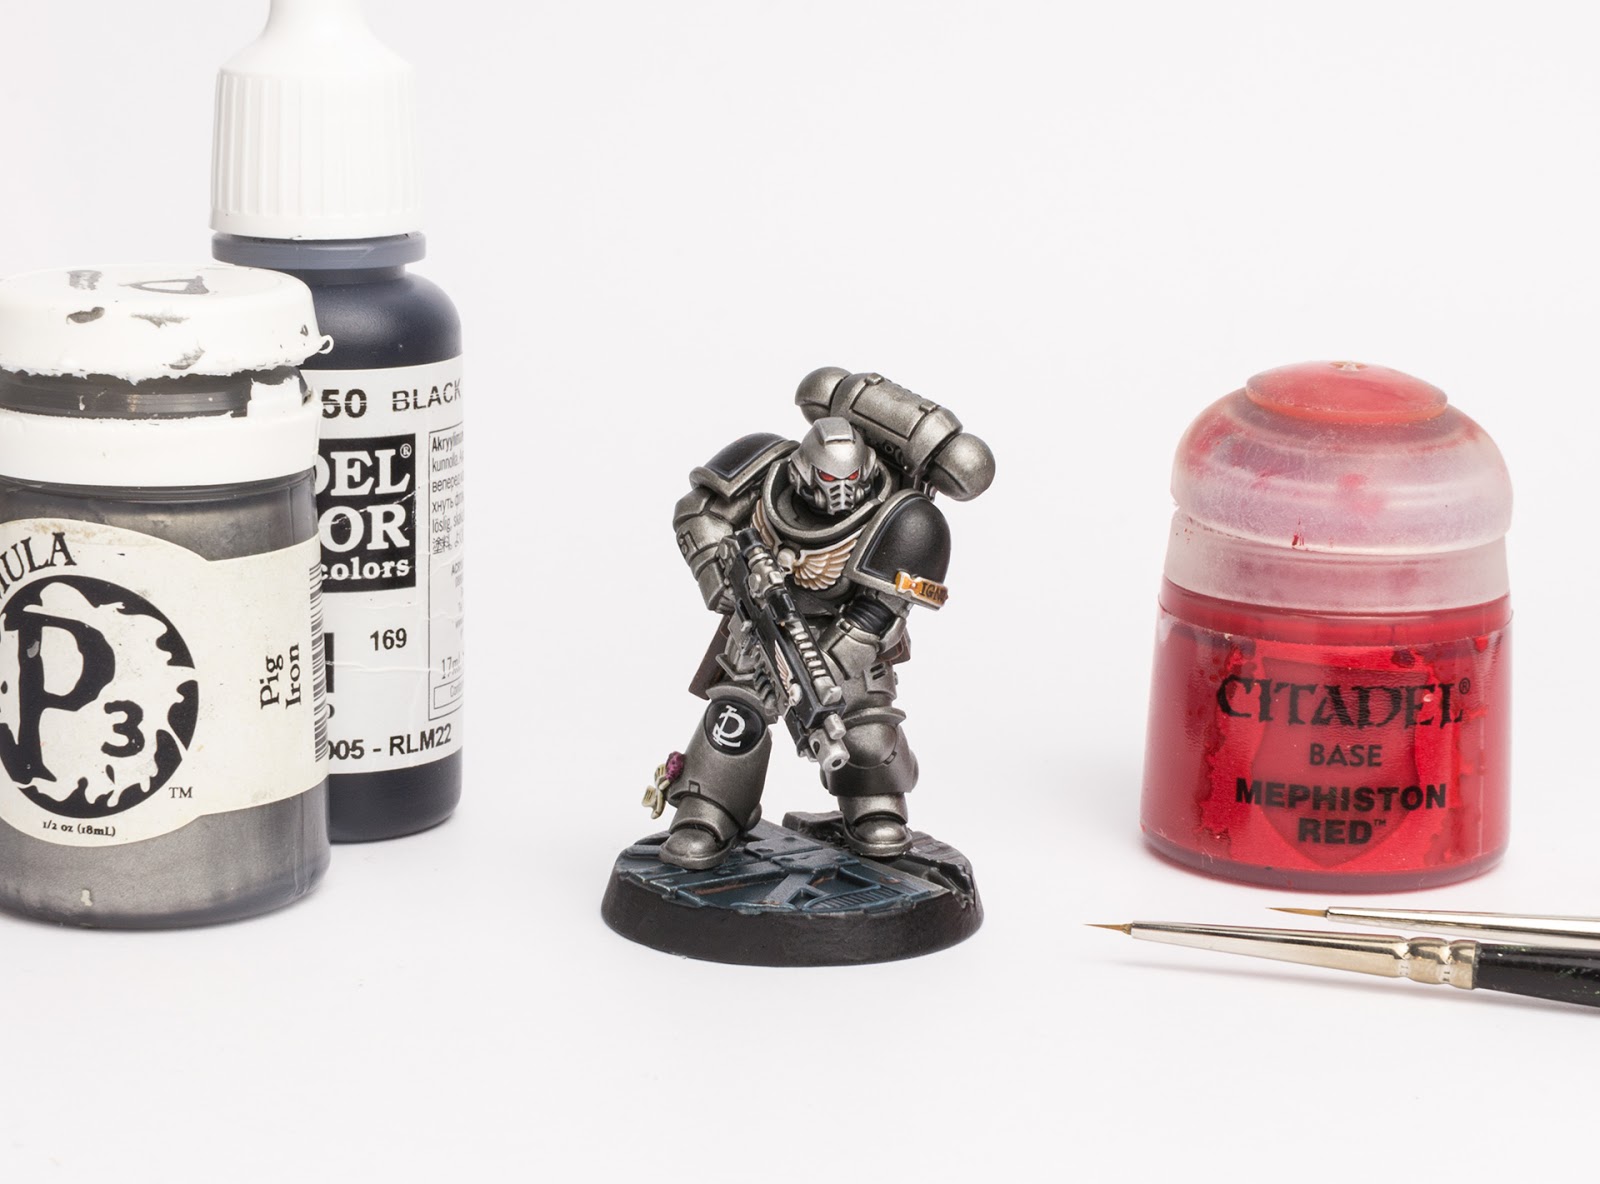

This tutorial assumes you have a good understanding of how to paint. Underneath each picture are the corresponding instructions. Each step shows the paint(s) I used during that step. I have a rather eclectic paint collection, so when I use a non-GW or OOP paint, I’ll try to provide you with suitable alternatives from the current Citadel paint range [in brackets].
Paints I used for this tutorial:
Mechanicus Standard Grey spray
Citadel Nuln Oil Gloss
Citadel Agrax Earthshade
Citadel Agrax Earthshade Gloss
Citadel Reikland Fleshshade
Citadel Reikland Fleshshade Gloss
Citadel Dawnstone
Citadel Steel Legion Drab
Citadel Screaming Skull
Citadel Screamer Pink
Citadel Emperor’s Children
Citadel Retributor Armour
Citadel Mephiston Red
Citadel Blood Red [OOP, Evil Sunz Scarlet]
Citadel Scorched Brown [OOP, Rhinox Hide plus Doombull Brown]
Citadel Adeptus Battlegrey [OOP, Mechanicus Standard Grey]
Army Painter Warpaints Dark Tone Ink [or Nuln Oil]
Army Painter Warpaints Plate Mail Metal [or Ironbreaker]
Army Painter Warpaints Shining Silver [Runefang Silver or Stormhost Silver]
Army Painter Warpaints Lava Orange [or Troll Slayer Orange]
Vallejo Model Color Black [or Abaddon Black]
Vallejo Model Color Dark Grey [or Eshin Grey]
Vallejo Model Color White [or White Scar]
Vallejo Game Color Brown Ink [or thinned Doombull Brown]
Formula P3 Pig Iron [or Leadbelcher]
Formula P3 Umbral Umber [or Rhinox Hide]
Formula P3 Bootstrap Leather [or Gorthor Brown]
Formula P3 Menoth White Base [or Ushabti Bone]
Reaper Master Series Polished Bone [or Pallid Wych Flesh]
In case you need to expand your paint collection, head over to Wayland Games or Element Games, which both stock a huge selection of paints at competitive prices.
Silver Skulls Primaris Intercessor painting guide
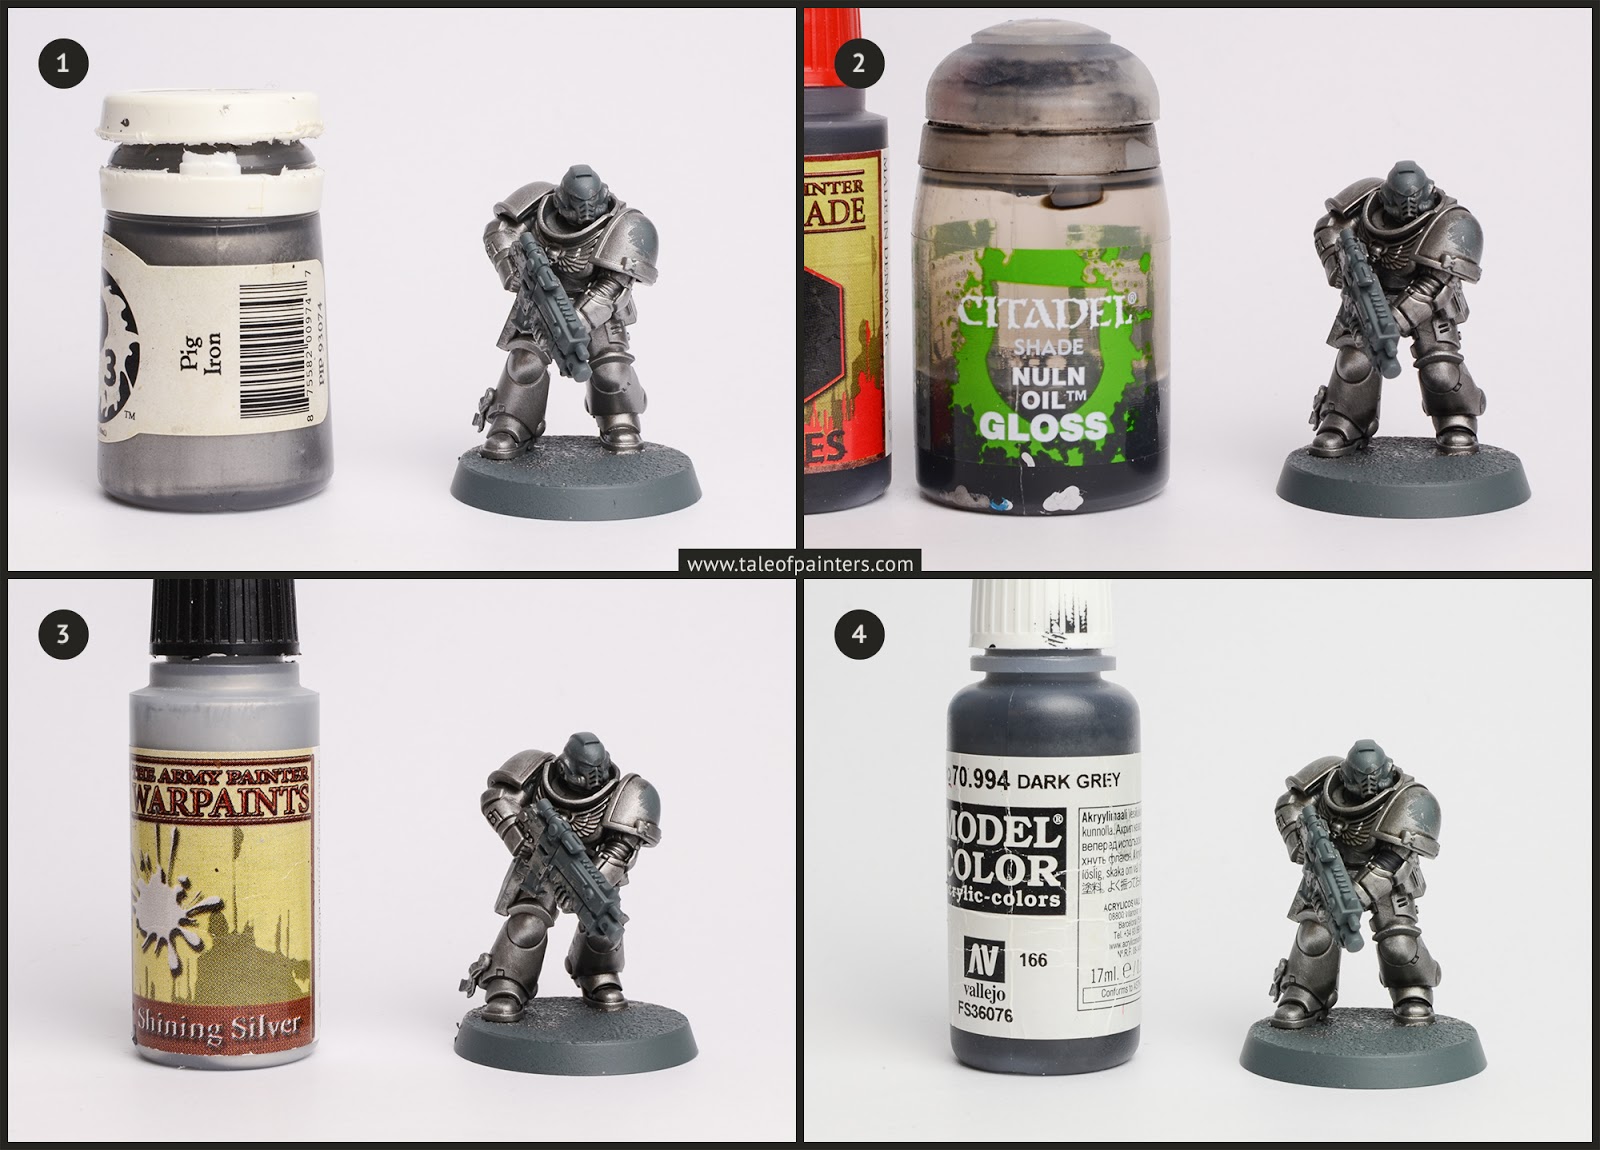

1. The Primaris Intercessor was primed with Mechanicus Standard Grey from Games Workshop, the armour then basecoated with a couple of thinned coats of Formula P3 Pig Iron [Leadbelcher]. I like to add a little drop of Vallejo Game Color Glaze Medium or Lahmian Medium to thin metallic paints, in addition to a drop of water. Metallic paints tend to dry rather fast, and the Glaze Medium will help to create a smoother basecoat. Of course, you could also use Leadbelcher spray for basecoating, or even use an airbrush.
2. The whole armour was washed with a 1:1 mix of Army Painter Dark Tone Ink [Nuln Oil] and Nuln Oil Gloss. The Nuln Oil Gloss is “runnier” and helps to reduce the surface tension, while the Dark Tone Ink [Nuln Oil] adds more “body” to the wash and removes most of the gloss. Take care to not let the wash pool on any of the flat armour panels. Use a damp brush to soak up any excess wash. If there are still any uneven areas once the wash is dry, mix a little bit of black into Pig Iron [Leadbelcher] to match the shade of silver and apply the mix in thin layers where needed.
3. I drybrushed the armour with Army Painter Shining Silver [Runefang Silver or Stormhost Silver]. I thoroughly wiped away any excess paint, keeping only a minimum of silver paint on my brush, then concentrated on hard edges.
4. The undersuit and belt were basecoated with Vallejo Model Color Dark Grey [Eshin Grey, I prefer VMC Dark Grey because the coverage is much better].
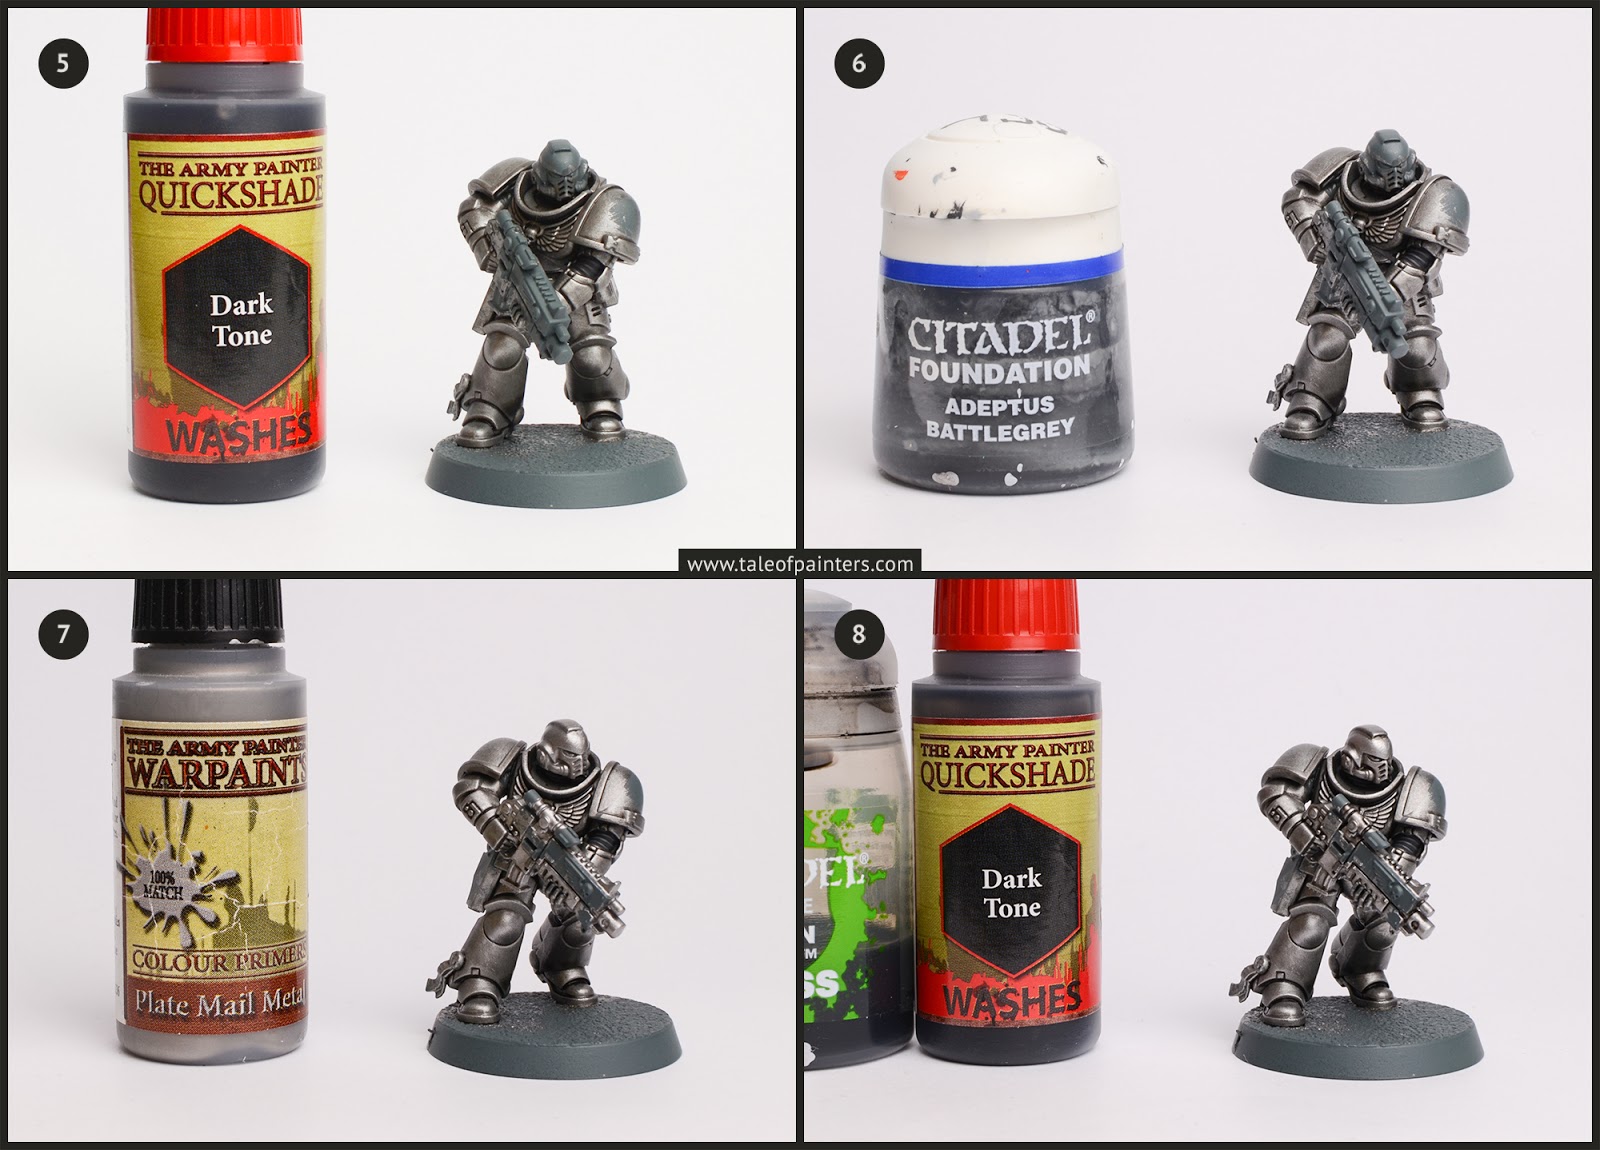

5. Undersuit and belt were washed with Dark Tone Ink. I felt the need to wash the belt a second time to darken it down a bit more.
6. I highlighted the belt and undersuit with old Foundation Paint Adeptus Battlegrey [Mechanicus Standard Grey is close].
7. I painted the areas I wanted to be a lighter, polished metal such as the gun, helmet and backpack exhausts with Army Painter Plate Mail Metal [Ironbreaker].
8. I shaded the polished metal with my 1:1 Dark Tone [Nuln Oil] and Nuln Oil Gloss mix, but instead of applying the wash all over, I painted it directly into the recesses. Once dry, I tidied up with Plate Mail Metal [Ironbreaker].
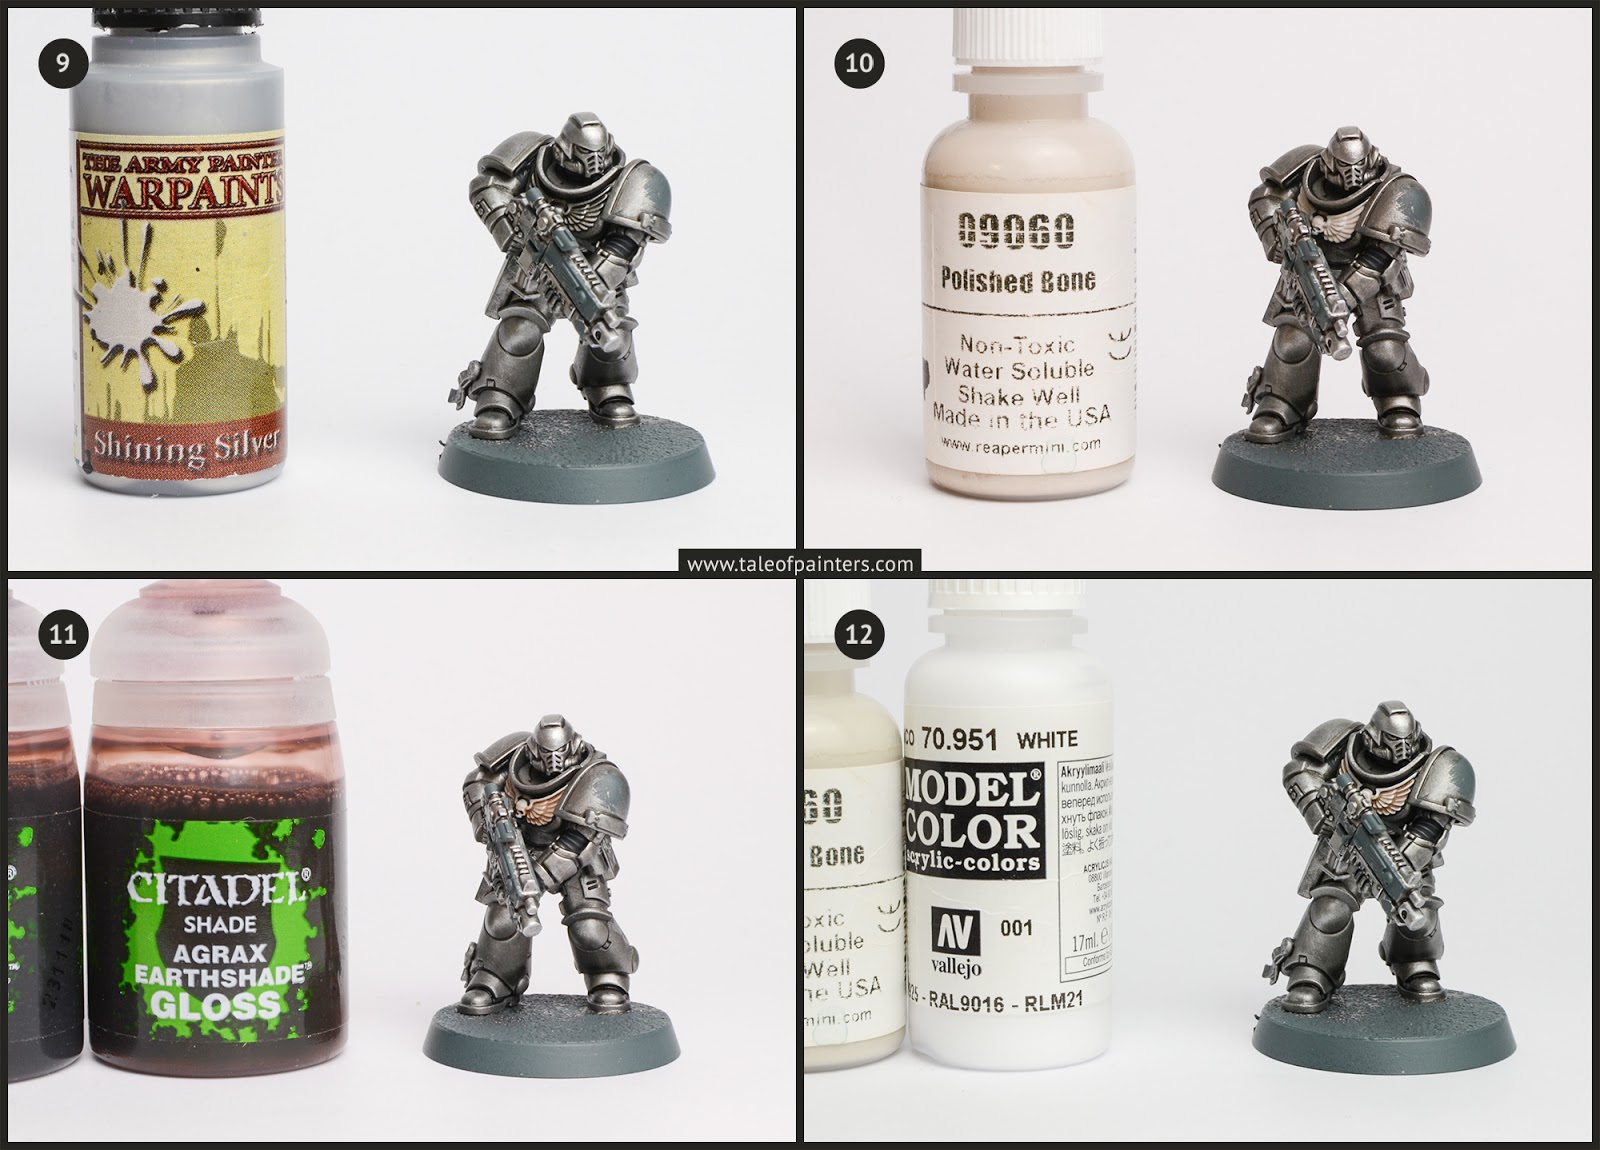

9. I highlighted the polished metal with Army Painter Shining Silver [Runefang Silver or Stormhost Silver].
10. The bone on the chest eagle was basecoated with Reaper Master Series Polished Bone [Pallid Wych Flesh is close but a bit lighter].
11. I washed the chest eagle with a 1:1 mix of Agrax Earthshade and Agrax Earthshade Gloss.
12. I layered RMS Polished Bone but only on the skull of the cheast eagle, then highlighted the whole chest eagle with Vallejo Model Color White [White Scar, but VMC White is my favourite white when it comes to coverage].


13. Any areas I wanted to be black such as the bolt rifle casing were painted with Vallejo Model Color Black [Abaddon Black, but I prefer VMC Black as the coverage is excellent and it is very matte].
14. I highlighted the black areas with VMC Dark Grey [Eshin Grey].
15. A final highlight of Dawnstone was applied to the black areas.
16. I basecoated the leather pouches with Formula P3 Umbral Umber [Rhinox Hide is pretty much the same].
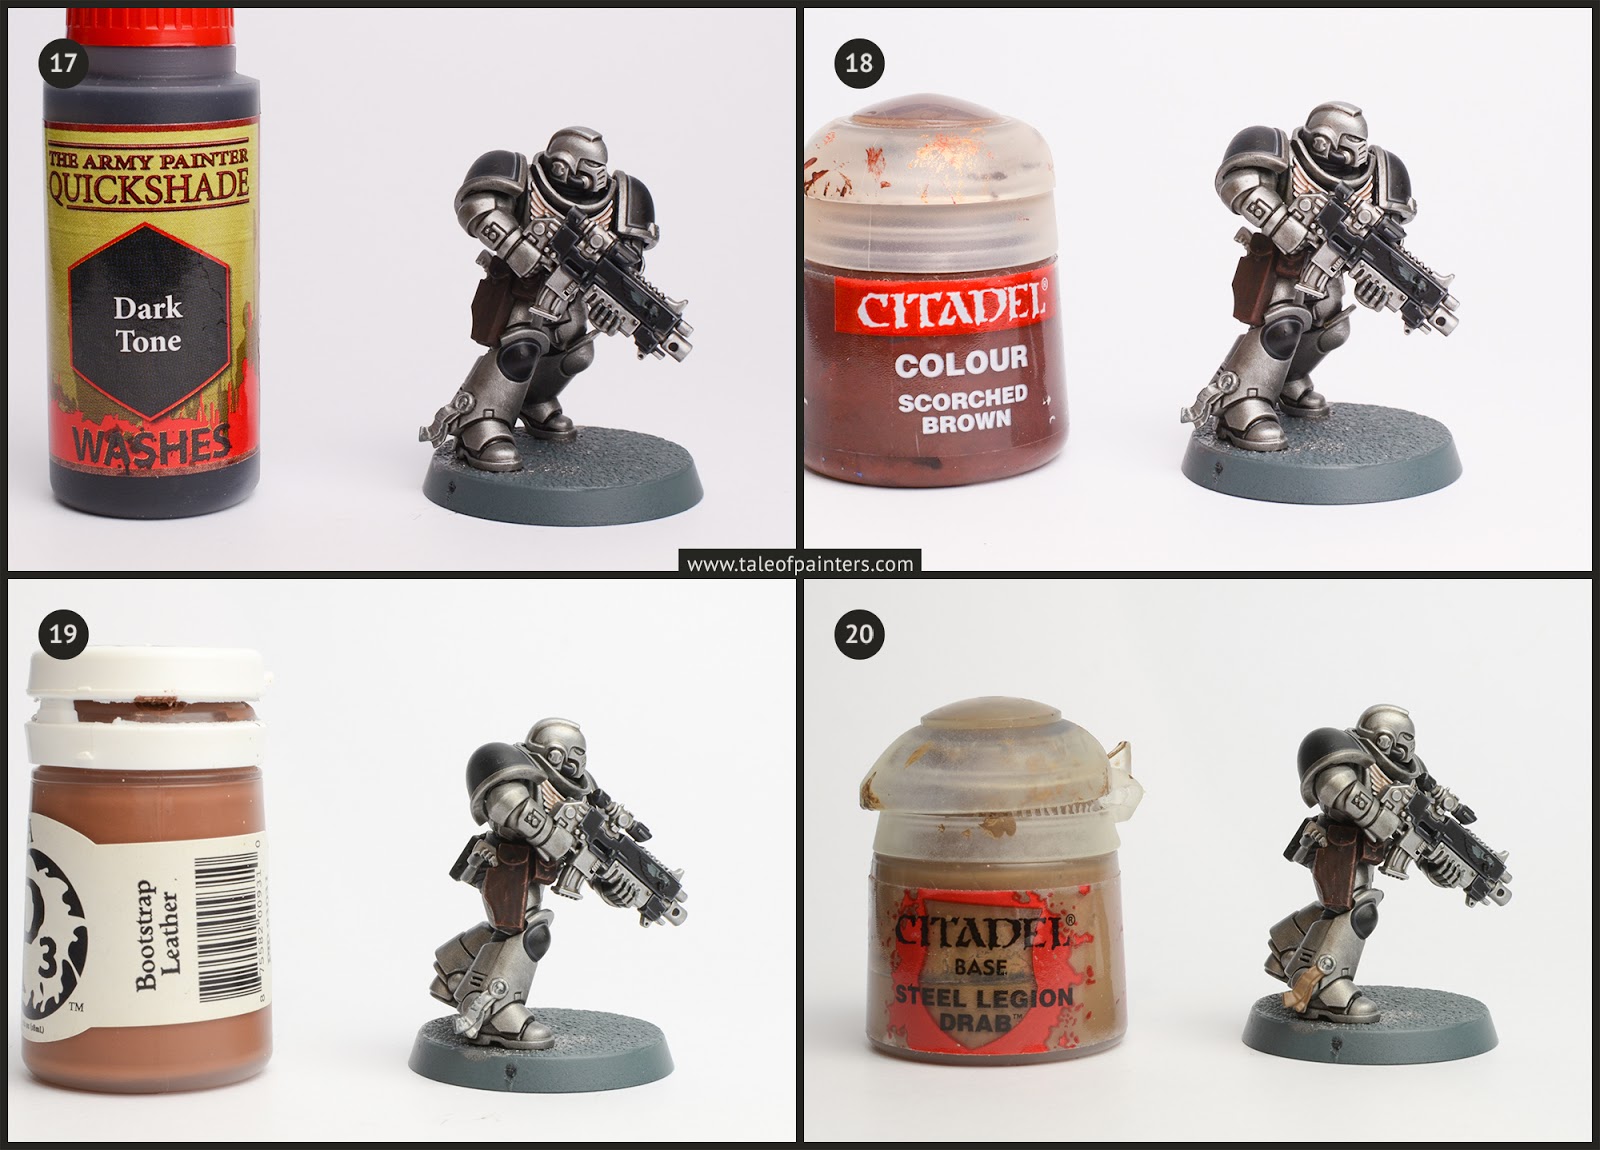

17. The leather was washed with Dark Tone Ink [Nuln Oil] all over.
18. I highlighted the leather with old Scorched Brown [mix Rhinox Hide with a little bit of Doombull Brown] in a “scruffy” way to add a worn texture.
19. Finally, I highlighted the leather with Formula P3 Bootstrap Leather [Gorthor Brown is probably the closest Citadel paint, even though Bootstrap Leather is a bit more reddish].
20. I basecoated the parchment of the purity seal with Steel Legion Drab.
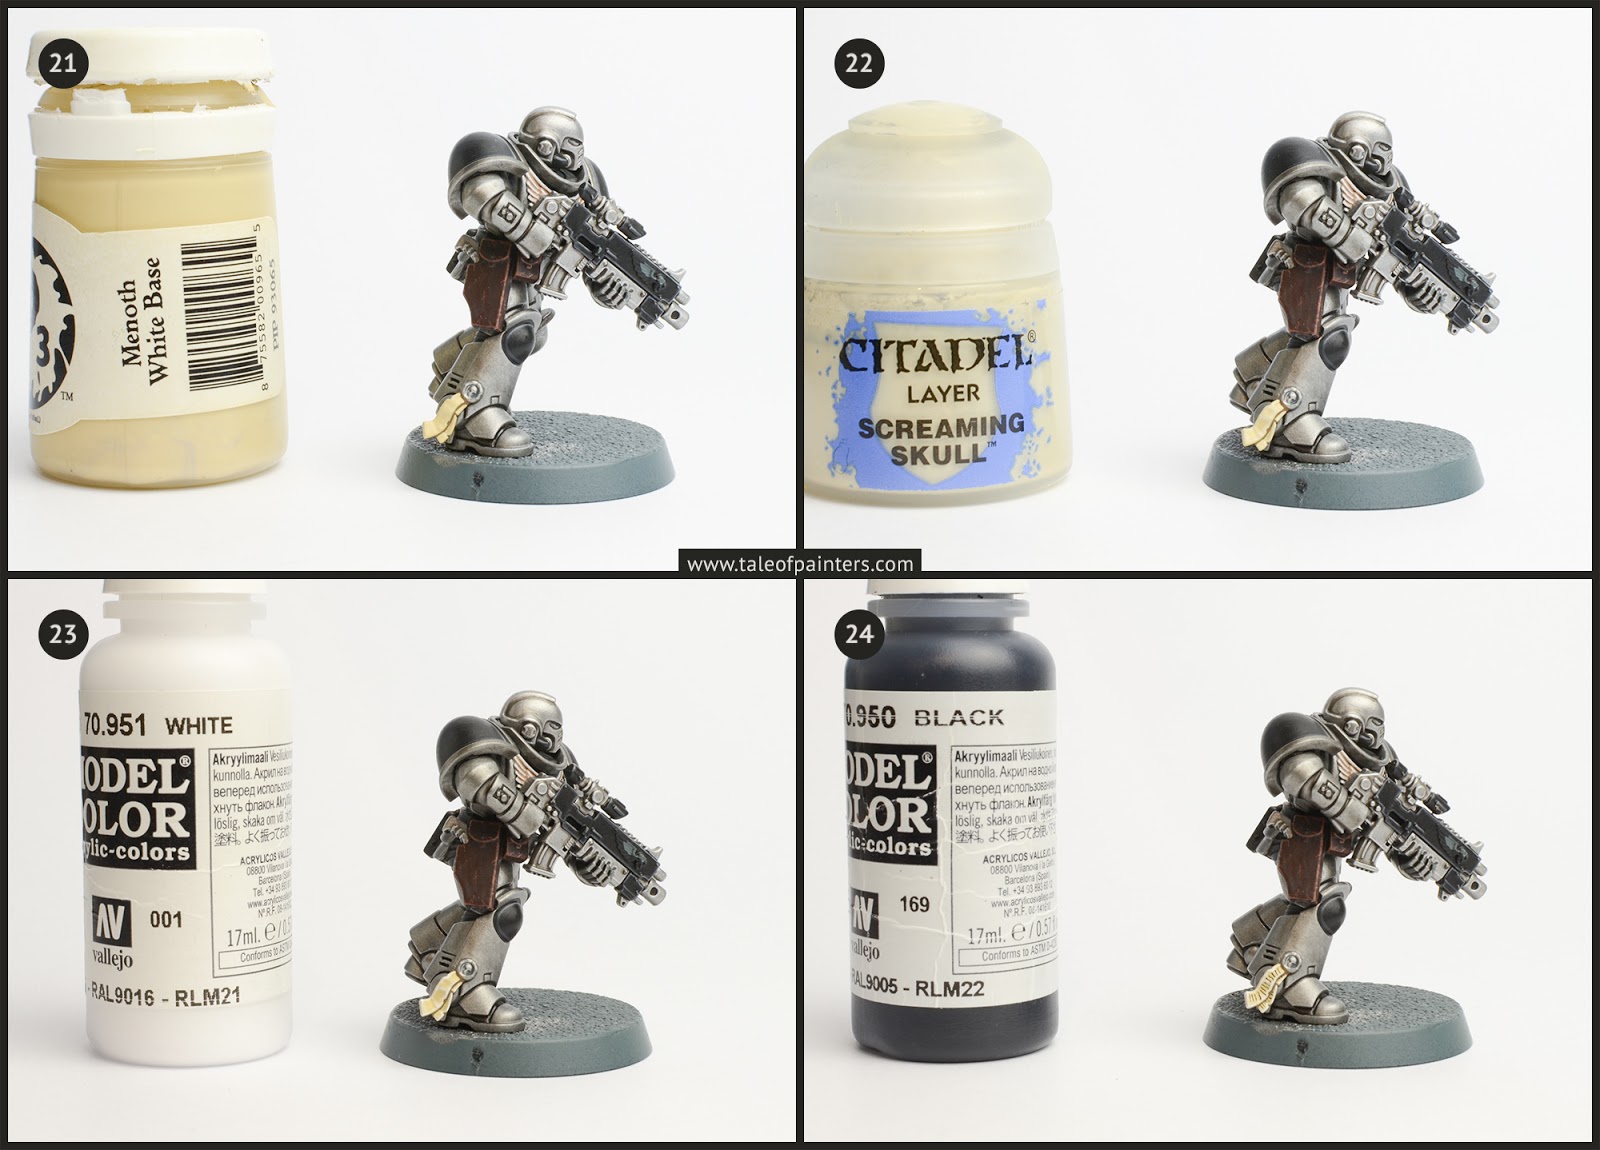

21. I layered Formula P3 Menoth White Base [Ushabti Bone], leaving Steel Legion Drab visible in the recesses.
22. I highlighted the parchment with Screaming Skull
23. I added another highlight of VMC White [White Scar].
24. With a very small brush I added fine lines of thinned VMC Black [Abaddon Black].
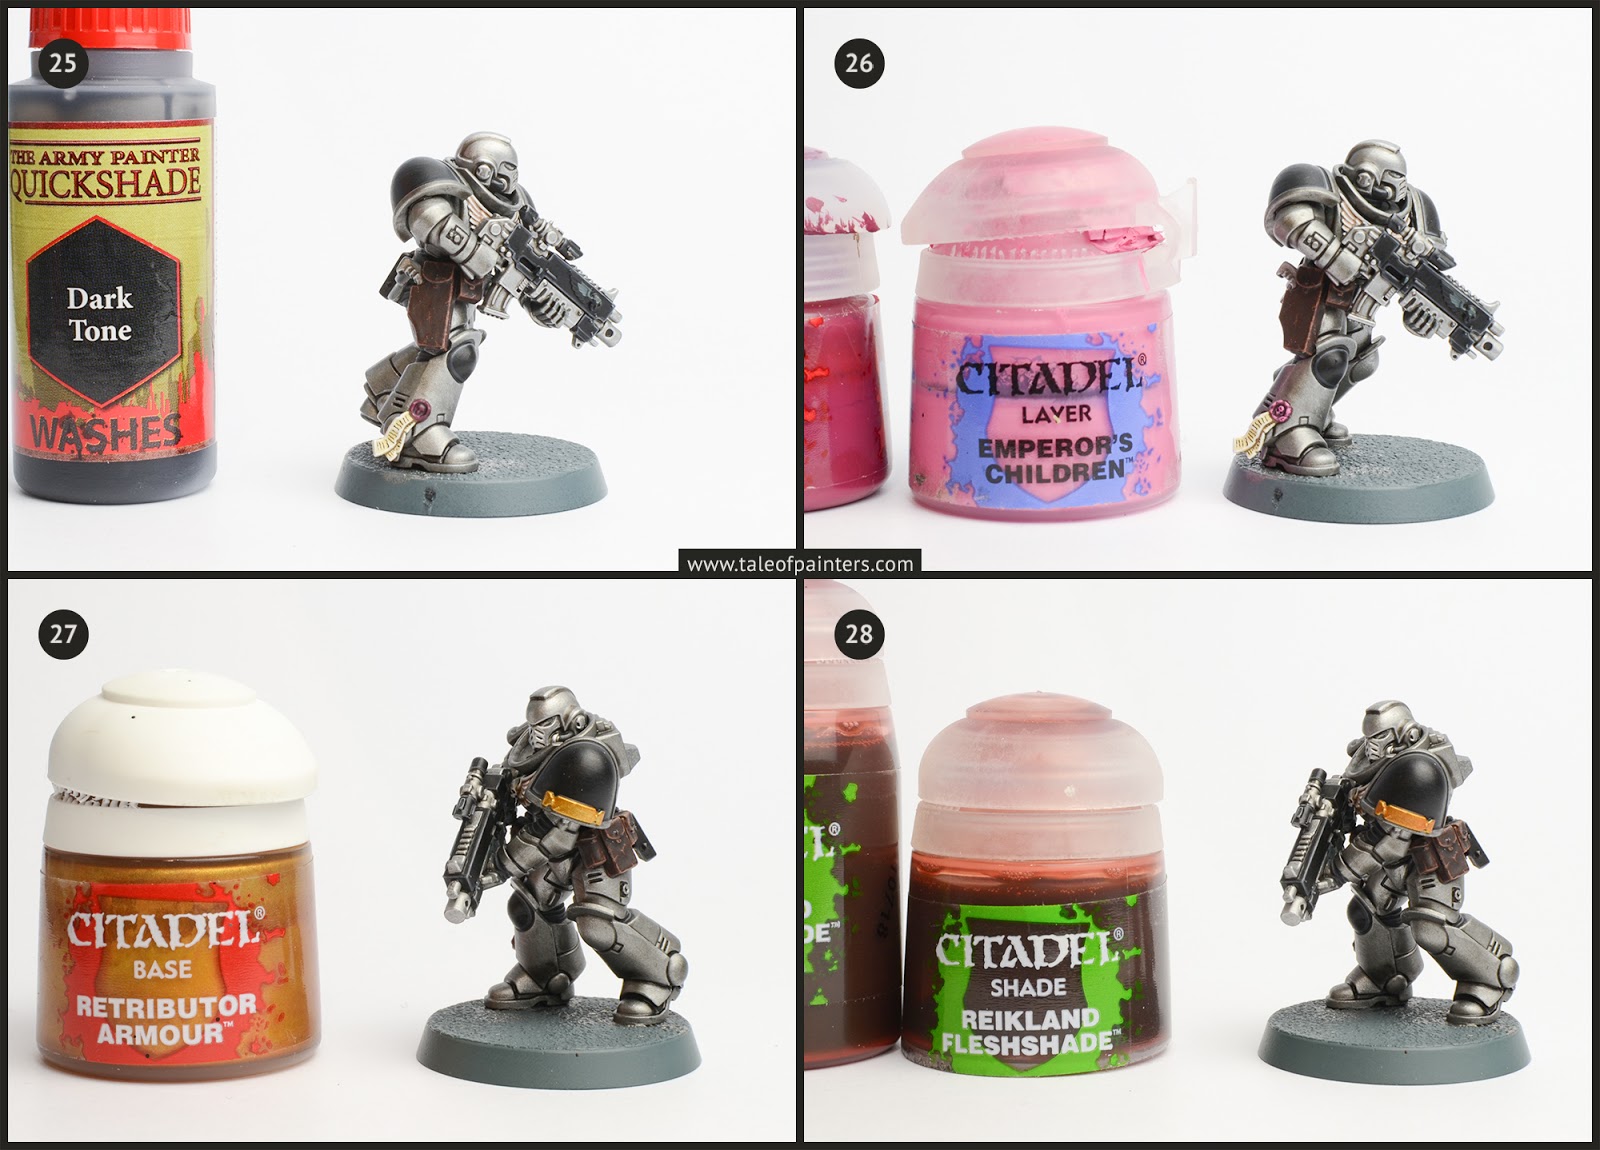

25. The wax seal was basecoated with Screamer Pink, then washed with Dark Tone Ink [Nuln Oil].
26. Once the wash was dry, I highlighted with a mix of Screamer Pink and Emperor’s Children and pure Emperor’s Children after that.
27. The golden plaque was basecoated with Retributor Armour.
28. A 1:1 mix of Reikland Fleshshade and Reikland Fleshshade Gloss was washed all over the gold.
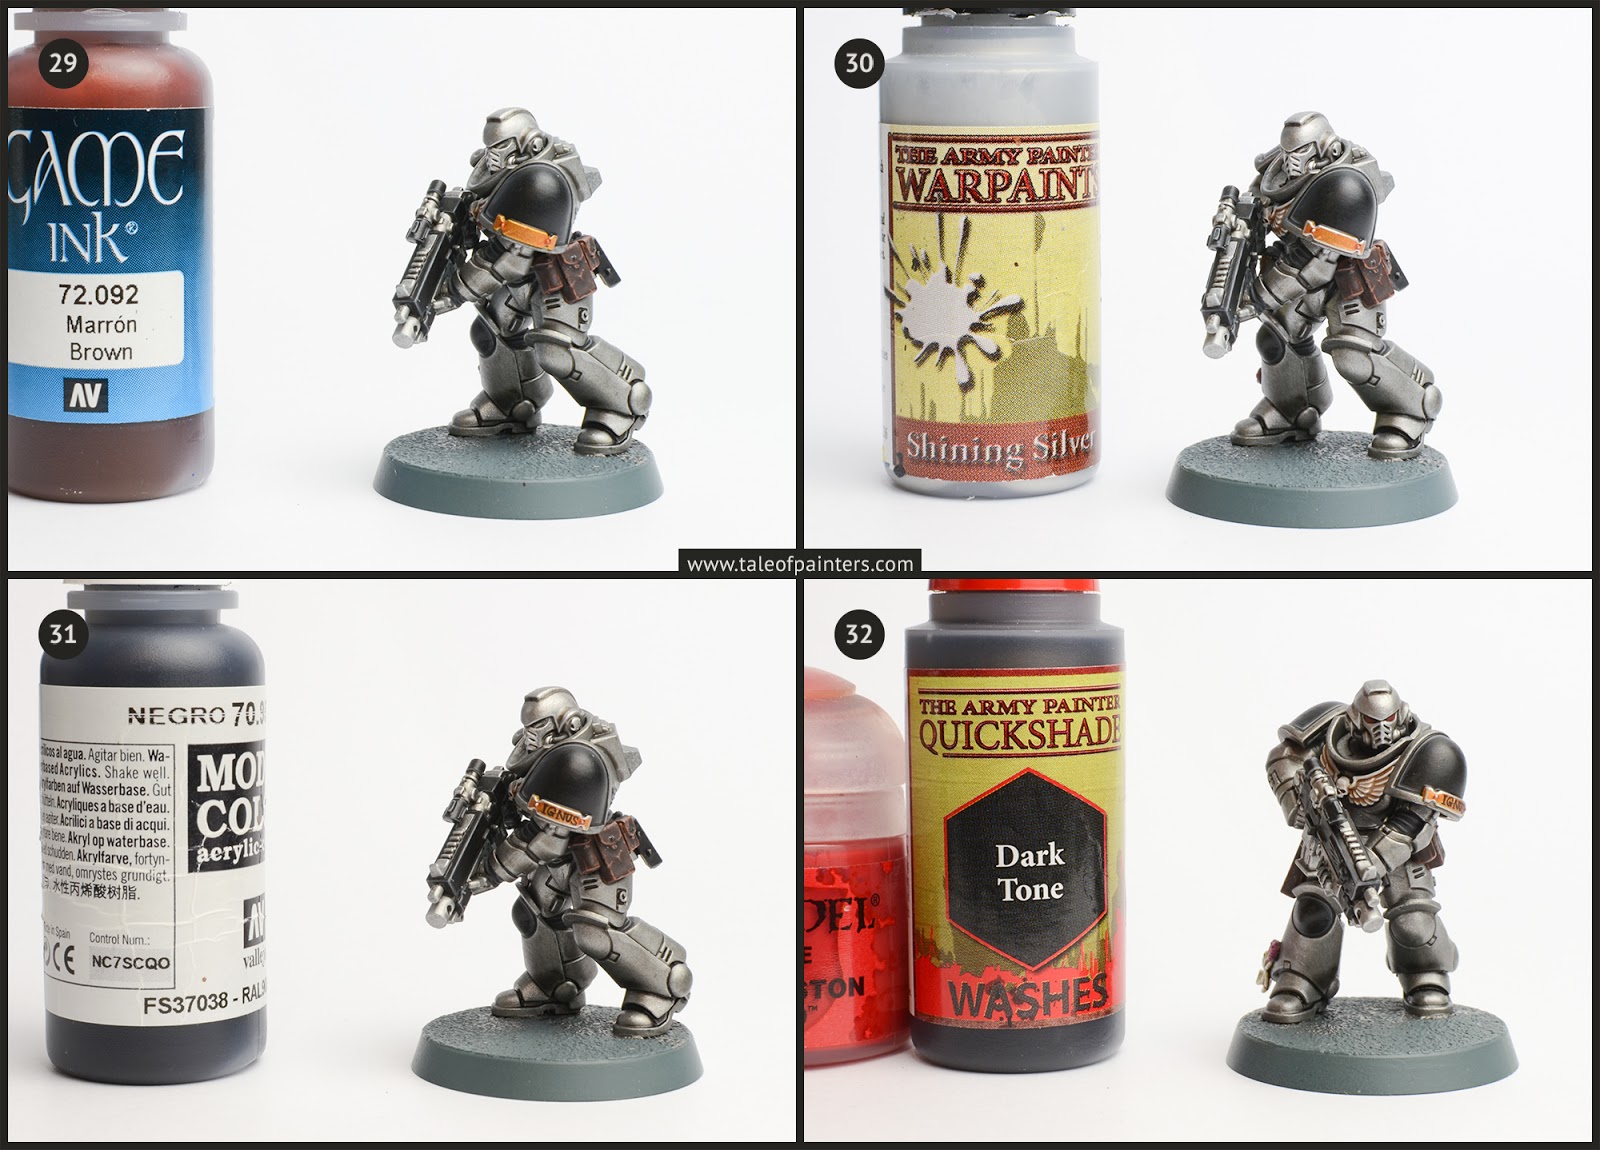

29. Vallejo Game Color Brown Ink [you can also use thinned Doombull Brown] was used to deep shade around the screws.
30. The gold was edge highlighted with Army Painter Shining Silver [Runefang Silver or Stormhost Silver].
31. With a small brush and thinned VMC Black [Abaddon Black] I added a name to the golden plaque.
32. I painted the eye lenses with Mephiston Red, then applied a wash of Army Painter Dark Tone Ink.
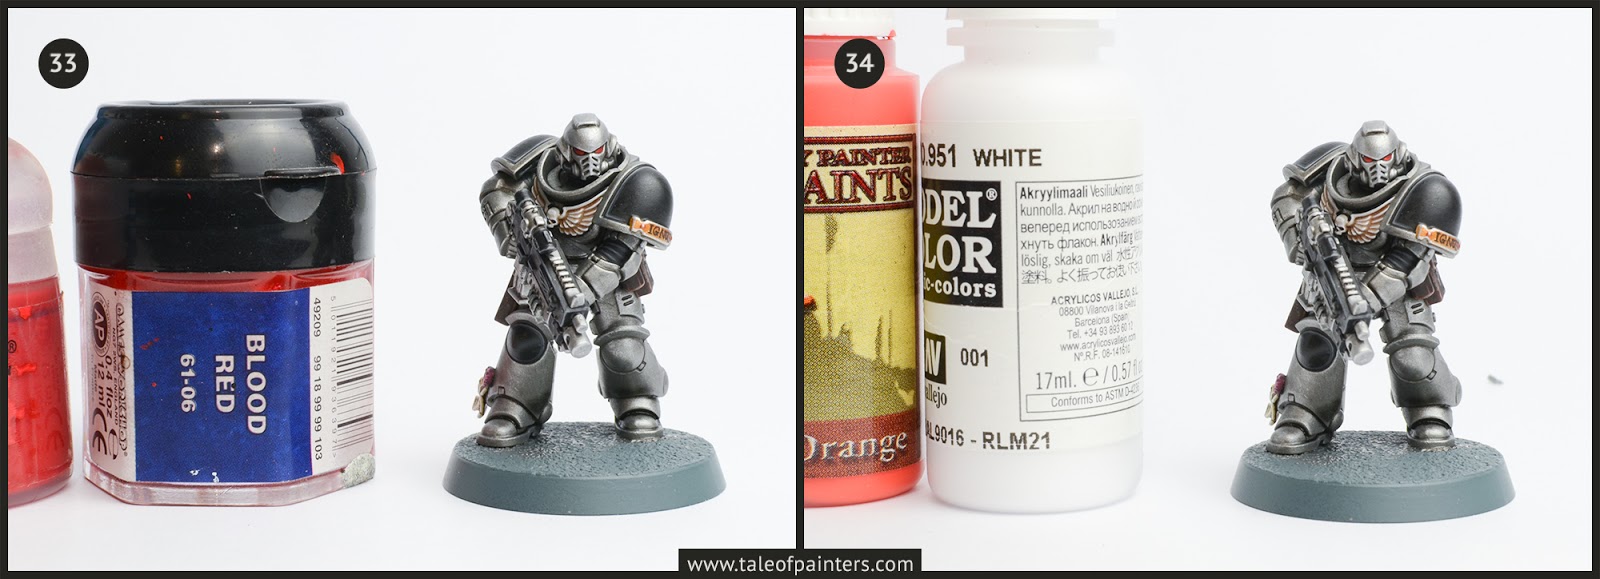

33. I highlighted the lenses with Mephiston Red, then old Blood Red [Evil Sunz Scarlet], concentrating my highlights on the front and lower parts of the lenses.
34. A final thin highlight of Army Painter Lava Orange [Troll Slayer Orange] was applied. Then I applied a small dot of VMC White [White Scar] for the reflection.
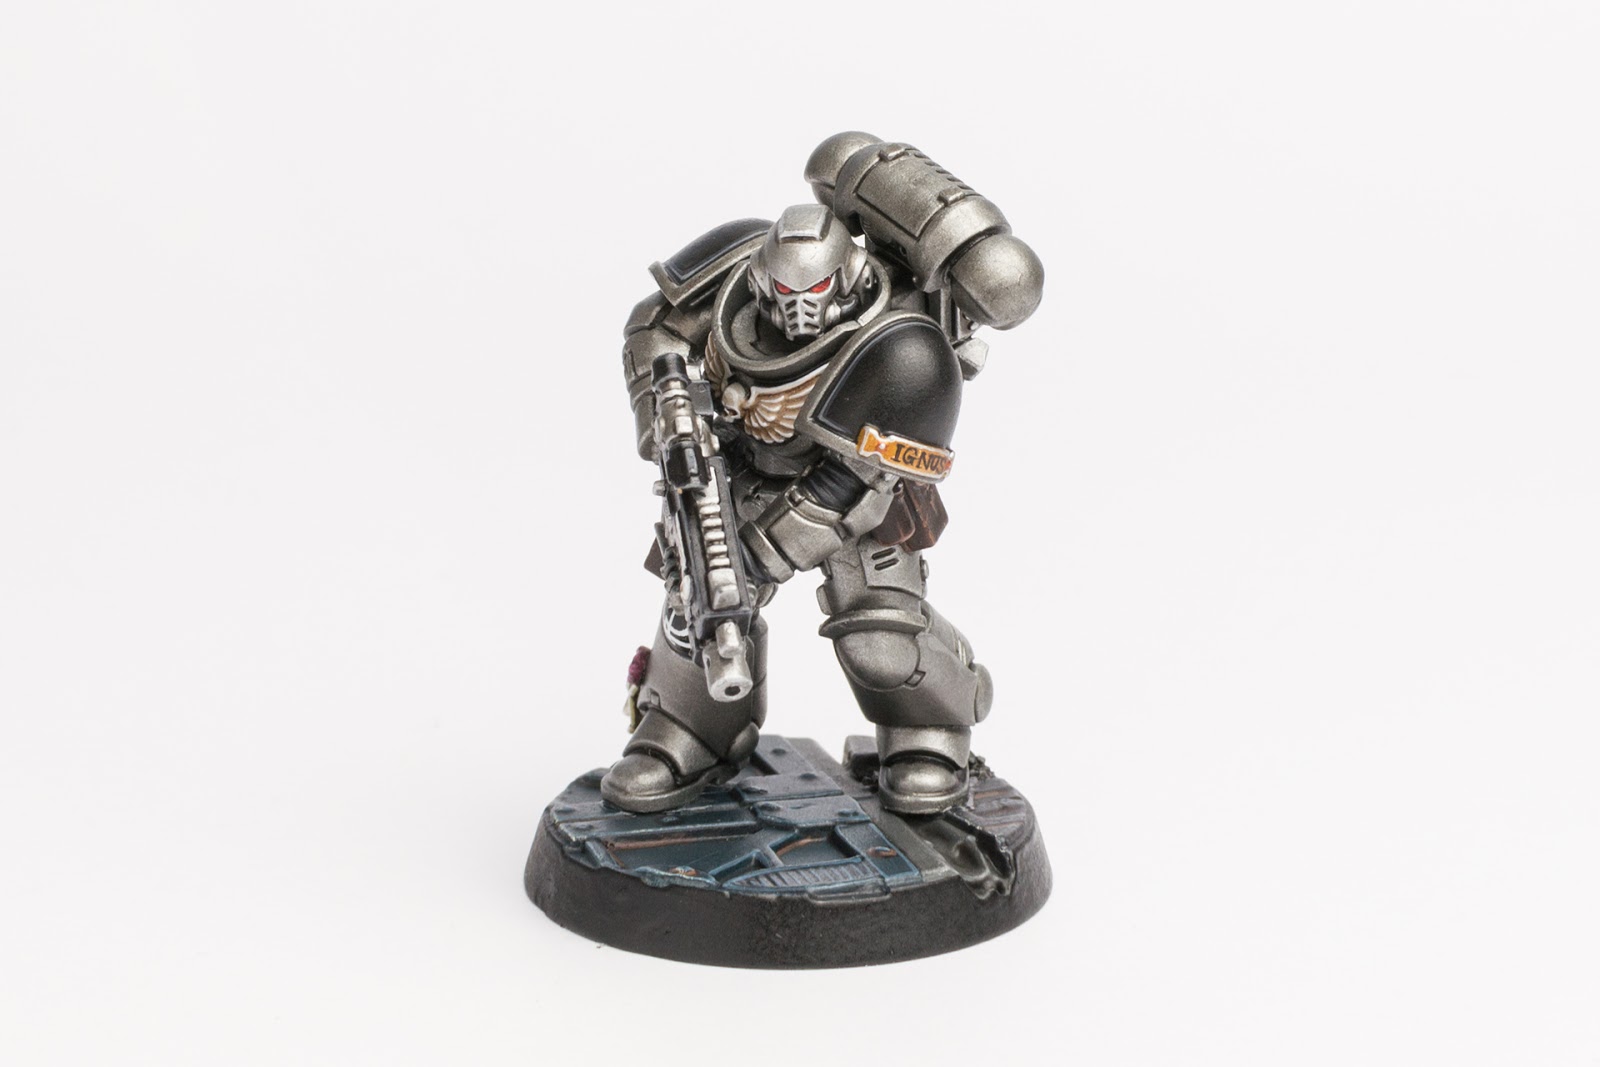

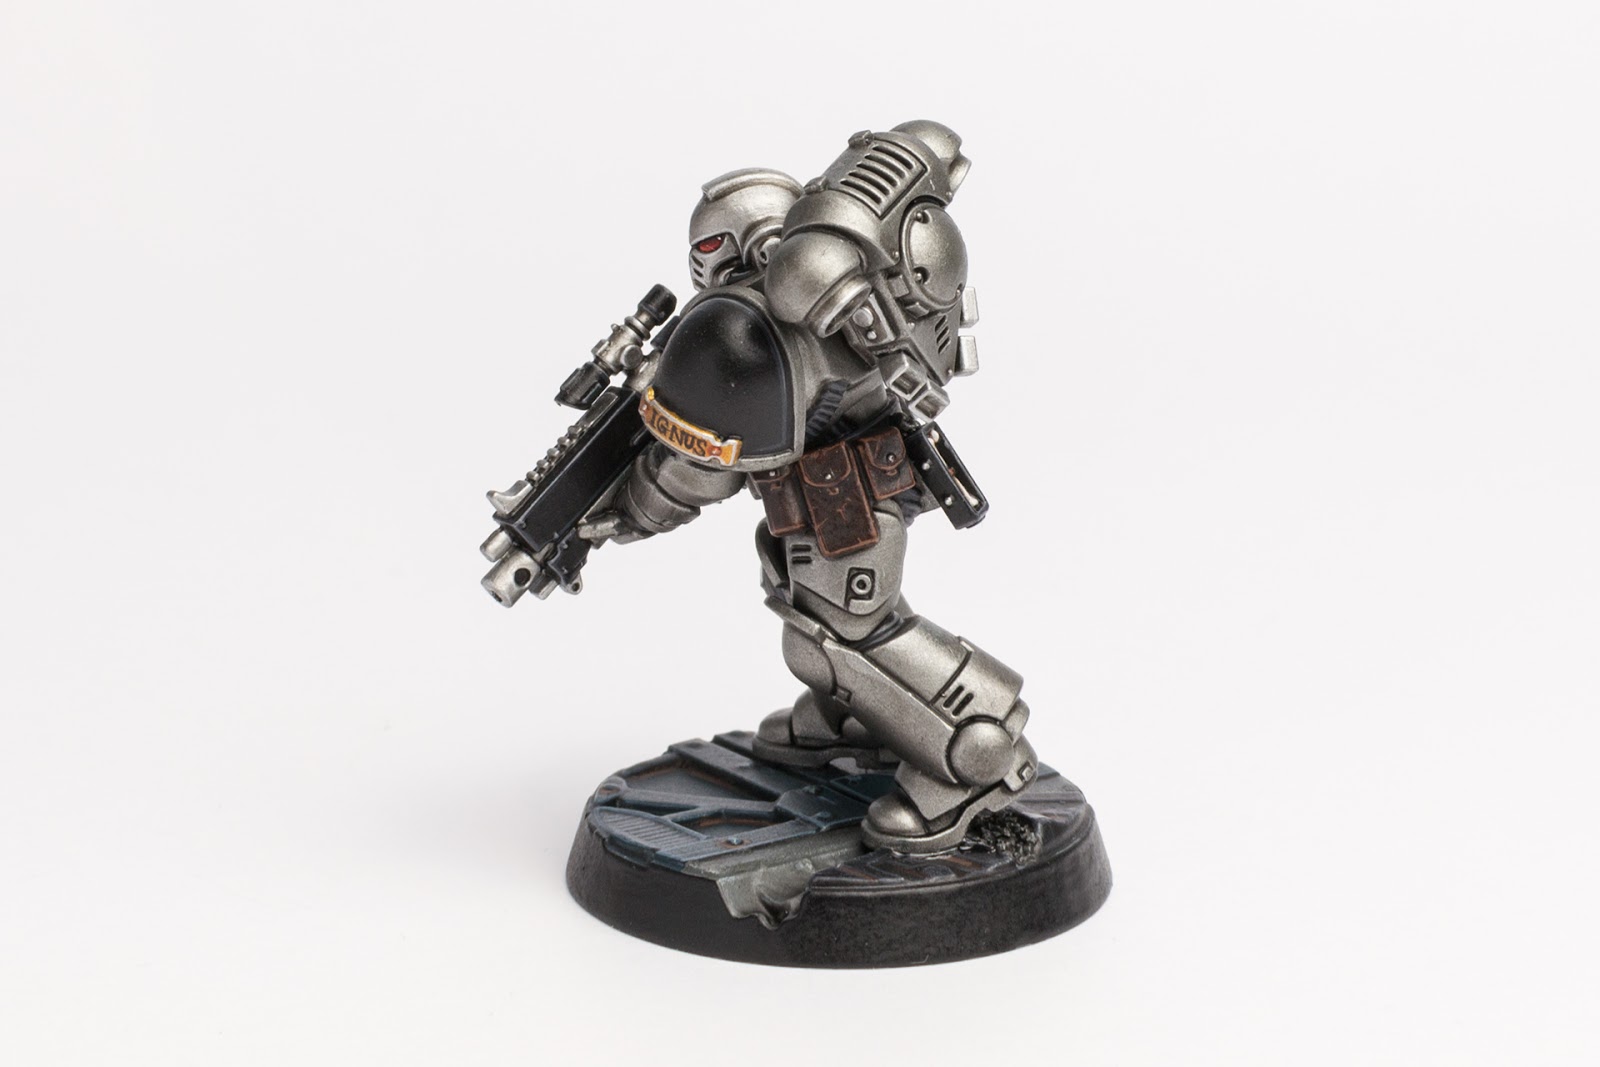


Here we have the finished Primaris Intercessor in my Silver Skulls paint scheme. I painted the backpack in the same way as the armour (steps 1 to 3), the exhausts like steps 7 to 9, and the aquila on the bolt rifle in the same way as the chest eagle, see steps 10 to 12.
Transfers were added to the model. I started with a coat of ‘Ardcoat to seal the paint job and to create a smooth surface for the transfer to cling on. Once in place and completely dry, I apply several coats of Microsol, which softens the transfer and makes it snuggle even to curved surfaces such as shoulder pads. The red tactical arrow is based on a white arrow from the Ultramarines transfer sheet, painted over with Blood Red [Evil Sunz Scarlet] once sealed in place. The numbers come from the Dark Angels section from the Dark Imperium transfer sheet. Finally, I sprayed the whole model with a couple of thin coats of satin varnish (Munitorum Varnish works great for this).
As you can see, the chapter icon is missing. I’m gonna use self-printed transfer for them, more about that in a future post.
How to paint Sector Imperialis bases


The base was painted separately. I sprayed the base with Mechanicus Standard Grey, then drybrushed the sand with Longbeard Grey. The black parts were painted with VMC Black [Abaddon Black], the turquoise parts with Incubi Darkness. I shaded the turquoise with VGC Black Ink [thinned Abaddon Black], then selectivly washed thinned Rhinox Hide and thinned Formula P3 Bootstrap Leather [Gorthor Brown] into the recesses for grime and rust. I highlighted the black parts with VMC Dark Grey [Eshin Grey] and the turquoise with Thunderhawk Blue (the detail on the Sector Imperialis bases is quite soft, but a thin edge highlight makes the details really pop). Finally, I drybrushed the black and turquoise gently with Screaming Skull, then washed the sand and grey areas with a 1:1 mix of Army Painter Strong Tone and Dark Tone Ink [Agrax Earthshade and Nuln Oil]. The base trim was painted with VMC Black [Abaddon Black].
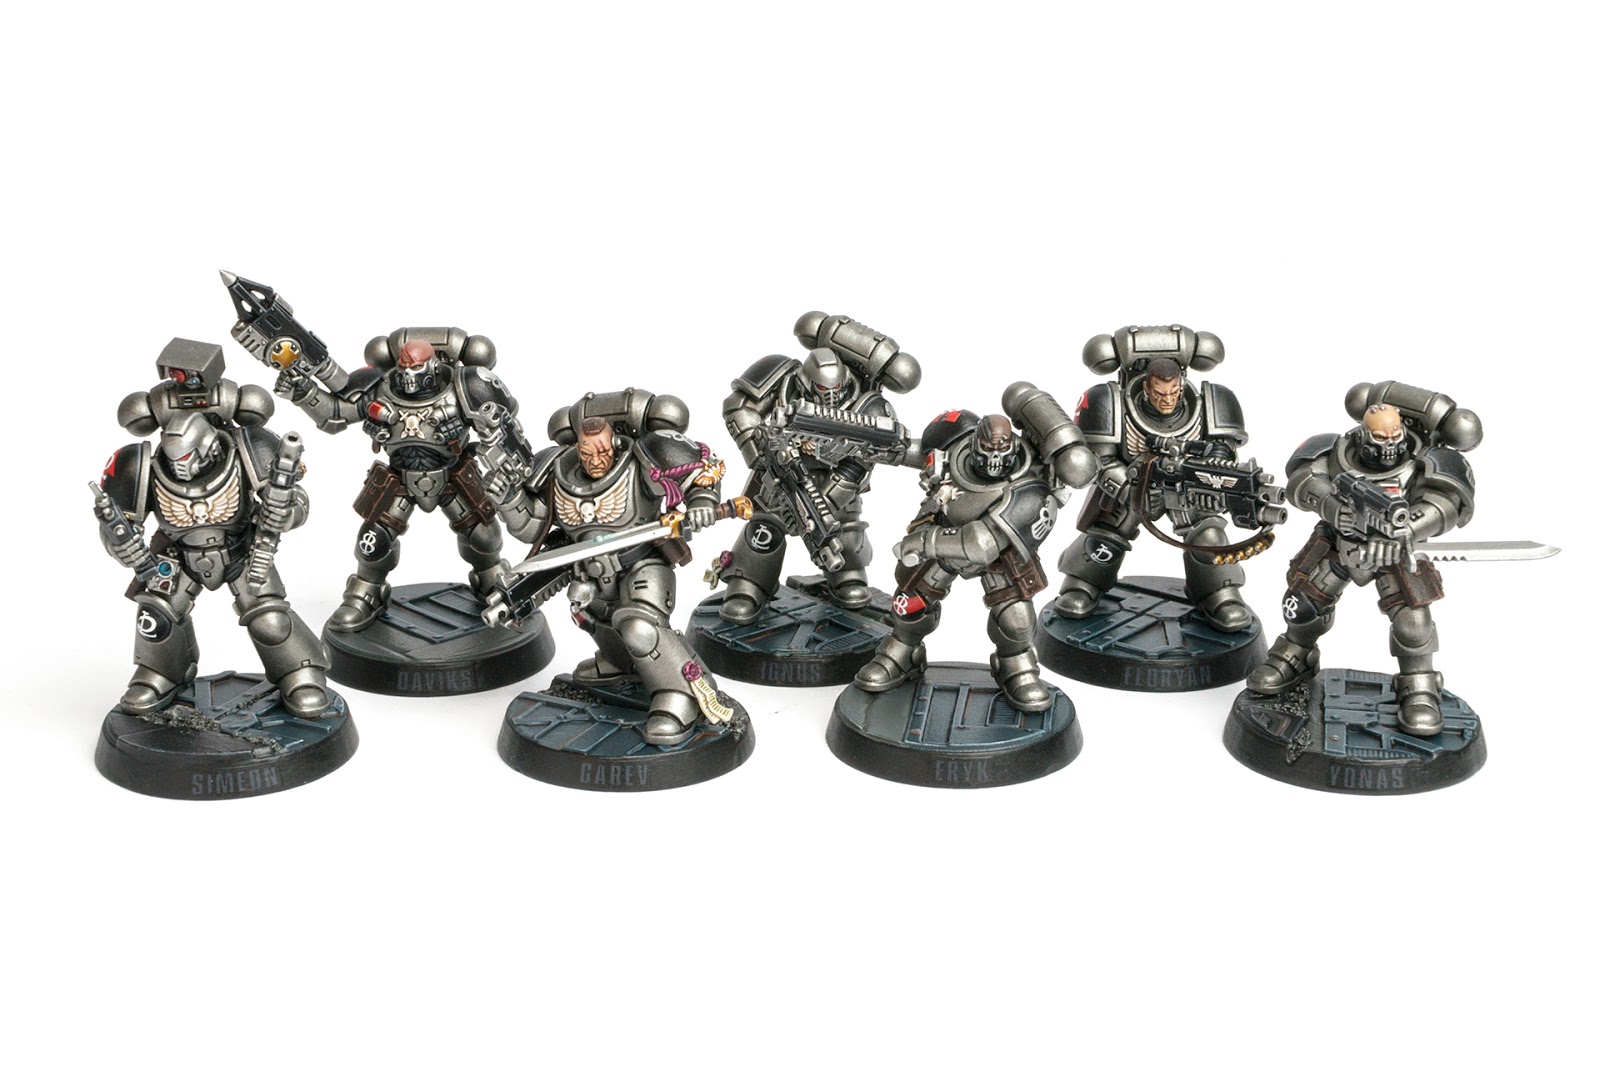

Check out more of my Silver Skulls Primaris collection:
How do you like my painting guide for Silver Skulls? Have you found anything useful in this tutorial for your own projects? Let us know in the comments!


Do you dilute the Inks from Vallejo when you use them to shade metallics?
No, straight from the bottle. You can also thin it down with a little bit of water or Lahmian Medium.
Thanks!
Hi Stahly. Thanks for the great tutorial! It's inspired me to do my shadowspear marines as silver skulls. I'd just like to know what ration you think would be good for step 2 where i had pooling please? Is 1-1 black to leadbelcher too much?
I like to use a 1:1 mix of Warpaints Dark Tone Ink and Nuln Oil Gloss – the gloss is key as it reduces the surface tension of the wash, so less pooling. Try to soak up excess wash with a damp brush as long as the wash is still wet. If there is still pooling (I have some too, often in weird spots), mix Leadbelcher with a little bit of black and paint over the pooling.
Thanks for the tutorial, I really like the finished model 😉
Awesome tutorial, that silver looks great!