
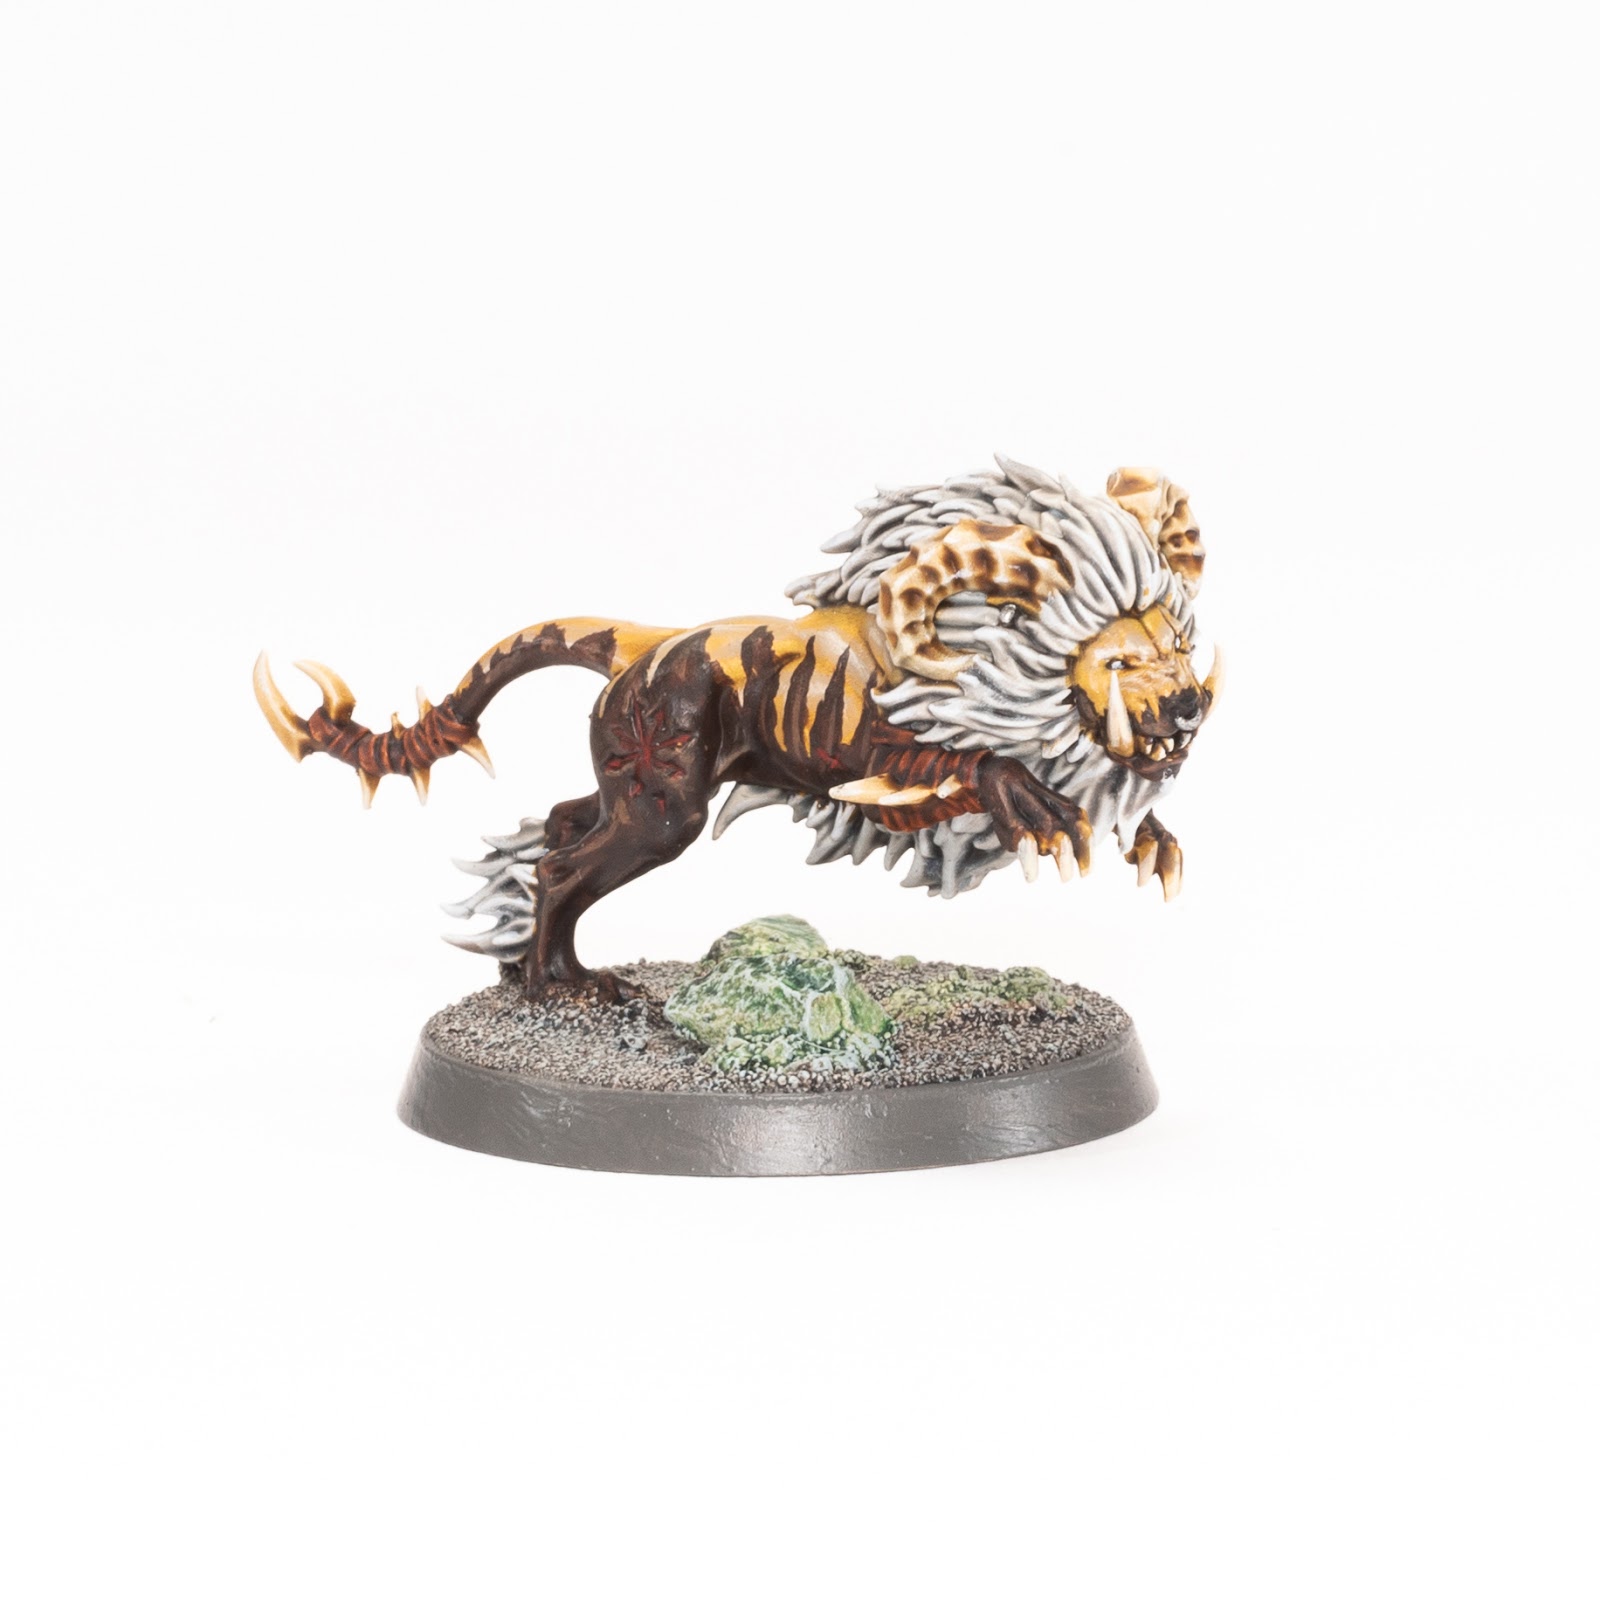
In today’s post, I share a tutorial on how to paint the Untamed Beast’s Rocktusk Prowler from the Warcry boxed game pictured above. More after the jump!
This tutorial assumes you have a basic understanding of how to paint. For the beginners, I will explain the techniques as I go along. Each picture below shows four chronological steps. Underneath each picture are the corresponding instructions. Each step shows the paint I used during that step.
Paints you will need for this tutorial:
Wraithbone
Contrast Medium (technical)
Apothecary White (contrast)
Basilicanum Grey (contrast)
Ulthuan Grey (layer)
Corax White (base)
Snakebite Leather (contrast)
Zamesi Desert (layer)
Zandri Dust (base)
Karak Stone (layer)
Screaming Skull (layer)
Skeleton Horde (contrast)
Gore Grunta Fur (contrast)
Rhinox Hide (base)
Doombull Brown (layer)
Deathclaw Brown (layer)
Nuln Oil (shade)
Abaddon Black (base)
Iron Breaker (layer)
Mephiston Red (base)

1. Undercoat the terrain with Wraithbone Contrast spray. Usual rules with spray apply, shake the can well for over 3 minutes. Wear a respirator or dust mask at a push. Spray outside in well-ventilated area. Check can for best ambient temperature spray conditions. Don’t spray close, don’t spray far away. Around 30 to 50cm away is fine.
2. Paint the mane and other fur areas with Apothecary White Contrast paint. Nice, thick coat of paint.
3. Once step two is dry, mix two parts Contrast Medium with one part Basilicanum Grey and then paint this thinned mix over the mane and fur.
4. Take some Ulthuan Grey from the pot with a large brush and wipe it onto a tissue so there is barely any paint left on the bristles. Then ‘drybrush’ the fur to hightlight it.
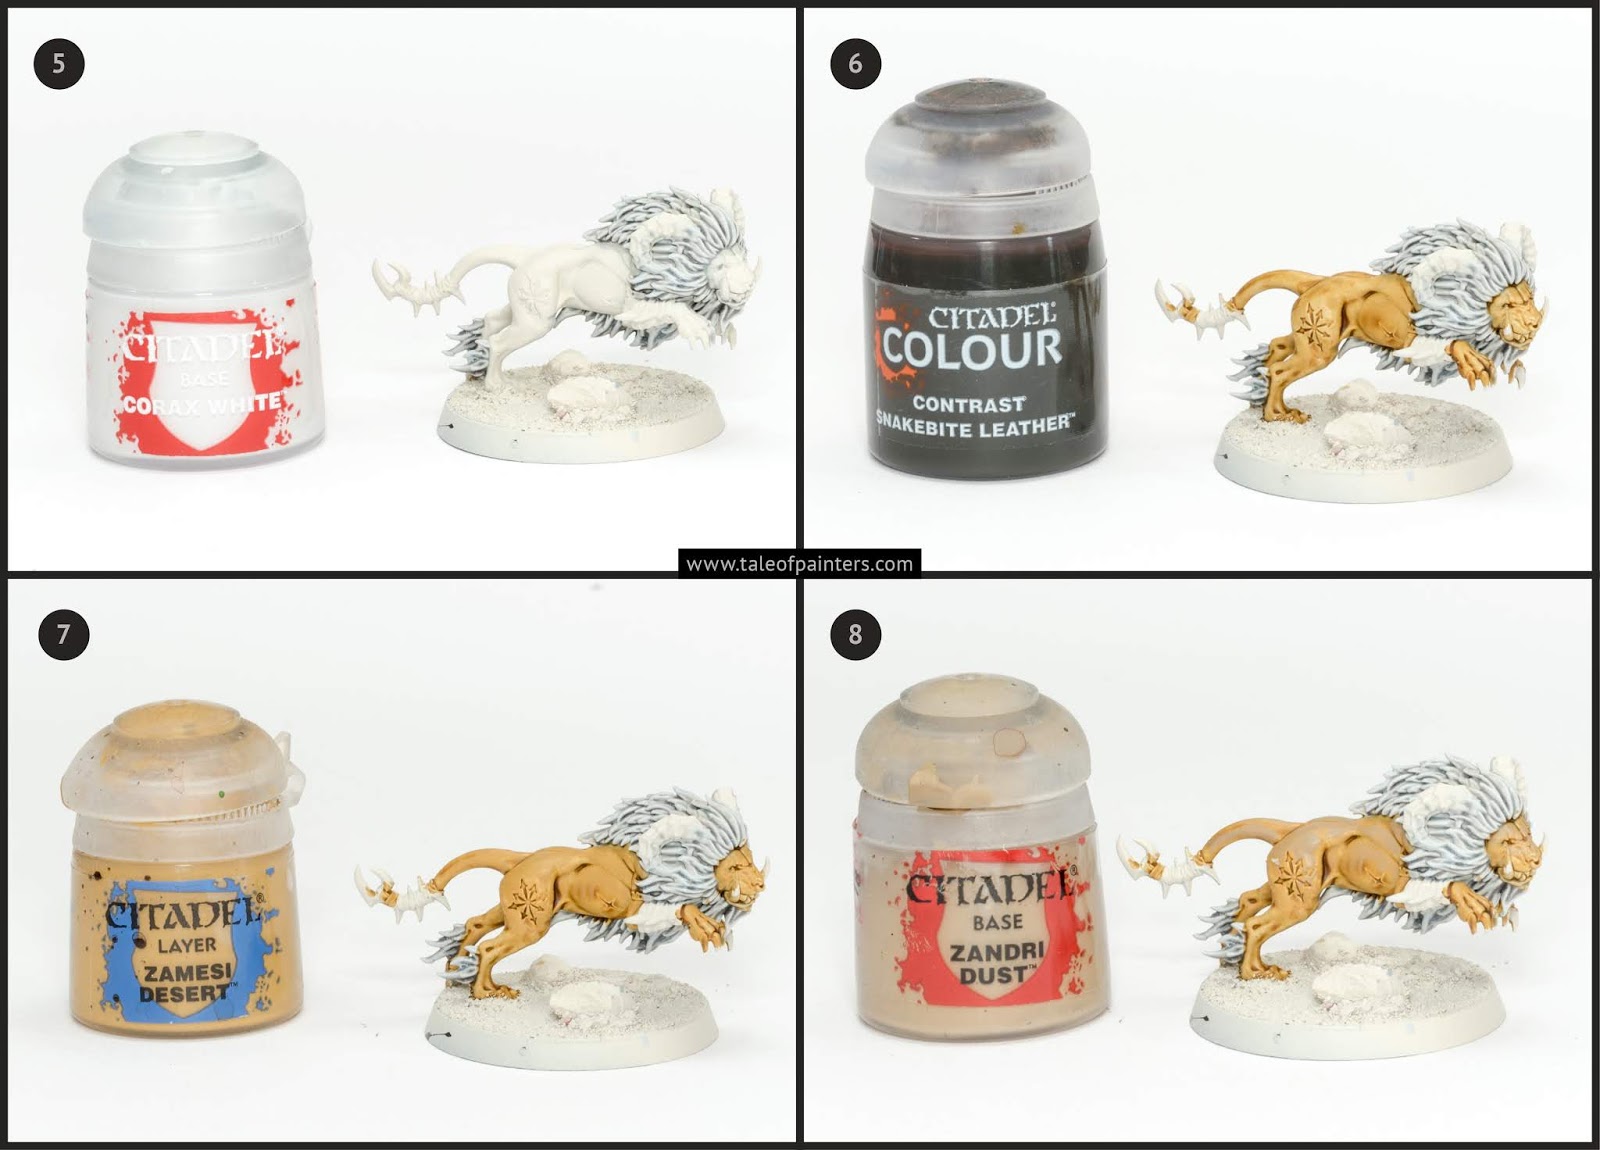
5. Repeat the previous drybrush stage again but this time with Corax White. This paint can be a little lumpy, so open the lid and use a toothpick or small stick to stir the paint thoroughly.
6. Paint the main body, paws and face with Contrast Snakebite Leather. Because these areas are smooth with little texture, try to paint the contrast on with as few brush strokes as possible. If it does start to pool in one area, use a spare brush to wick some excess paint away.
7. You can use Zamesi Desert to tidy up the skin if the previous layer went a little blotchy.
8. Paint some area highlights of Zandri Dust on the back, tail and face. Add a little water to thin your paint.

9. Repeat the previous process but use Karak Stone.
10. Thin some Screaming Skull with Lahmian Medium to make a translucent glaze. Carefully glaze on some small area hightlights. Do this two or three times letting each layer dry before applying the next layer.
11. Paint the horns, teeth, claws and spikes with a thick coat of Contrast Skeleton Horde.
12. Paint the wraps on the legs and tail with a thick coat of Contrast Gore-Grunta Fur.

13. Copying the above picture (and the reference pictures at the end of this tutorial) carefully copy the pattern. Thin your paint with water so the paint easily flows from the bristles and then paint the outline. Once the outline of the pattern is done, block in the shape with Rhinox Hide.
14. Using a 1:1 mix of Doombull Brown and Lahmian Medium paint on a couple of thin layers of area highlights over the Rhinox Hide layer.
15. Repeat the previous step but this time use a glaze mix of 1:1 mix of Deathclaw Brown and Lahmian Medium.
16. Mix two parts Contrast Medium with one part Nuln Oil onto a palette (plastic or ceramic is good, do not use a wet palette, Contrast paint doesn’t agree with water). Then paint over the the horns, dark brown fur, the mane and other white fur areas and the brown wrap straps.

17. Highlight the teeth, claws, spikes and horns with Screaming Skull.
18. Paint the ear ring, nose ring, eyes and nose with Abaddon Black.
19. Paint the ear ring and nose ring with Iron Breaker.
20. Paint the Eight Pointed Star Brand on it’s hind quarter with Mephiston Red. There are a couple of other wounds you can pick out with red as well.

21. Paint the eyeballs with Corax White. Add some final white edge highlights to the fur and bone.
To finish your model, paint the base. I painted my base with Agrax Earthshade, then Ork Flesh Contrast and dry brushed with Celestra Grey. The base rim is painted with Stormvermin fur.
Do you like our tutorials and reviews? Here is what you can do to support us: Check out the websites of our sponsors, place your next orders at Wayland Games by clicking here or at Element Games by clicking here. Thank you very much, we appreciate any help to keep us going.

