
Games Workshop invited me to the Horus Heresy Open Day 2022 BUT asked me to paint a Primarch – alongside the best painters and content creators in the world.
Sounds too good to be true? Yeah, there was a catch: they wanted us all to paint either a Primarch OR the contents of the new Starter Box for the event. For me, the choice was Magnus the Red, the Crimson King of the Thousand Sons. Being a super slow painter and only having a few weeks until the deadline, I knew that this would be quite a challenge. After all, I had never painted such a large and detailed resin model before. On top of that, I was fully aware that I was far from being the best painter on the invitation list.
So in this video, I show you how I met the challenge and take you from the initial planning stage to the finished model. I’ll run you through my thought process and share a lot of tips and tricks on how to master such a complex resin model, and how not to lose motivation even after several weeks so that hopefully my insights can help you with a similar project one day. And of course, there’ll be a lot of impressions from the event, the new edition of Horus Heresy, and meeting the other content creators:
Inspiration & research
Before I start a new painting project, I first do as much research as possible to get the brainstorming going. It can help to save the images in a folder on your PC or start a Pinterest board or Instagram collection.
In the case of Magnus, I naturally first looked at the studio paint job on the Forge World website to get a general idea of which colours go where. Then I googled further, and found quite a few beautifully painted Magnuses, for example, this flawless masterpiece by the brilliant Andy Wardle, who by the way was also invited to the event and tasked to paint Jaghatai Khan.
Looking at all the fantastic paint jobs was quite overwhelming, I have to admit, so I needed to take a step back. I realized, that even though the other Primarchs would be painted by some of the best painters in the world, I had to stay true to my own painting style. That meant: bold colours, true metallic metals, and classic painting techniques. Still, I try to learn something new whenever I start a new army or faction to keep the hobby fresh. Even if it’s just a few colours or paints I don’t use very often. For Magnus, I decided to introduce a few more advanced techniques like zenithal highlights and oil paint based washes.
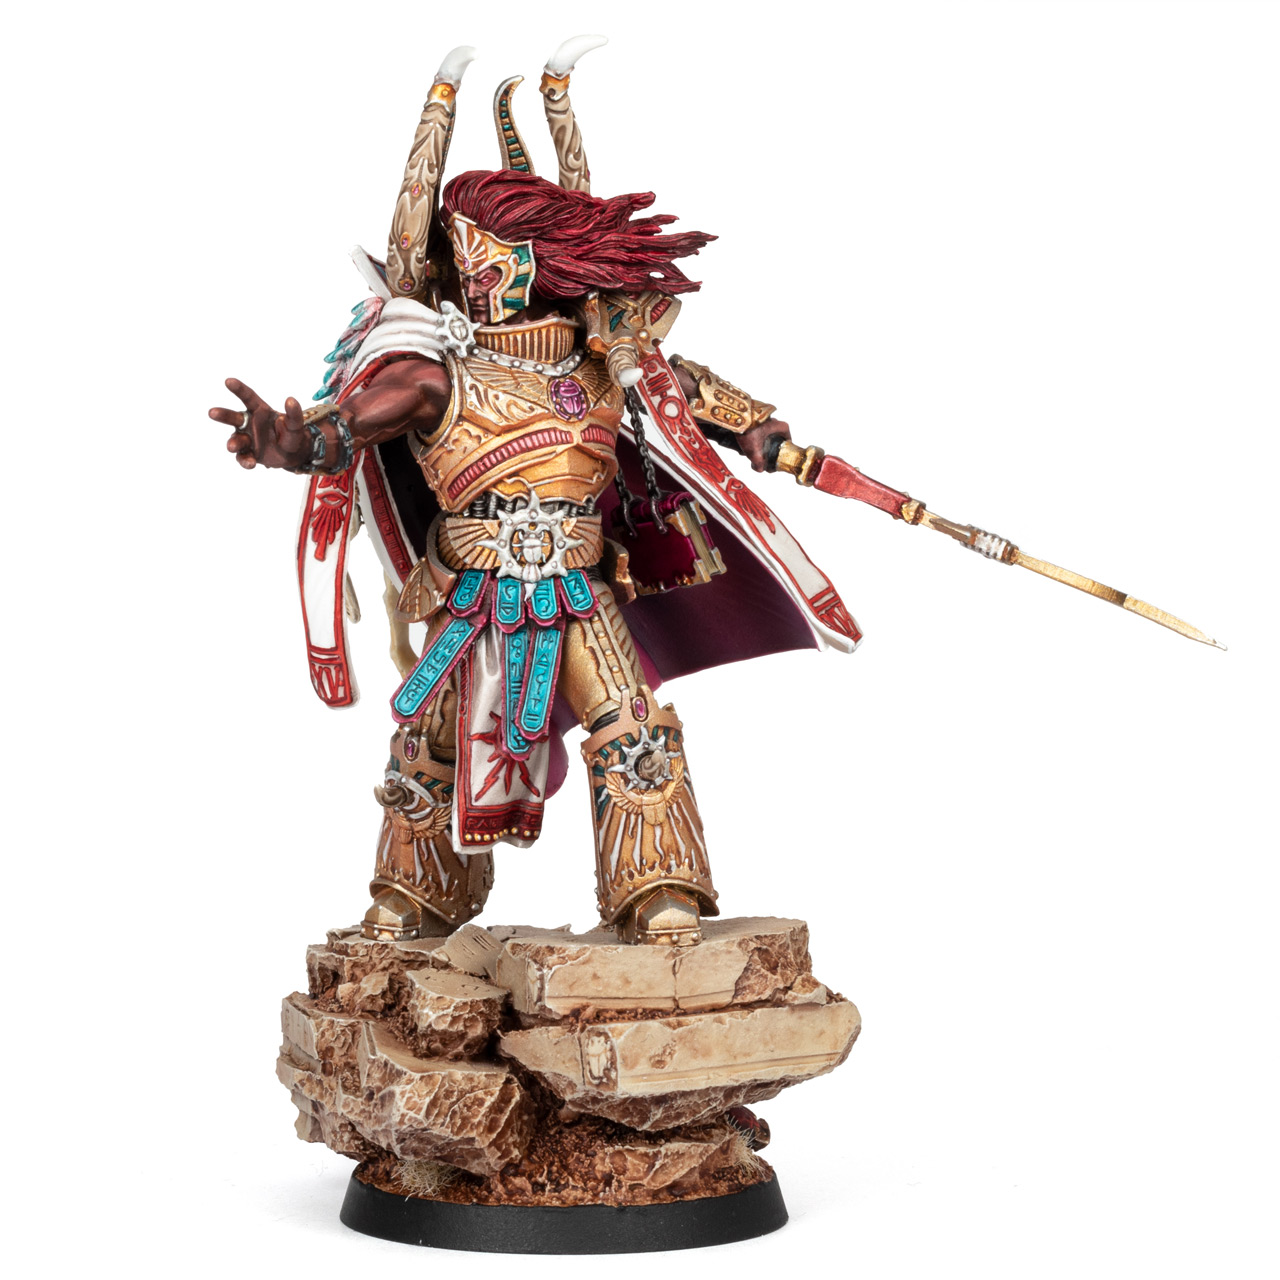
Besides painted models, I also looked at artwork. Conveniently, the Visions of Heresy artbook was published in the Warhammer Vault shortly before I started painting. There I found some interesting artistic interpretations of Magnus the Red. This artwork in particular was a great influence for choosing my colour palette. I liked the bright and yellowish gold tone of the armour, the flowing red hair, the shade of his skin, and the magenta gems and cape, and I knew I wanted to do something similar.
Assembling Magnus
But before I could start painting, first I had to assemble the model. After opening the box, I had to fight my way through the mountain of resin parts and sort everything out. Luckily nothing was missing and the casting was flawless.
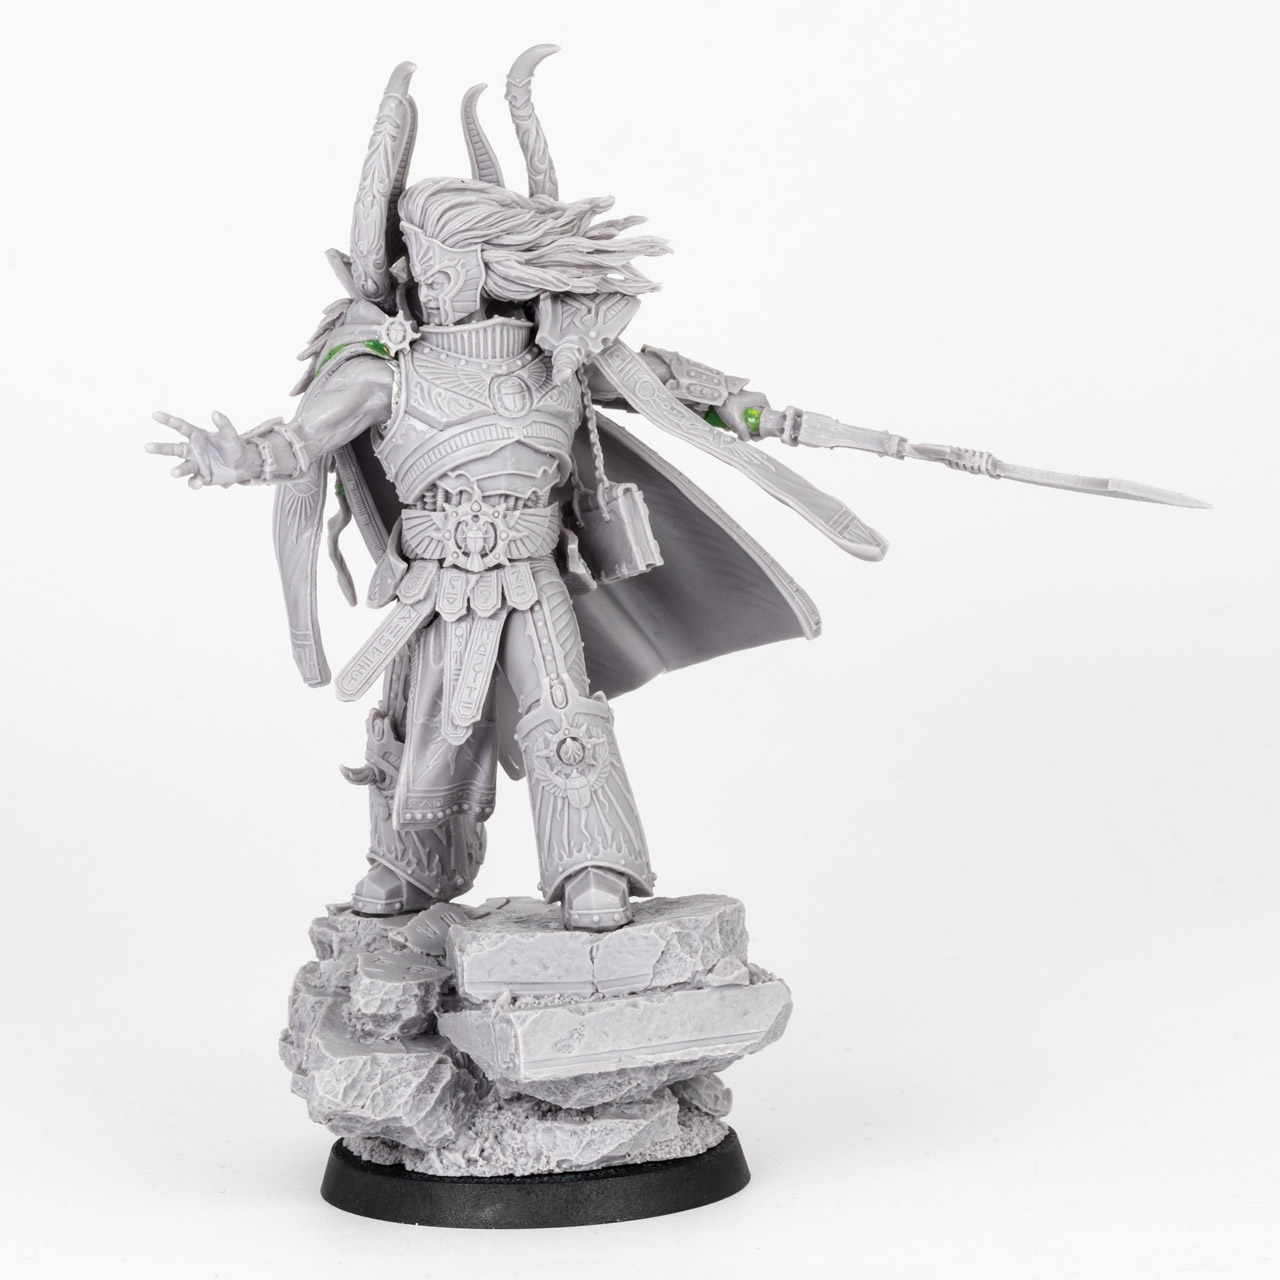
I painstakingly cleaned all the parts over two long evenings. I removed the larger resin joints with a side cutter, removed the nubs with a hobby knife, before taking care of the mould lines with a mould line remover tool and fine-grit sandpaper. Remember to always use a mask when sanding resin.
After everything was mould line free, I cleaned the pieces with water, washing-up liquid and a toothbrush with soft bristles. This has two functions: Firstly, it removes the release agent from the casting process, which ensures better adhesion of the primer, and secondly, it also removes any leftovers from the flash and mould lines removal process.
After everything was dry, I could take care of the assembly. To make painting easier, I decided to use as many sub-assemblies as possible. Nevertheless, some things had to be glued in place. A good super glue is key for resin and metal models. I prefer to use Gorilla Glue, which is formulated for increased impact resistance and not as brittle as most other super glues. This makes pinning mostly unnecessary, in fact, I only pinned the rocks onto the base.
Painting Magnus the Red
With the preparation done, I had three and a half weeks left and could finally start painting. As mentioned earlier, I wanted to use an airbrush to establish a basic shading, so I primed everything black because you have to start dark when you want to apply a zenithal highlight. For the light gold tone of the body, I first sprayed everything with a gold paint similar to Auric Armour Gold, and then applied a zenithal highlight with a light silver sprayed from above. Inspired by the artwork, I turned the model around and sprayed pink ink from below, which added a lot of richness to the armour.
The rocks on the base were basecoated with a reddish-brown and then sprayed with a light bone colour similar to Ushabti Bone from above.
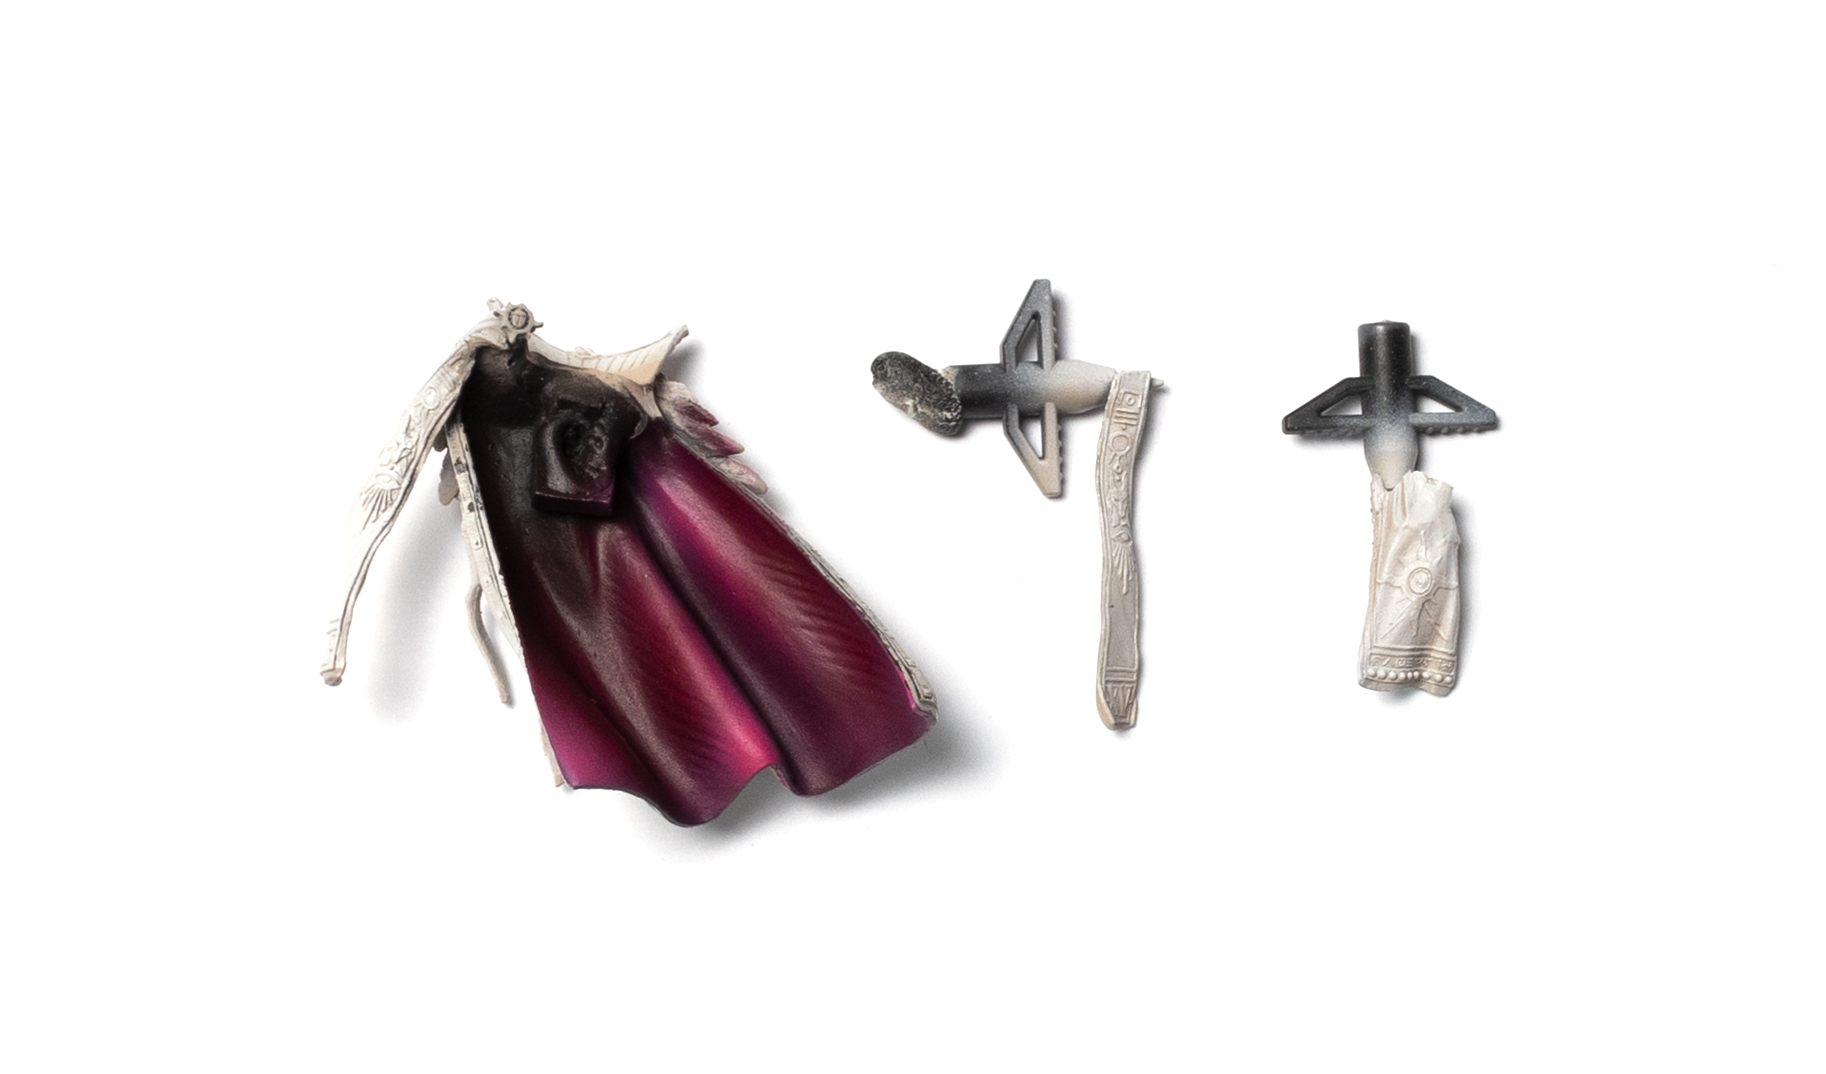
For the cape, I sprayed the exterior with a brown-grey similar to Rakarth Flesh and then applied some highlights with a light off-white similar to Pallid Wych Flesh. I did the same on the tabard. On the inside of the cape, I applied a dark purple, leaving the recesses black, and highlighted the folds with a pink similar to Emperor’s Children.
I then primed all the other parts with a dark brown and added a zenithal highlight with the same off-white colour as on the cape. To protect all the airbrushing I did, I applied a coat of semi-gloss varnish, which is crucial for using oil washes later.
Messing up
Unfortunately, during varnishing, I made a big mistake. I hadn’t noticed that some dust flakes had settled on the light-coloured cape and sealed them in place with varnish, which looked terrible and couldn’t be painted over easily. I decided to strip the whole cape and spray it again, but unfortunately, despite thorough cleaning, some paint residues remained and the result became even rougher.
After a nervous breakdown and writing a tearful email apologising for my failure and asking to find someone else for the event, which I thankfully never sent, I decided to move on, hoping it wouldn’t be so noticeable once all the other details were painted. Sometimes you just need to carry on and stick with it…
Painting week 1
With the airbrushing all done, I started to detail the body. I mixed a rusty brown oil paint with white spirit to a wash-like consistency and applied it directly to the recesses. Due to the low surface tension, the shading went by itself like magic and I could easily remove all imperfections with a cotton swab.
After everything was dry, I carefully drybrushed the edges of the armour with a light silver to bring out the details, and also picked out a few corners with manual edge highlights to emphasise the effect. I then painted all the other details with good old brushwork. The red and turquoise metallic details were painted with Flesh-Tearers Red and Akhelian Green that I applied straight over the gold and then highlighted.
Now that I knew what the gold tone of the armour would look like, I was able to match the colour of the base to it. I drybrushed the rocks with Screaming Skull and white to bring out the texture, then used washes and Contrast paints like Darkoath Flesh to pick out the sand and soil. For the finishing touch, I used rust-brown pigments, which I brushed into the recesses of the rocks and the sand, and fixed them with a thin layer of matt varnish from my airbrush.
Painting Magnus the Red, week 2 and 3
With the basic shading already established by airbrush, and because of the light basecoat, I could simply pick out the red patterns with Flesh Tearers Red, which helped to save some time. Nevertheless, I still had to highlight everything by hand, which took me several evenings. The feathers were more fun. I wanted to have a transition from pink to turquoise blue, similar to how a Pink Horror turns into a Blue Horror, a nod to Magnus’ allegiance to Tzeentch. I mixed a pink wash and applied it to all the feathers, then started to build up a gradient by applying multiple coats of Aethermatic Blue thinned with Contrast Medium, and finally thinned Akhelian Green.
When I was happy with the gradient, I mixed white with a little bit of either turquoise or pink and highlighted all of the individual barbs, which was again quite time-consuming.

And after I painted the purity seals, here is what the model looks like. You can see the completed gradient effect on the feathers, and the script and runes on the purity seals. Painting the cape and tabard took me 9 days instead of the intended 7, so I realized I was in a slight delay. Fortunately, the Easter holidays came to my rescue and got me a few days off to catch up.
Week 4 of painting a Primarch
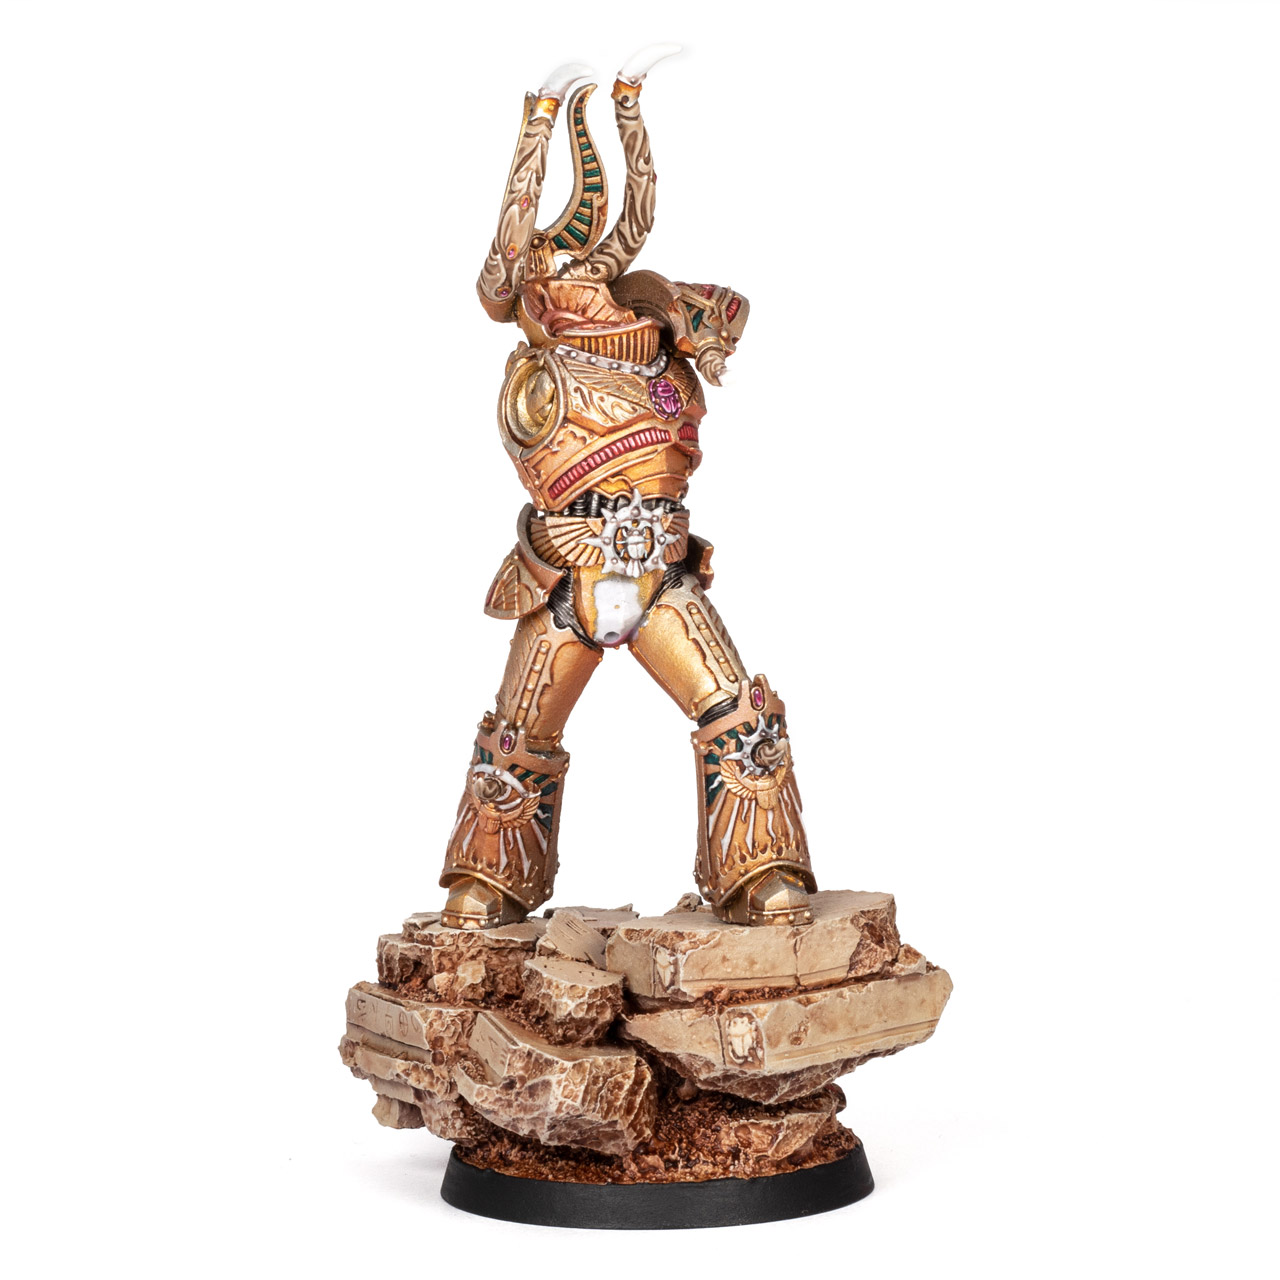
So next came all the organic parts like the arms and head. My idea was to apply several layers of Guilliman Flesh over the zenithal basecoat. This worked very well for the face and the hands, but not so much for the bigger arm muscles. I knew I wanted a dark tan skin tone as a contrast for the light gold armour, so I had to resort to a more classic approach and apply multiple thin layers and glazes of paint with a brush until I was happy. As Magnus is known as “the Red” and not “the Tan”, I also added red glazes for a more reddish skin tone in the end.
With the skin done, I worked through the rest of the details like the blade and the book. And there we are, at the end of week 4, finished just on time for the deadline, ready to be packed up and sent to Nottingham to be displayed on the Horus Heresy Open Day.
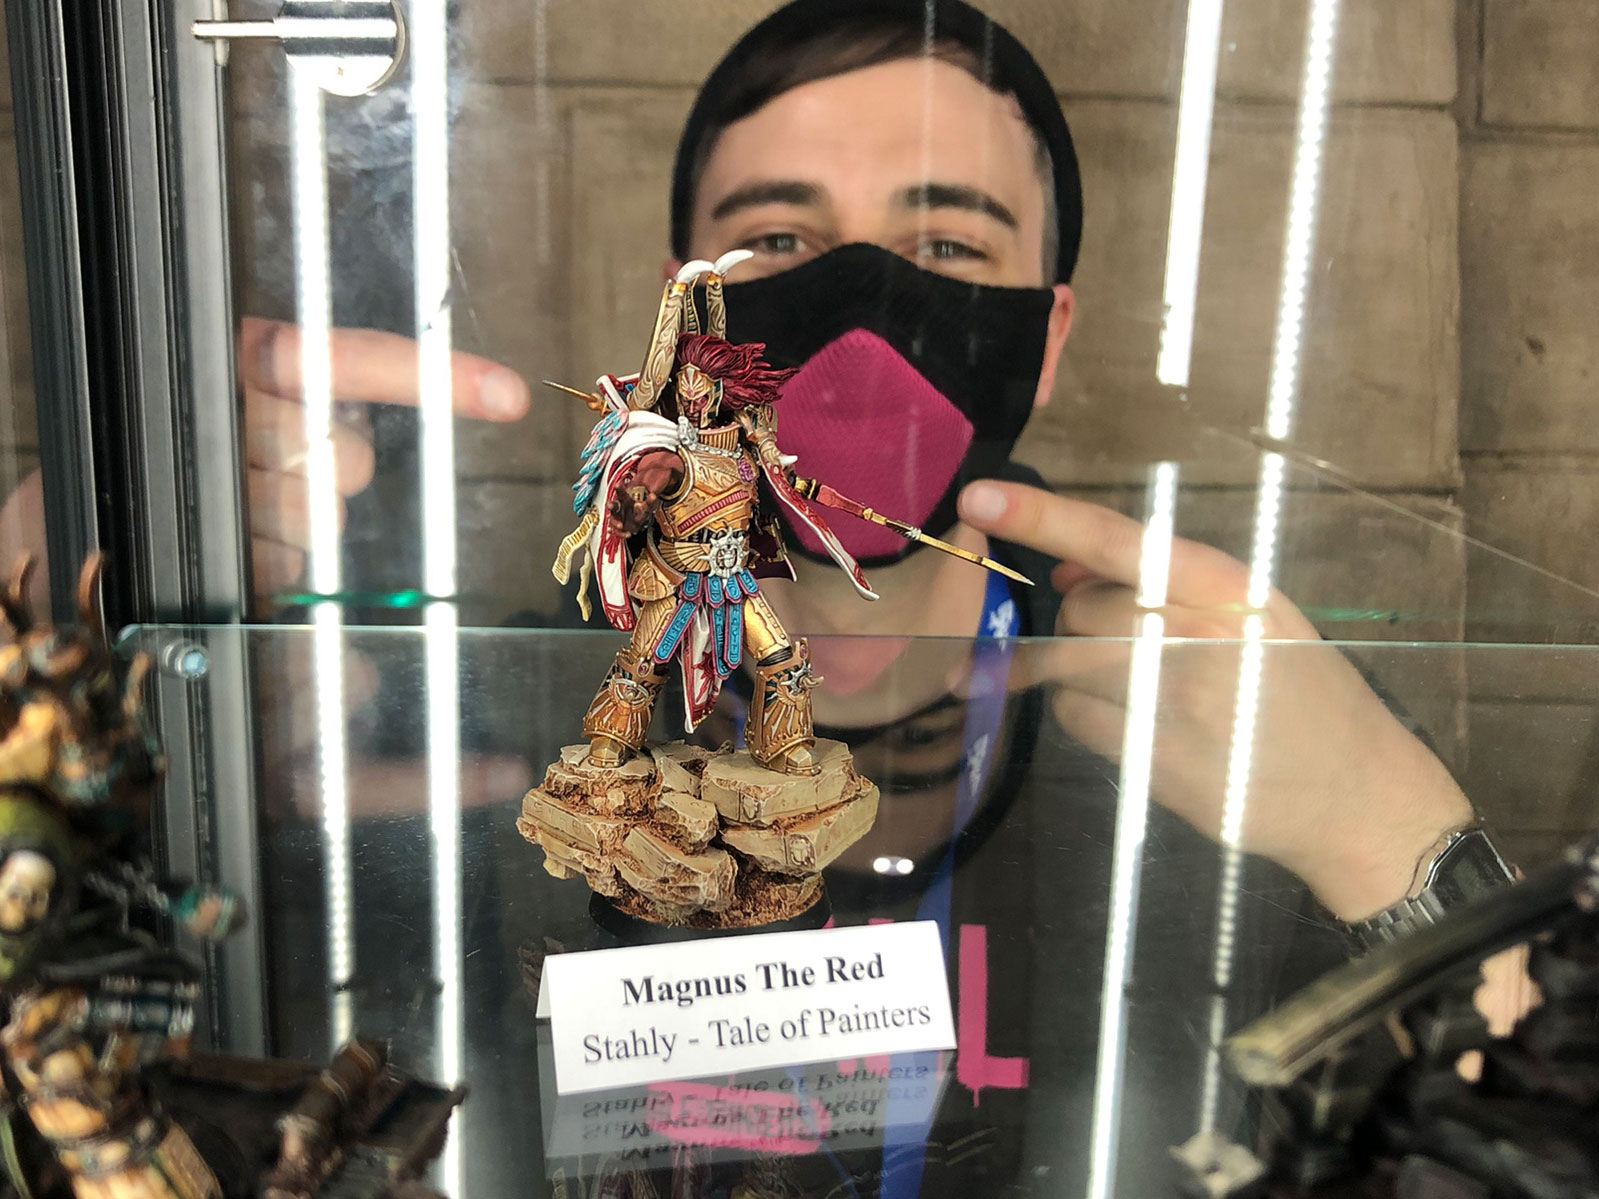
Horus Heresy Open Day 2022
The event itself was fantastic. So many great conversations and experiences with the other content creators! I let the video speak for itself, check my montage of the Open Day here:
Some of the people invited for the event:

Conclusion
Wow. About 40 to 50 hours of work went into this model, and even though I was far from the best painter of all the people invited, I am proud of my own Magnus. If you take your time for research and inspiration, then think about a plan and follow it through, and don’t let yourself be put off by small setbacks, you can master even a model as complex as Magnus the Red.
For more pictures, check out my showcase post here:
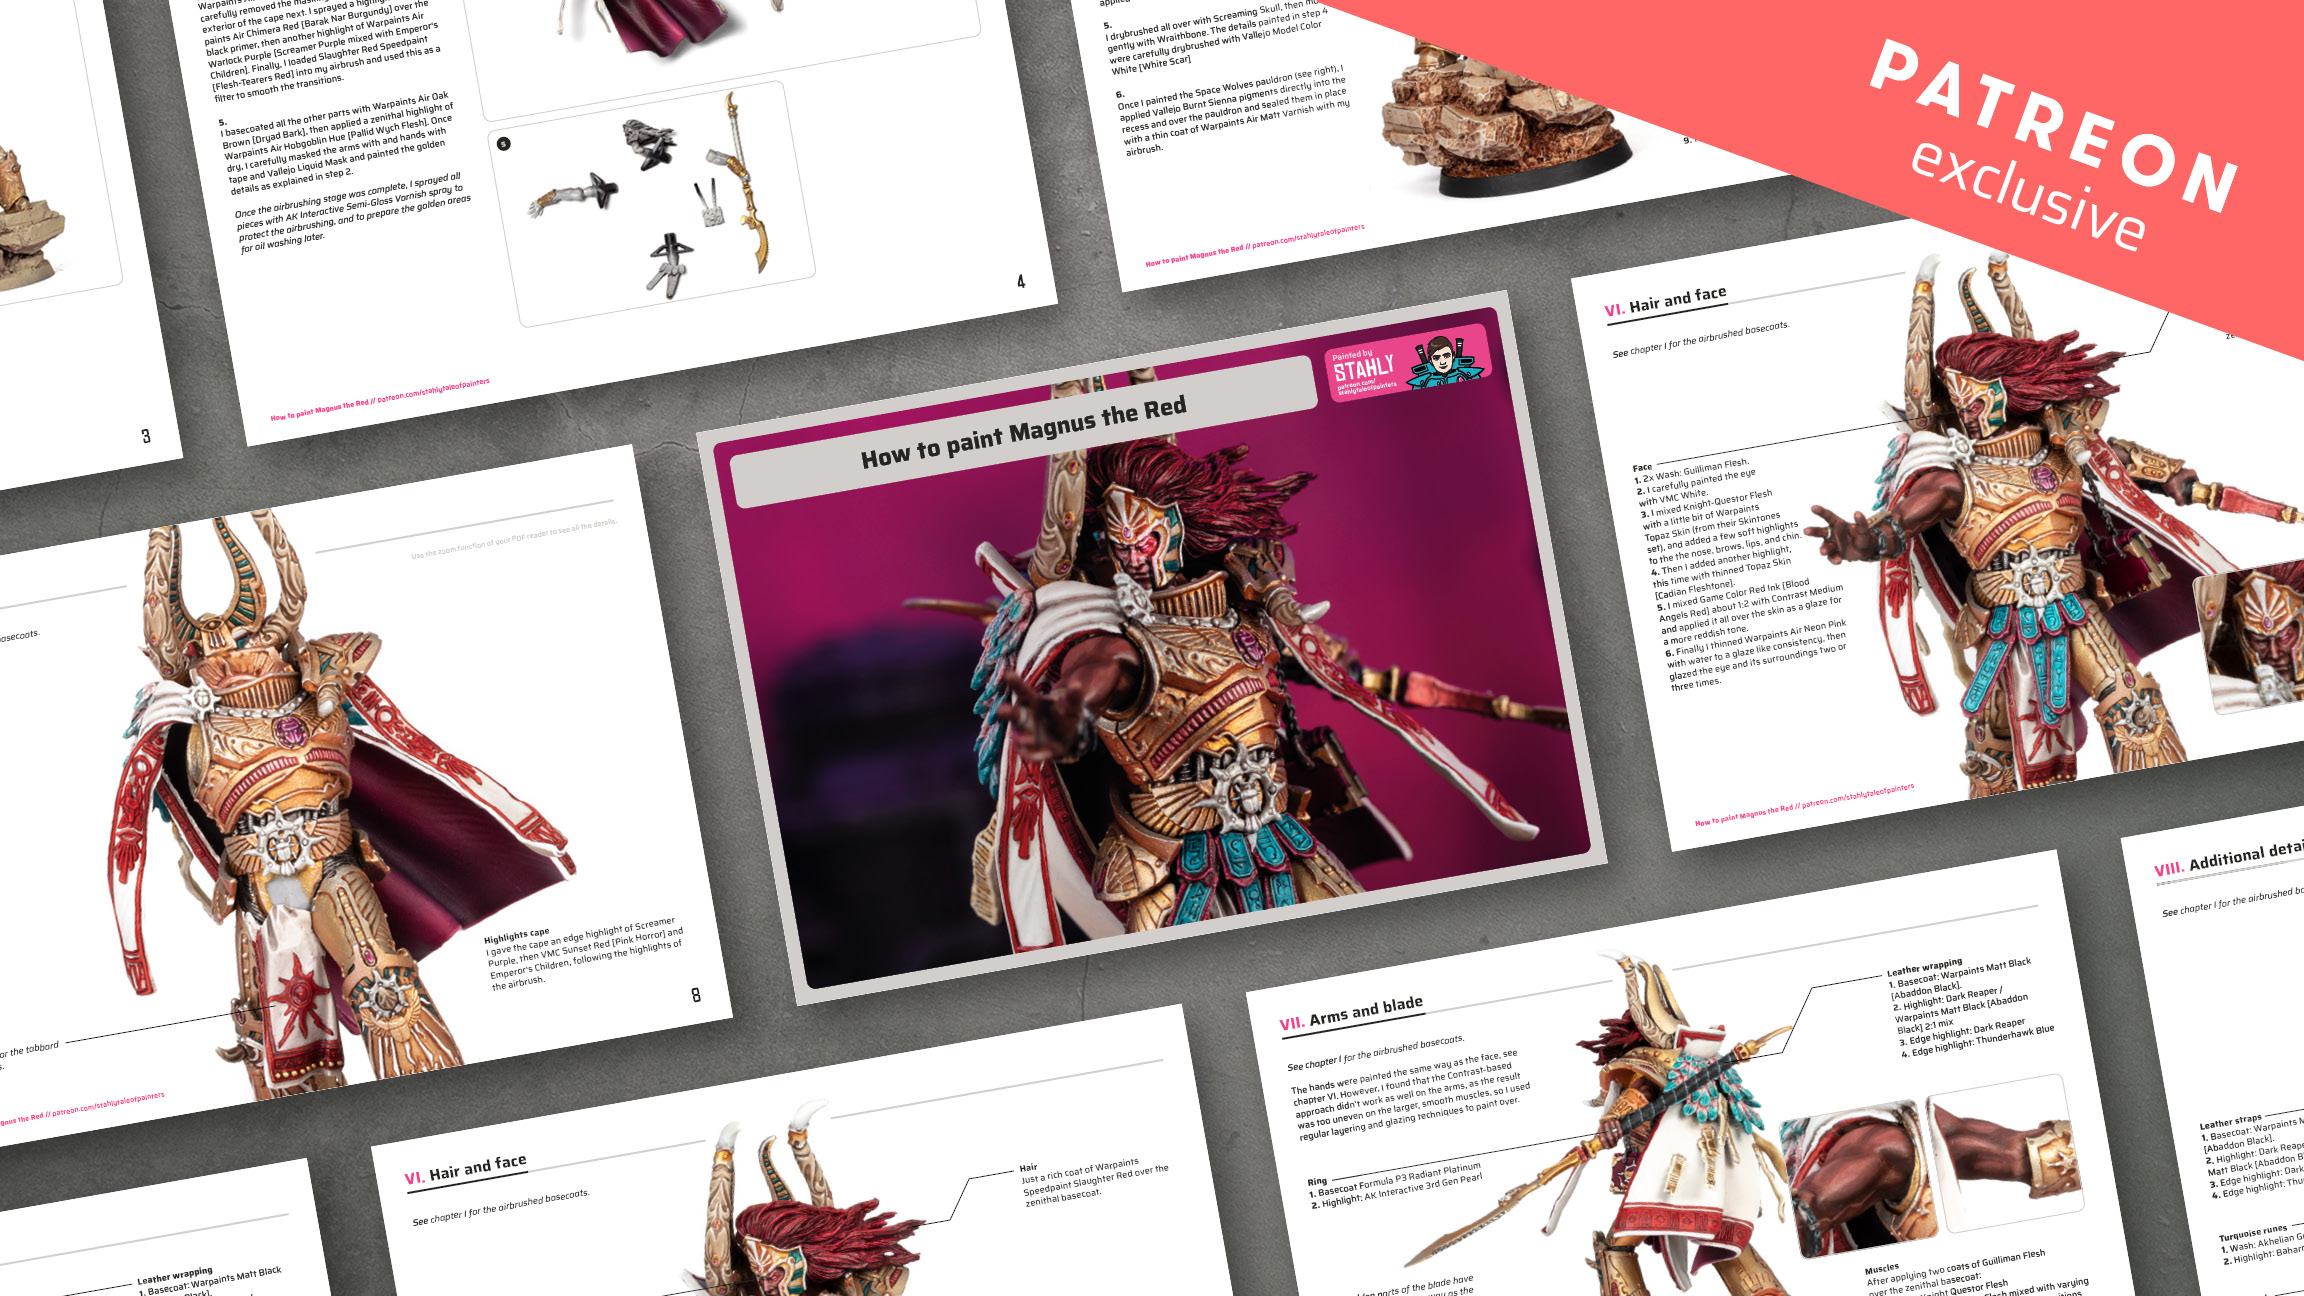
Hope you enjoyed following my journey of painting this enormous chunk of resin. This post can’t cover it all, but I wrote a detailed 14 pages painting guide with all the paint recipes and techniques I used, you can find it over on my Patreon, including a photo dump of the event.
If you got any questions, drop them in the comments section or over on our Discord server. Thanks a lot, and happy heresying!

Tale of Painters is the unofficial Warhammer hobby magazine run by hobbyists like you. Support our work by using the affiliate links from our 🇺🇸 / 🇨🇦 partner stores for your next orders so we can continue to bring you fantastic FREE content every day:


Or support us directly:


