In this tutorial I show you how to paint the striking orange of the Trans-hyperion Alliance using the example of a Hearthkyn Warrior. Using Contrast paints and weathering techniques, this method helps you paint your Leagues of Votann effectively, striking a balance between quality and speed.
This tutorial assumes you know the basic grips of painting Warhammer miniatures. Step-by-step I explain all the paints and techniques I used. I have a rather eclectic paint collection, so when I use a paint that is not from Games Workshop (or out of production), I’ll try to provide you with suitable alternatives from the current Citadel paint range [in brackets]. However, if you want to achieve exactly the same result as shown, I recommend expanding your paint collection. You’ll find a list of all the paints used in this tutorial at the end of the post.
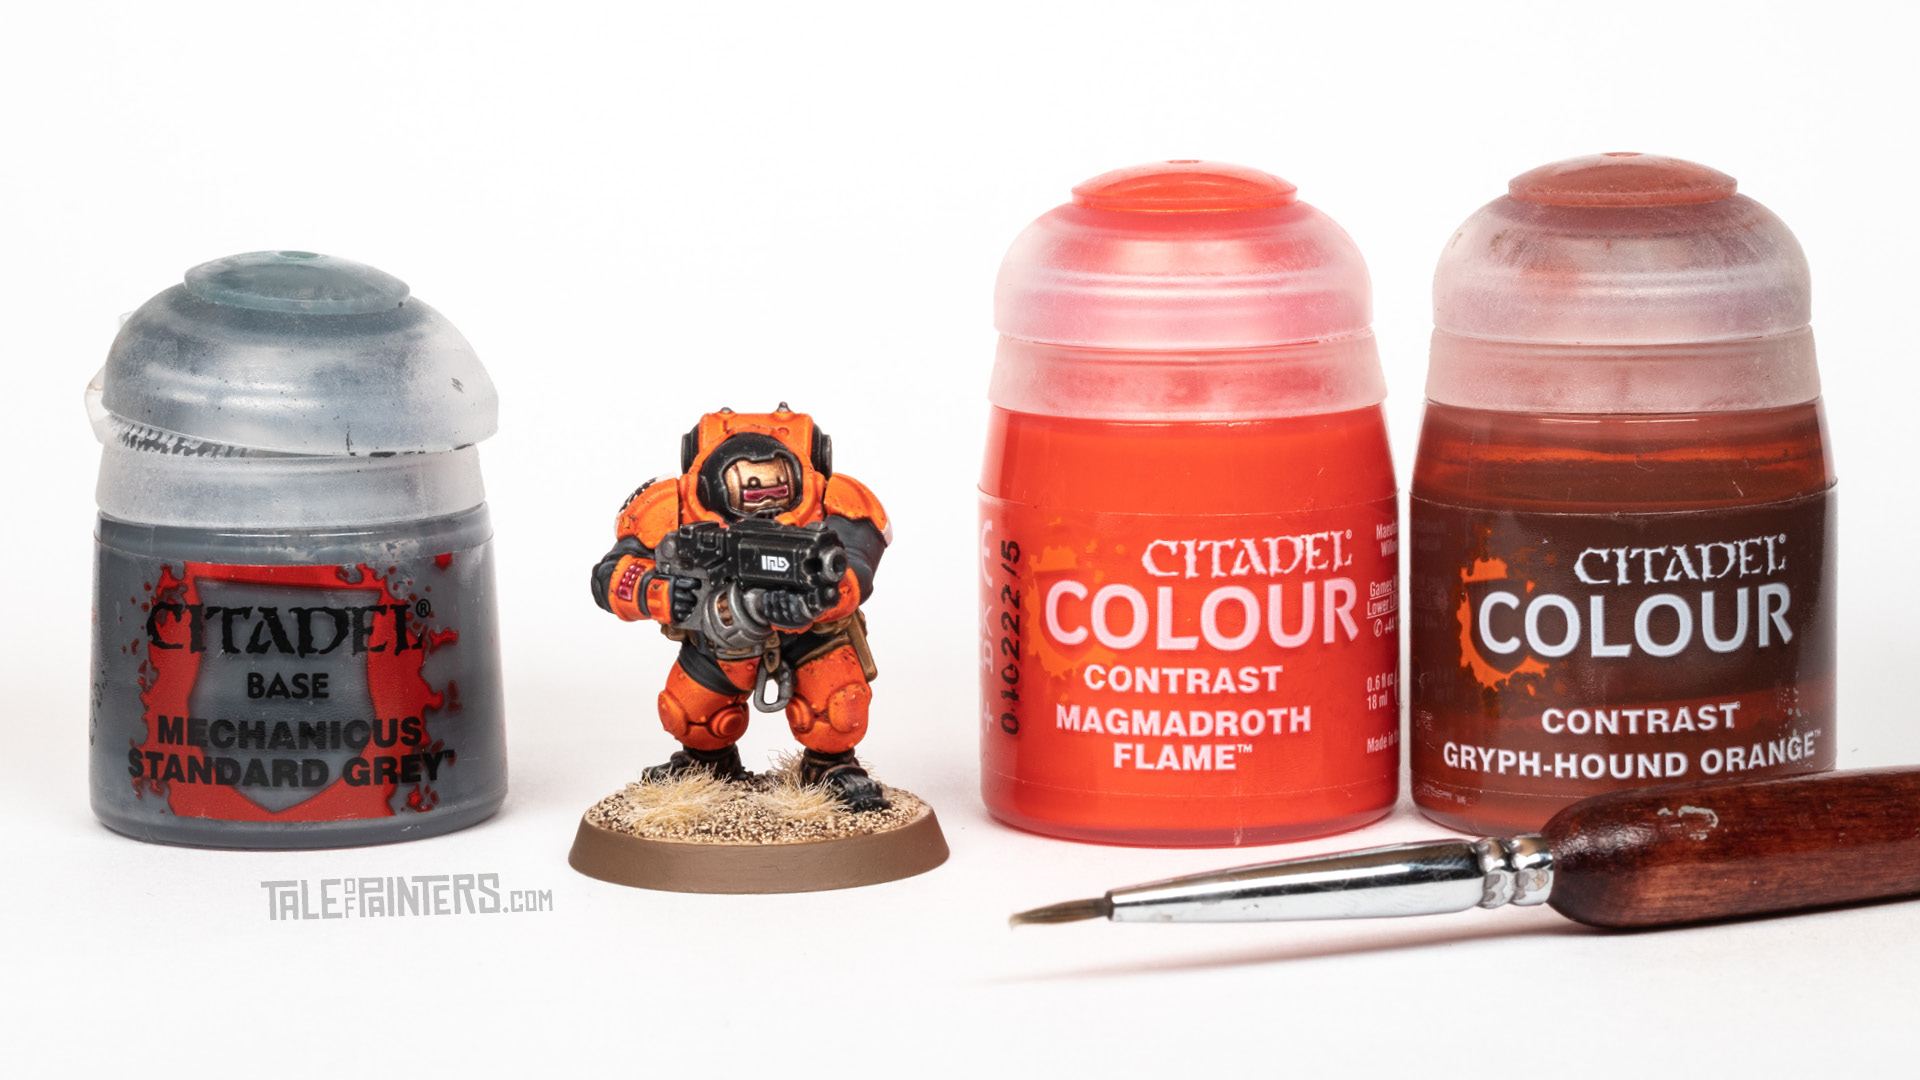

How to paint Trans-Hyperion Alliance
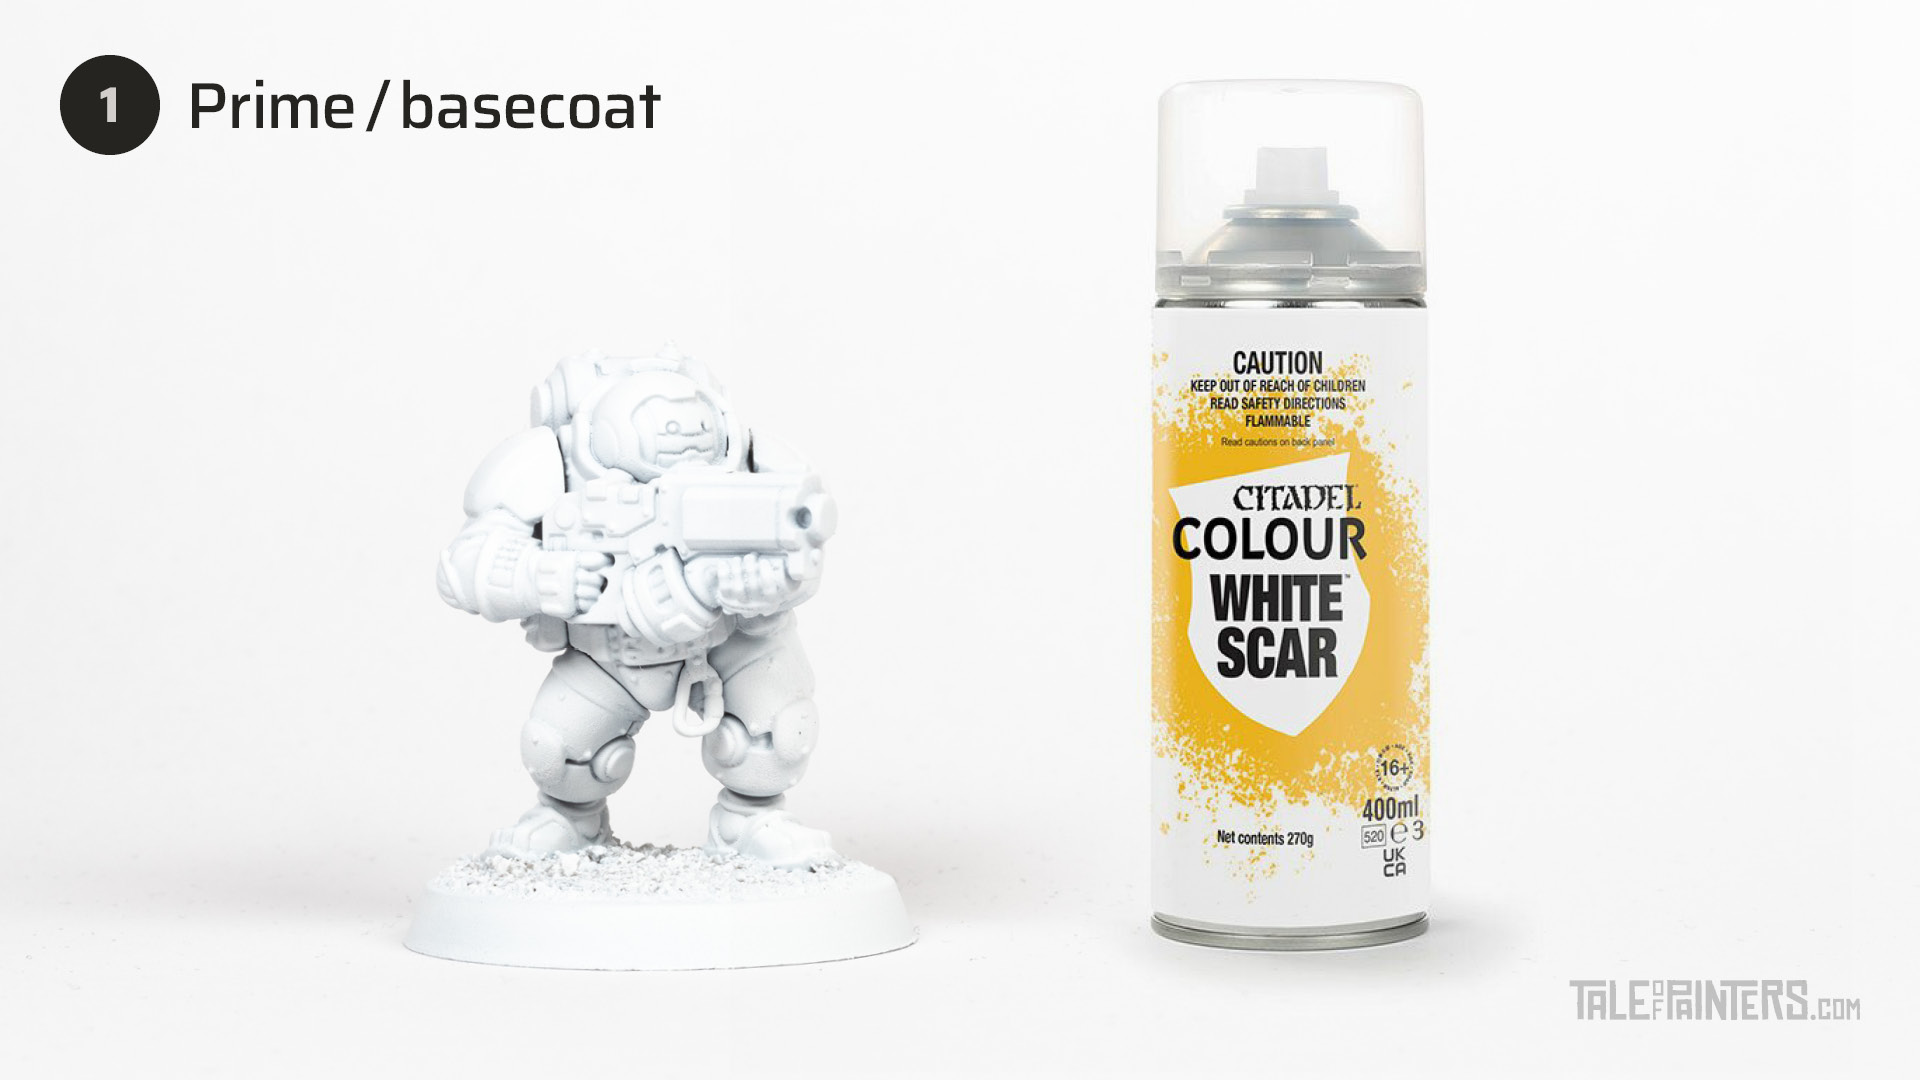

Prime the model with a few thin coats of White Scar spray or your favourite white primer.
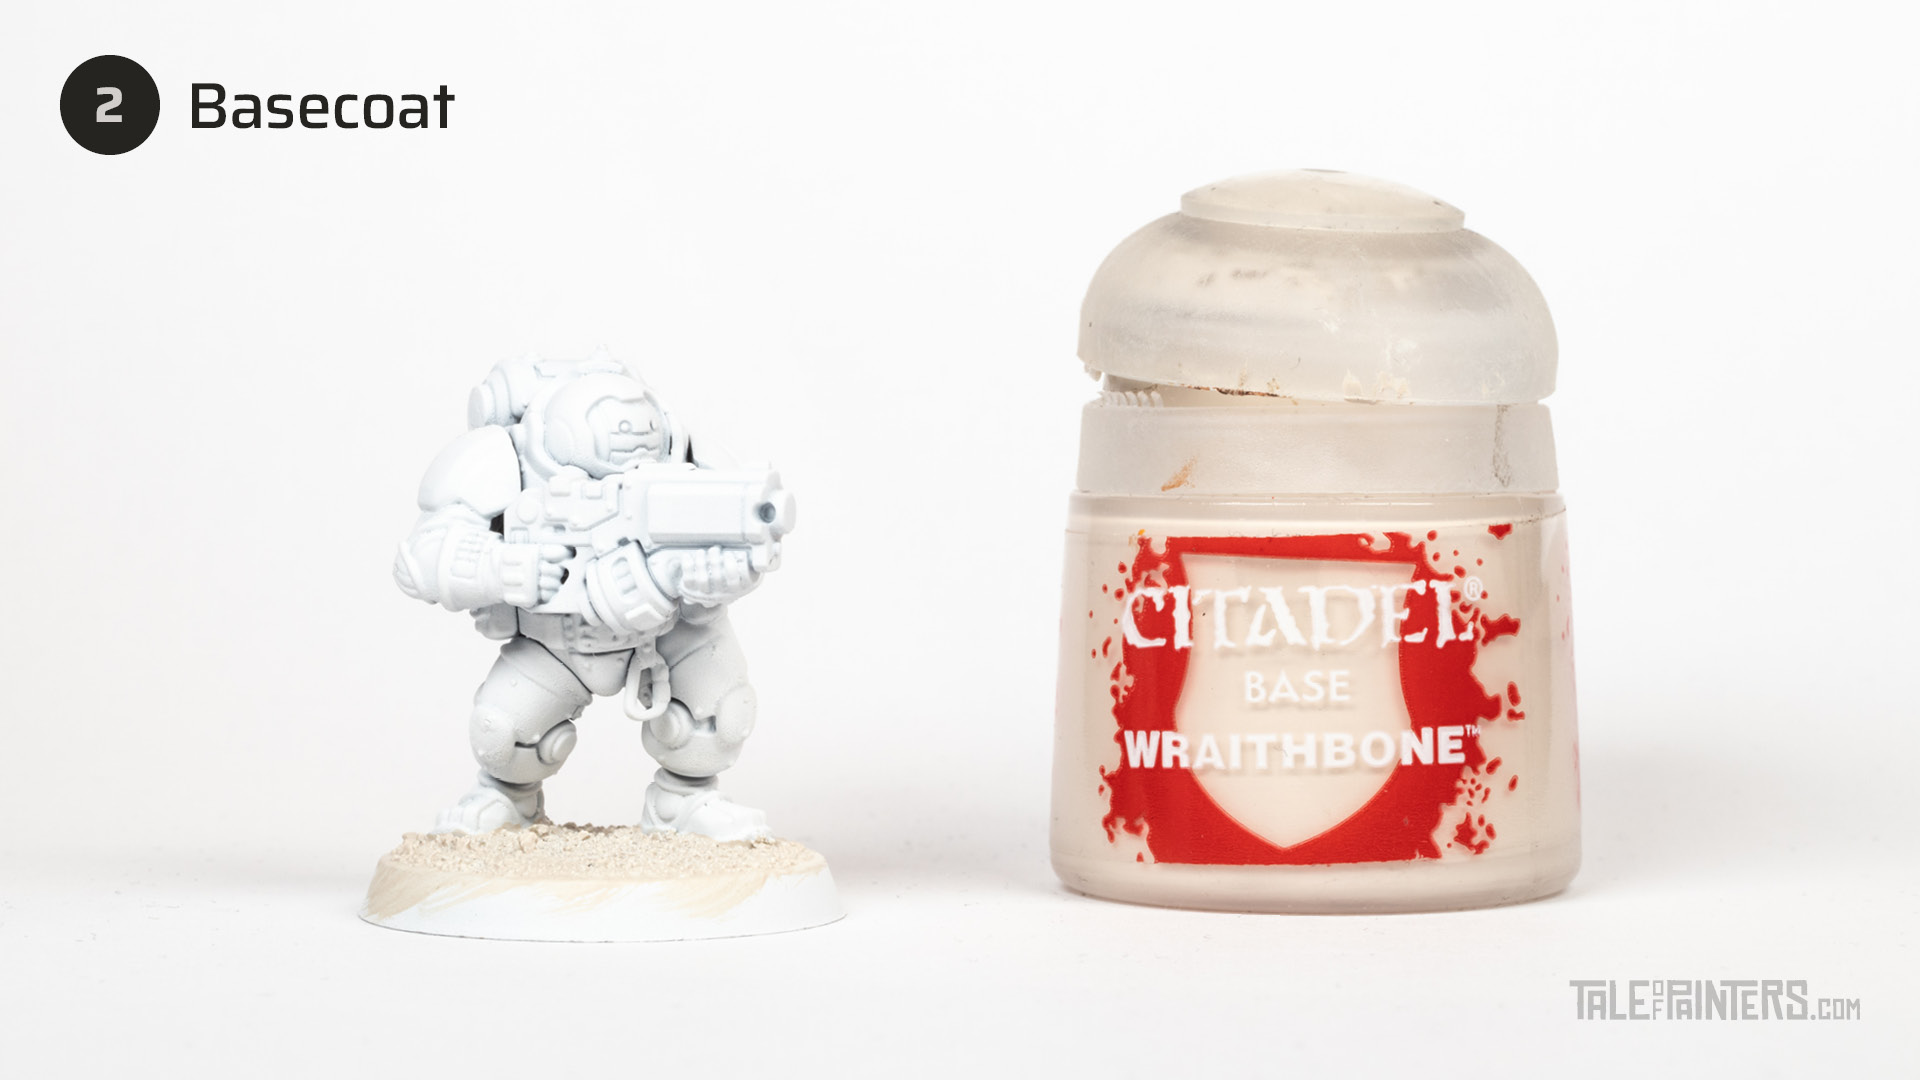

Basecoat the texture of the base with Wraithbone.
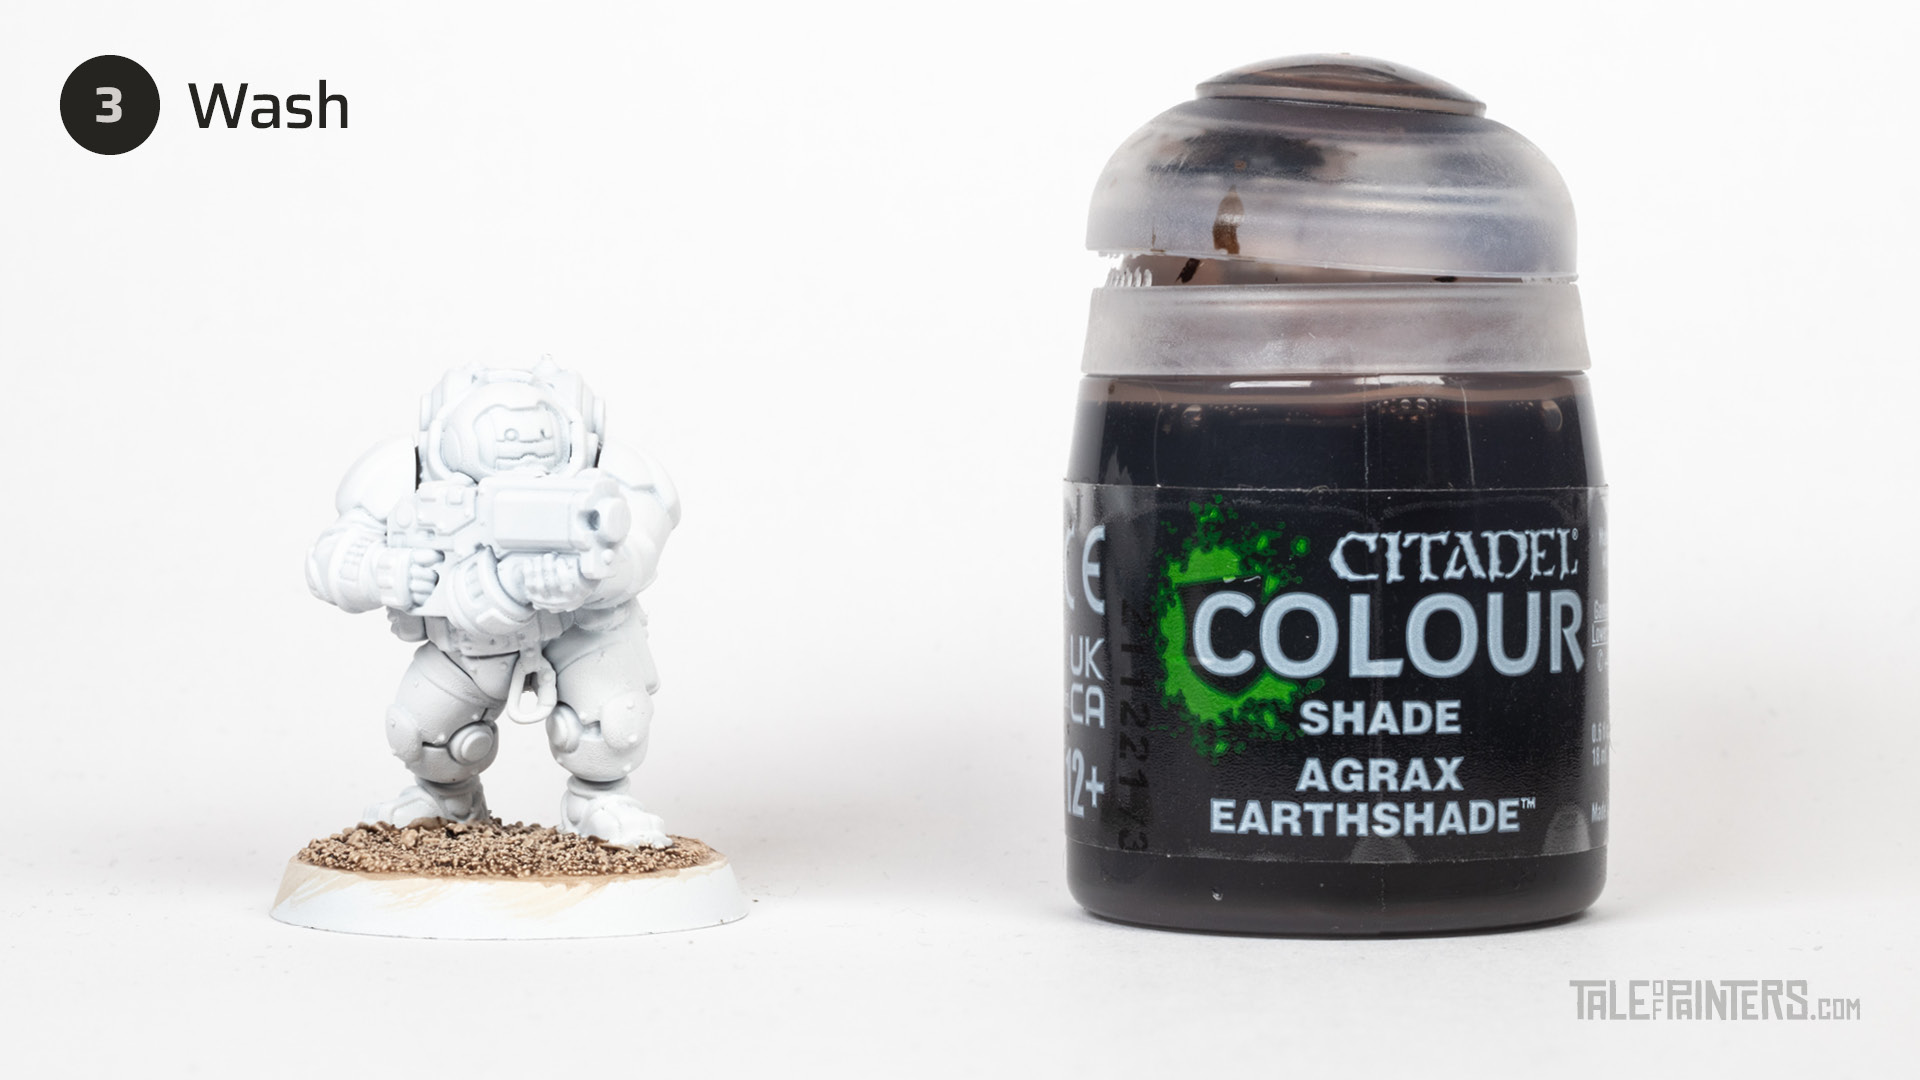

Then, give the Hearthkyn Warrior’s base a wash of Agrax Earthshade.
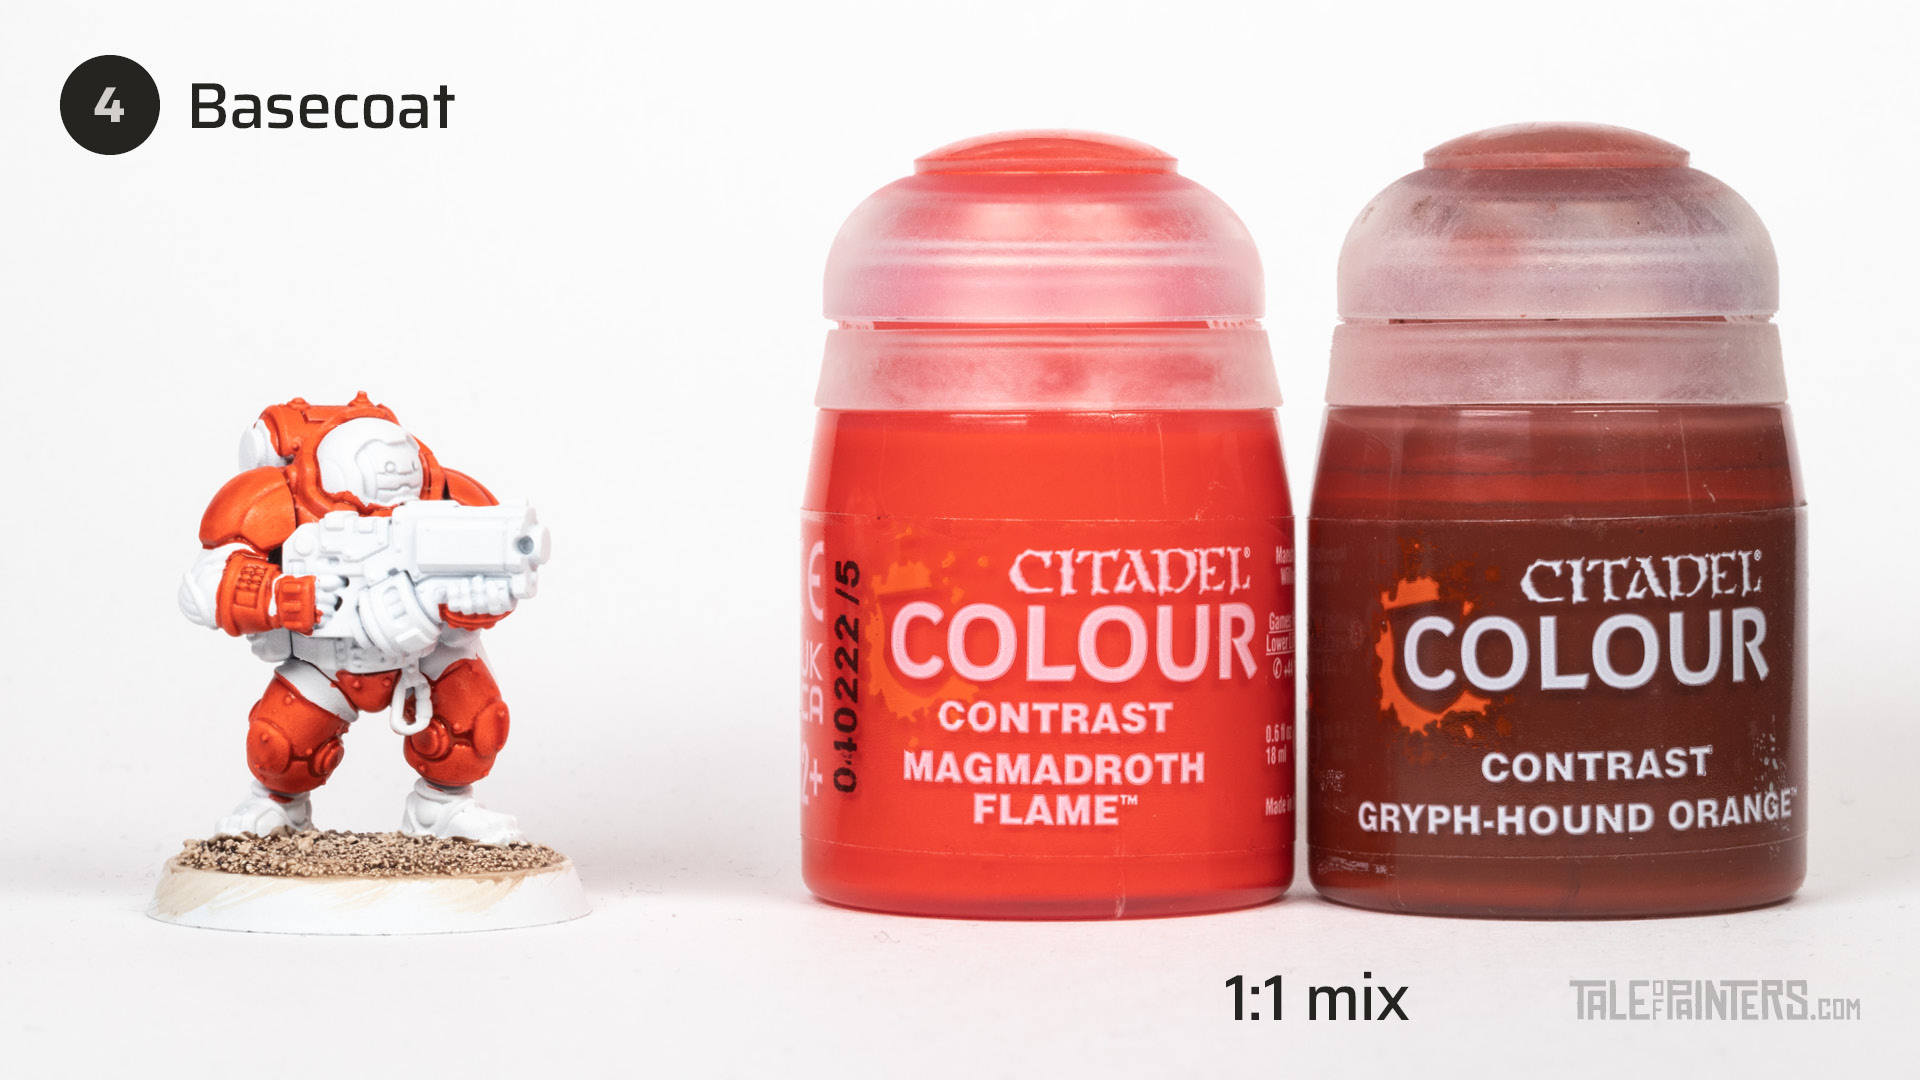

Prepare a 1:1 mix of Magmadroth Flame and Gryph-hound Orange and paint it all over the armour. For the best result, apply the paint generously, and when it has settled after a few moments, soak up any excess with a clean brush.
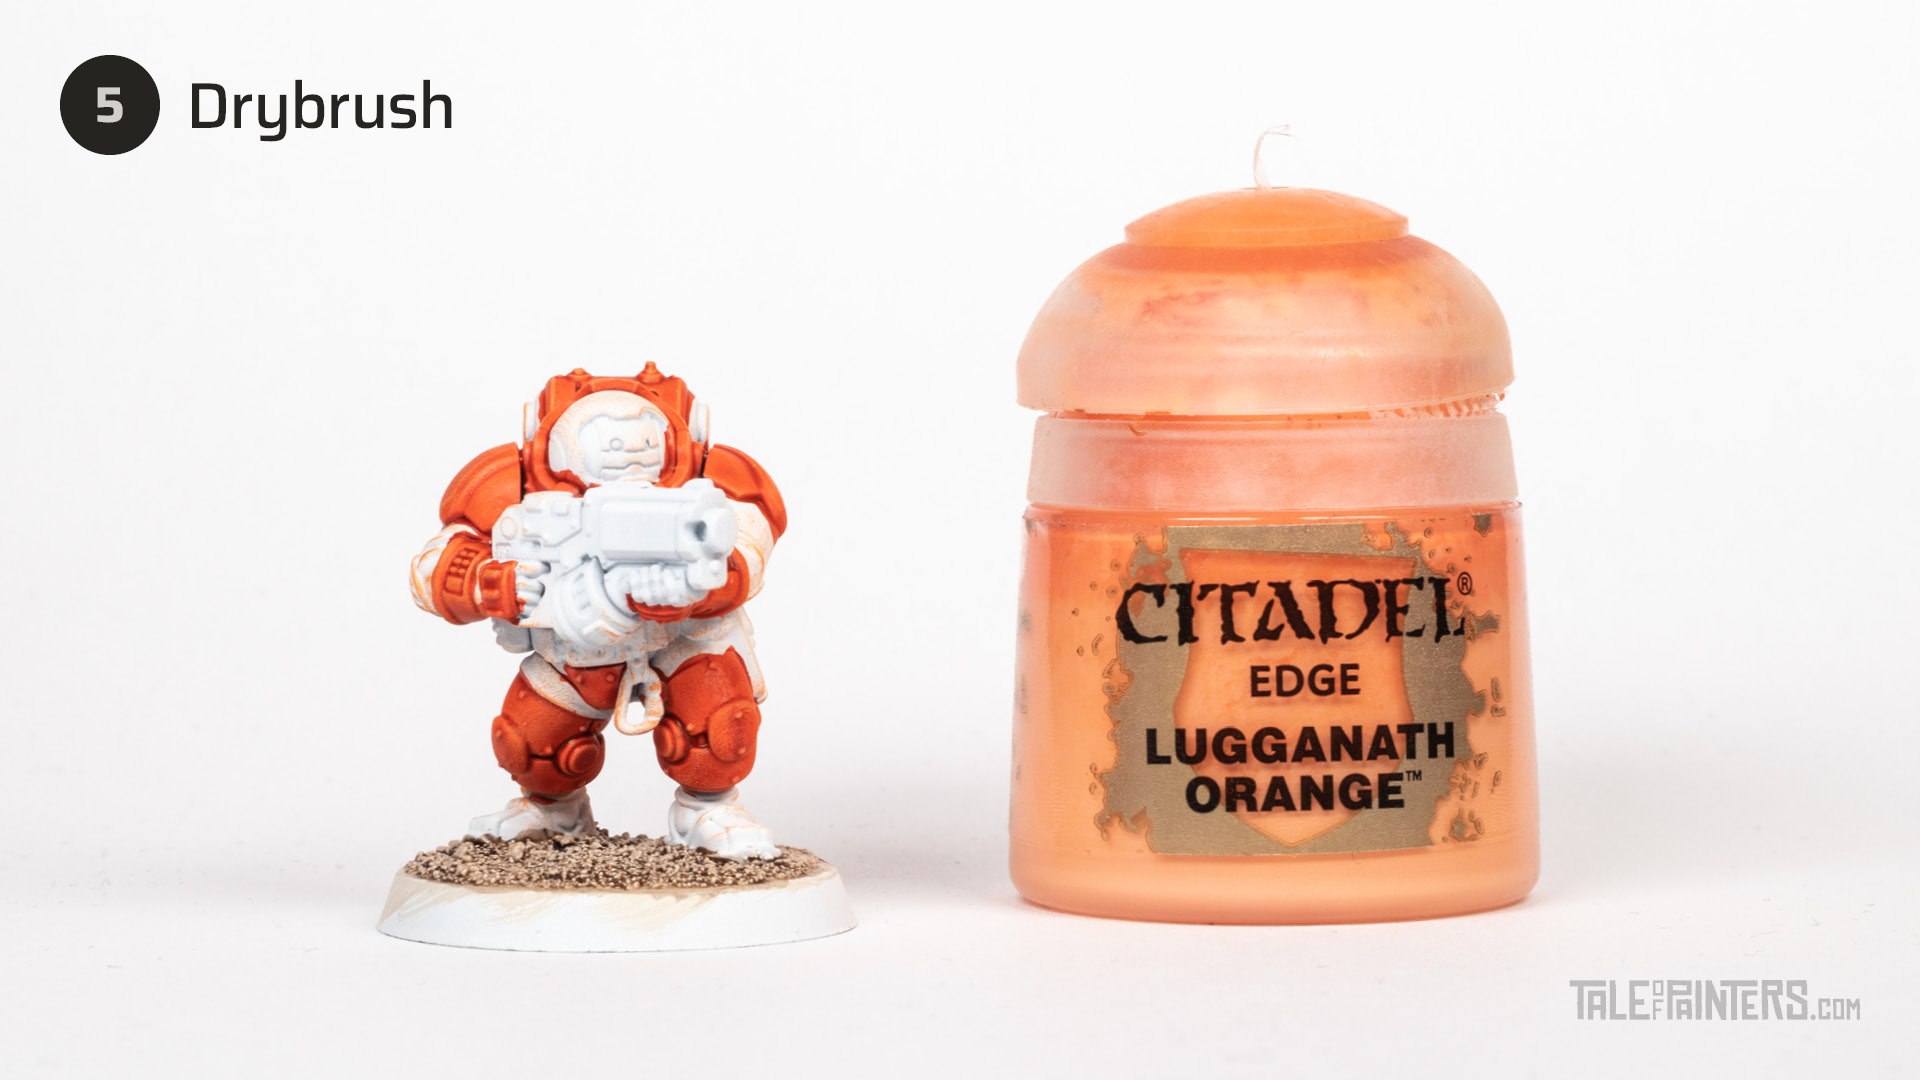

Give the Trans-Hyperion Alliance armour a gentle drybrush of Lugganath Orange, concentratng on the edges of the exo-suit.
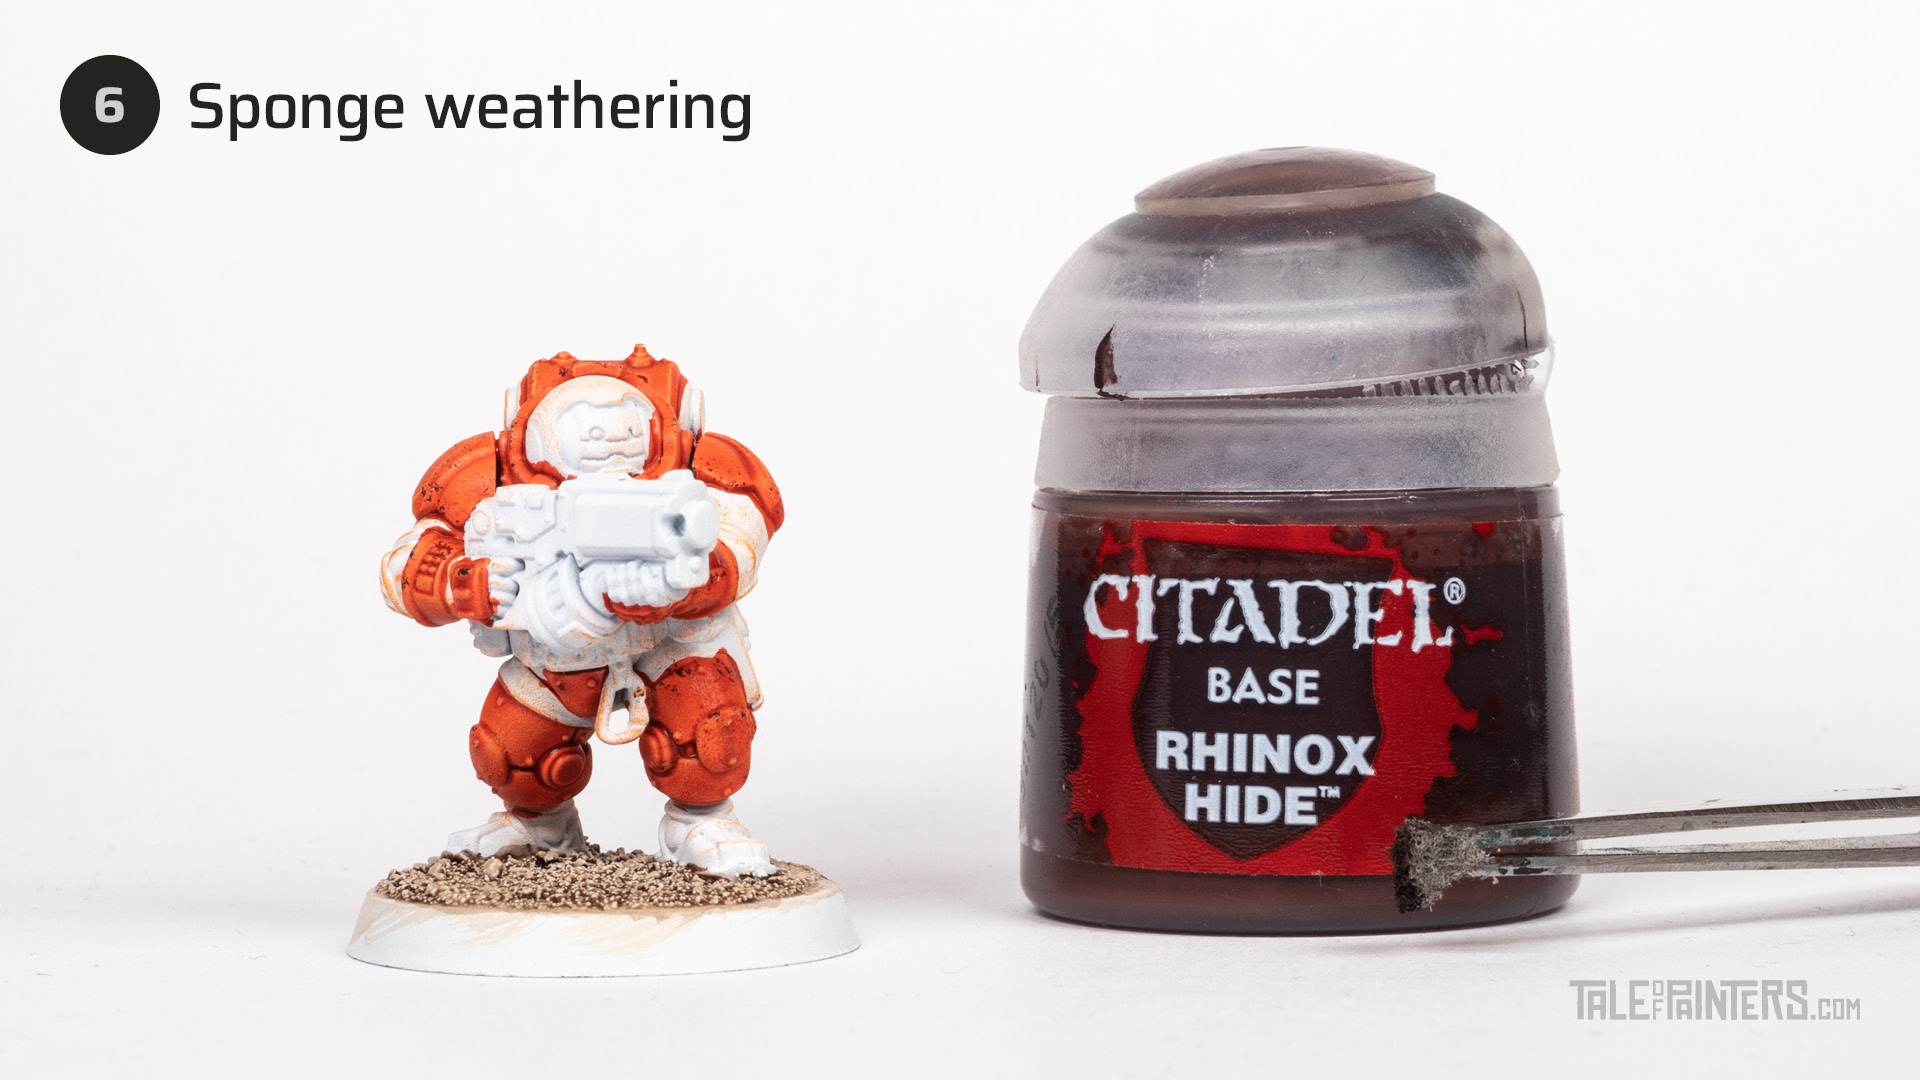

Dab a little piece of blister sponge into Rhinox Hide, wipe away the excess, and then carefully press it onto random edges of the armour to add some sponge weathering and texture.
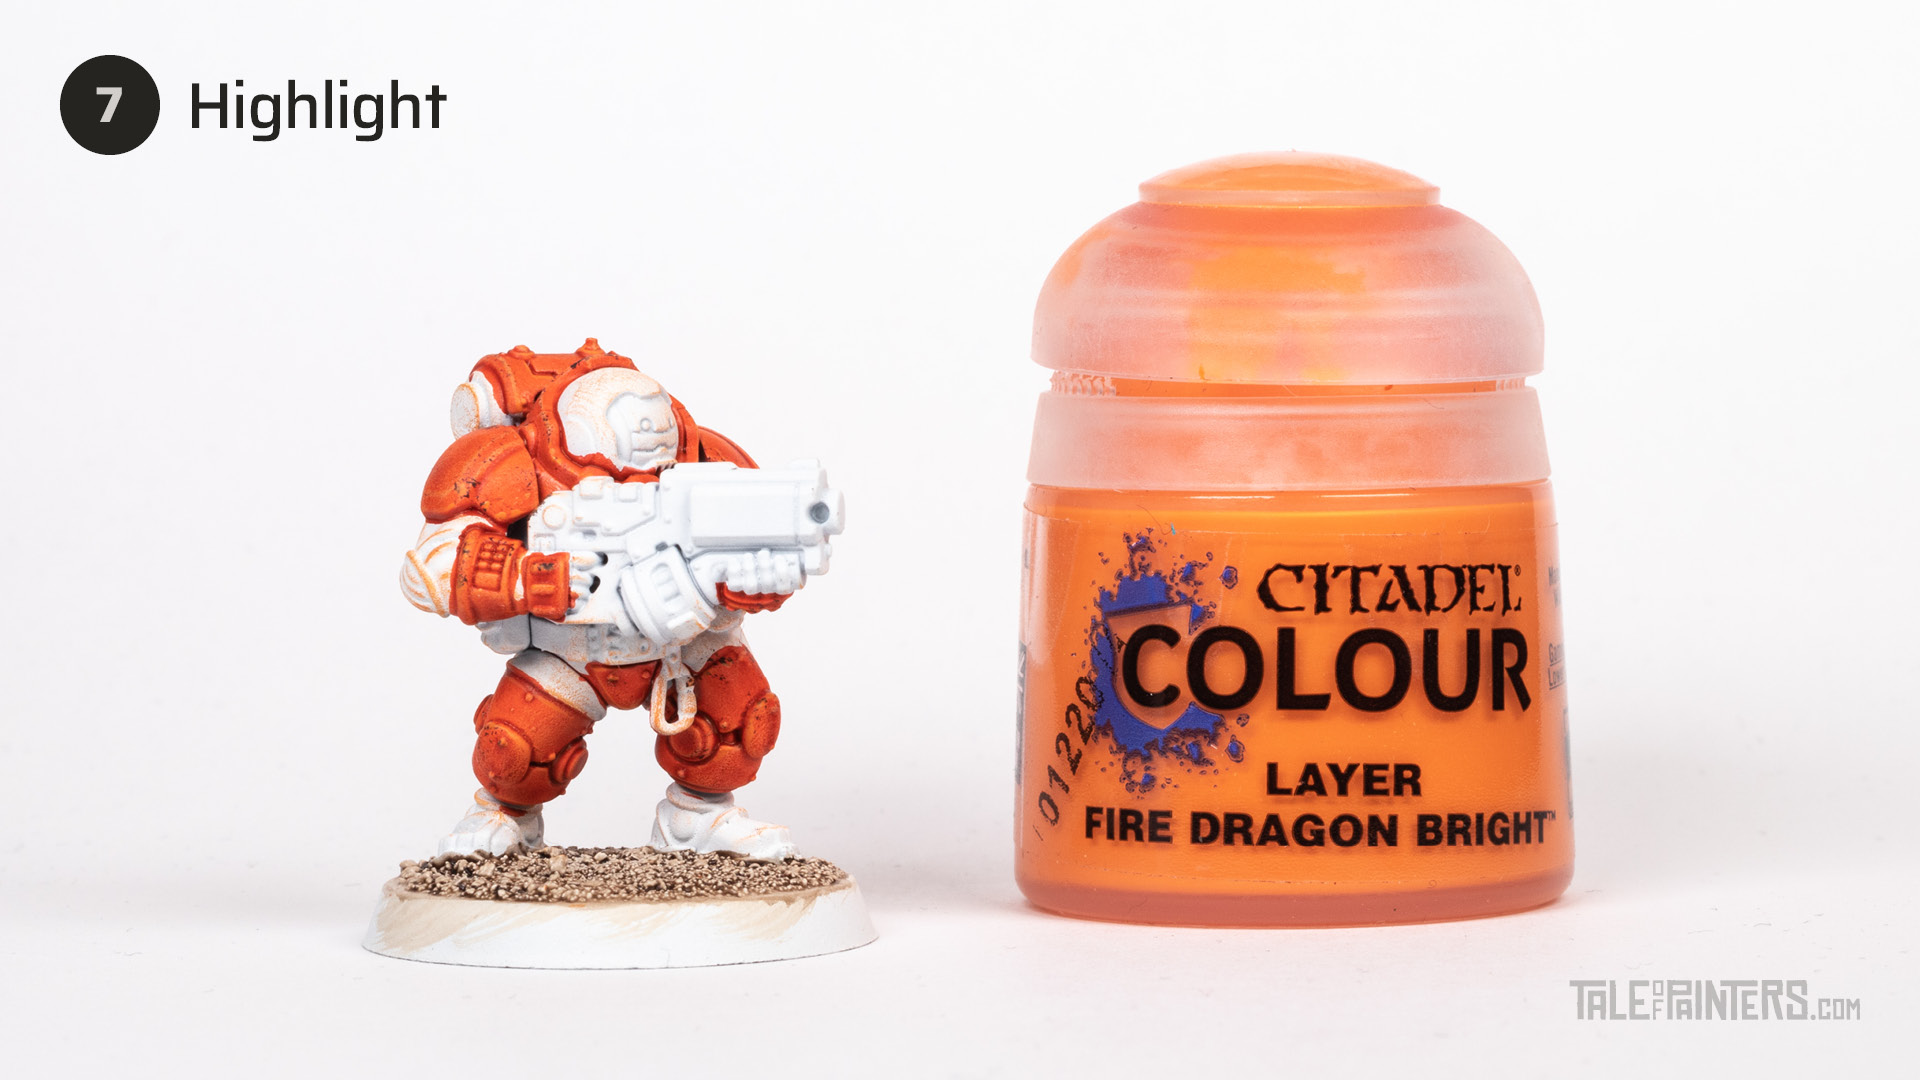

The Contrast paint and orange drybrush should have done most of the highlighting work for you, but you can refine the armour with a few quick edge highlights of Fire Dragon Bright. I also like to highlight the lower bottom of the larger sponge weathered chips for a more 3D effect.
If you need to correct any mistakes on the Trans-Hyperion Alliane orange armour later on, mix Wild Rider Red with Fire Dragon Bright until you get a matching colour.
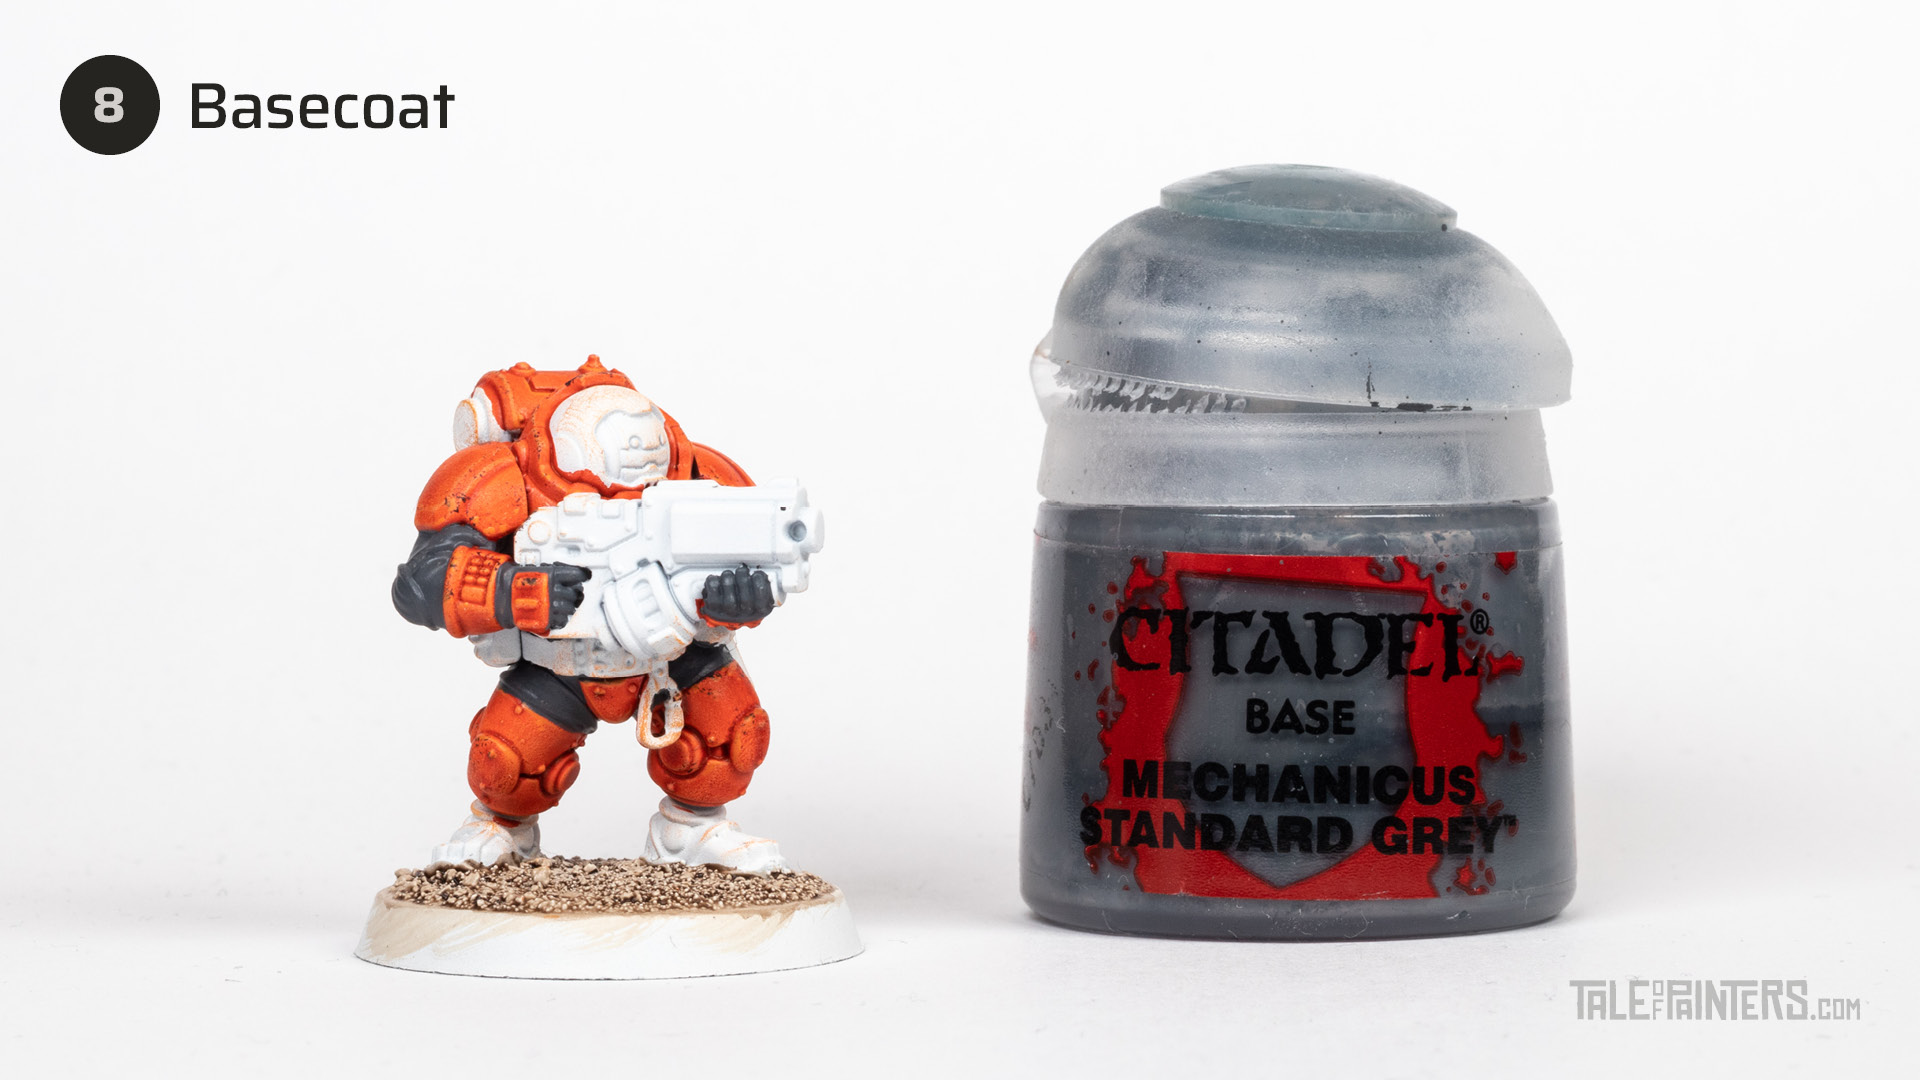

Basecoat the undersuit with Mechanicus Standard Grey.
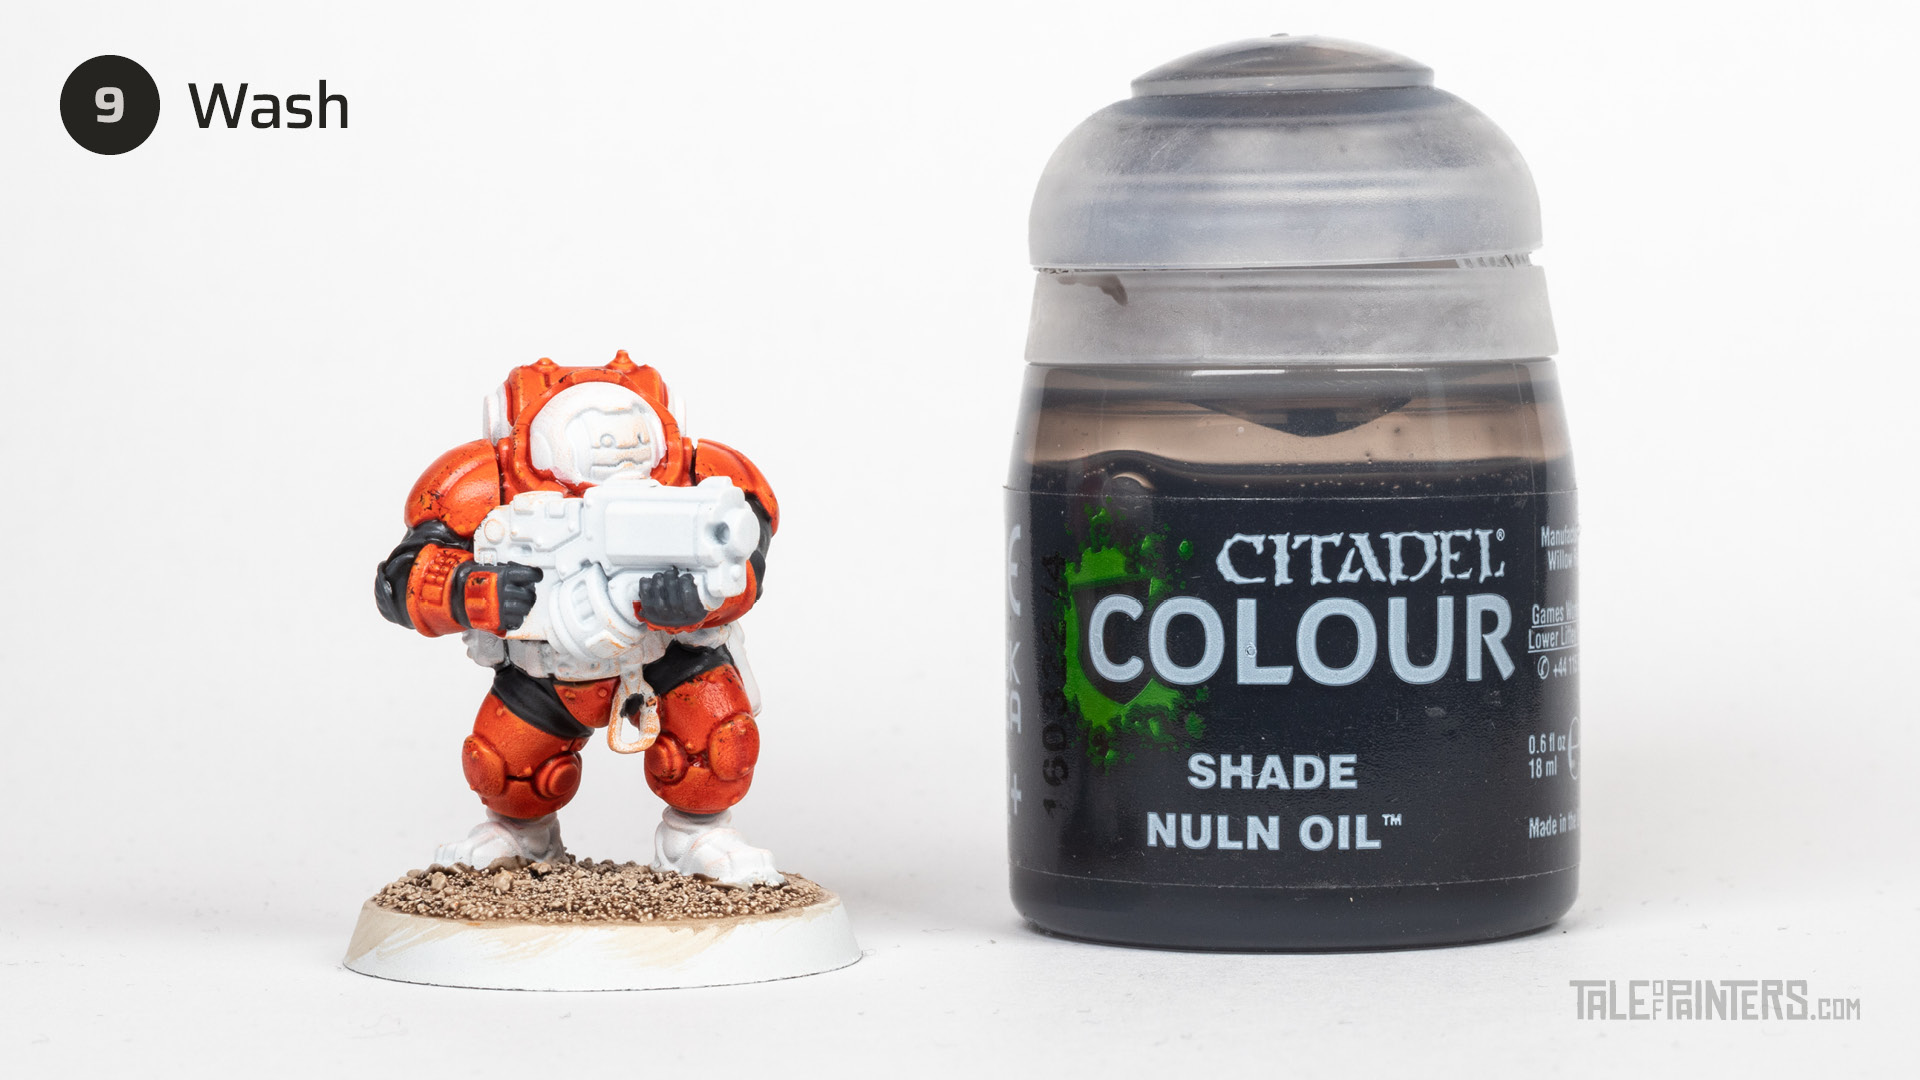

Give the Hearthkyn Warrior’s suit a wash of Nuln Oil (if you’re using the old formula, you might want to add a drop of Lahmian Medium or Contrast Medium).
Restore the white areas that got hit with the orange drybrush with a coat of Corax White, and then a few thin layers of Vallejo Model Color White [or White Scar].
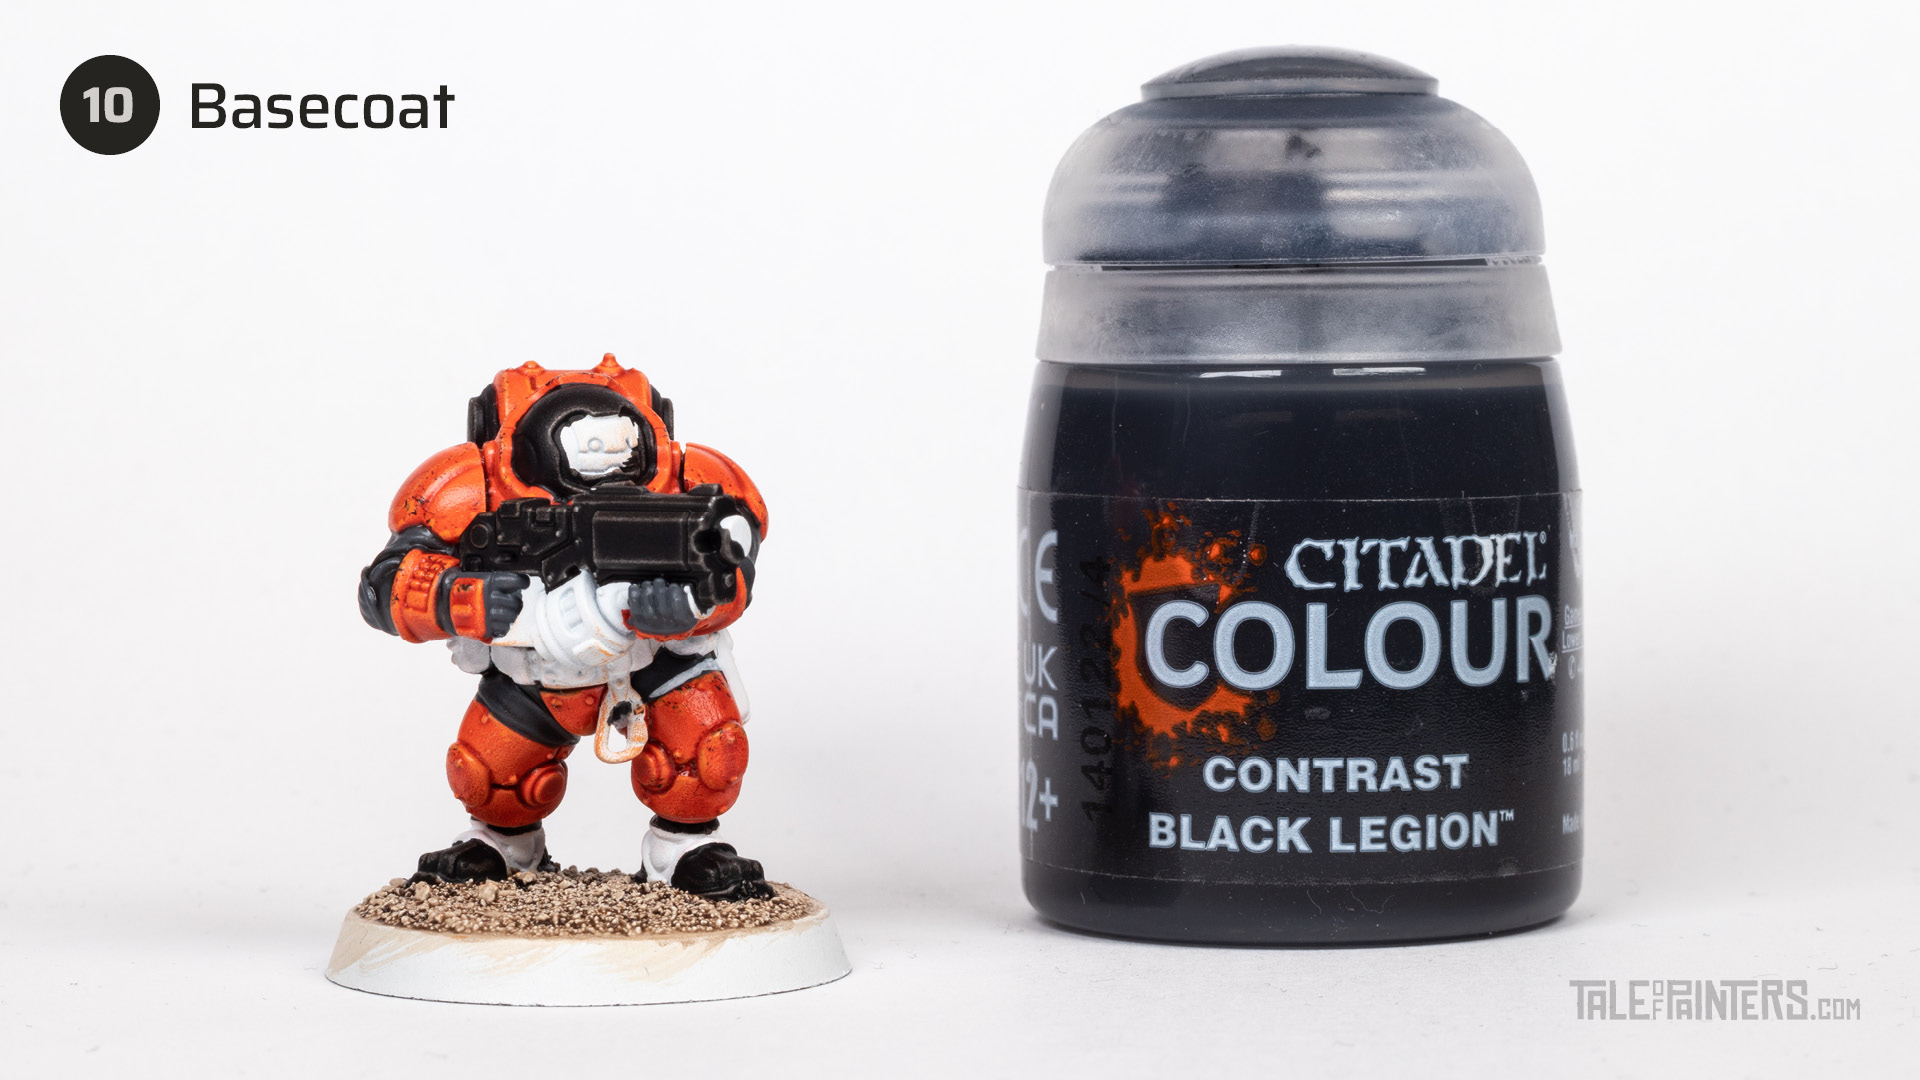

Basecoat any black armoured details such as the gun, helmet, and feet with Black Legion. Apply a second coat on the flat areas to create a more even black, but don’t hit the edges with the second coat so you don’t knock down the highlights.
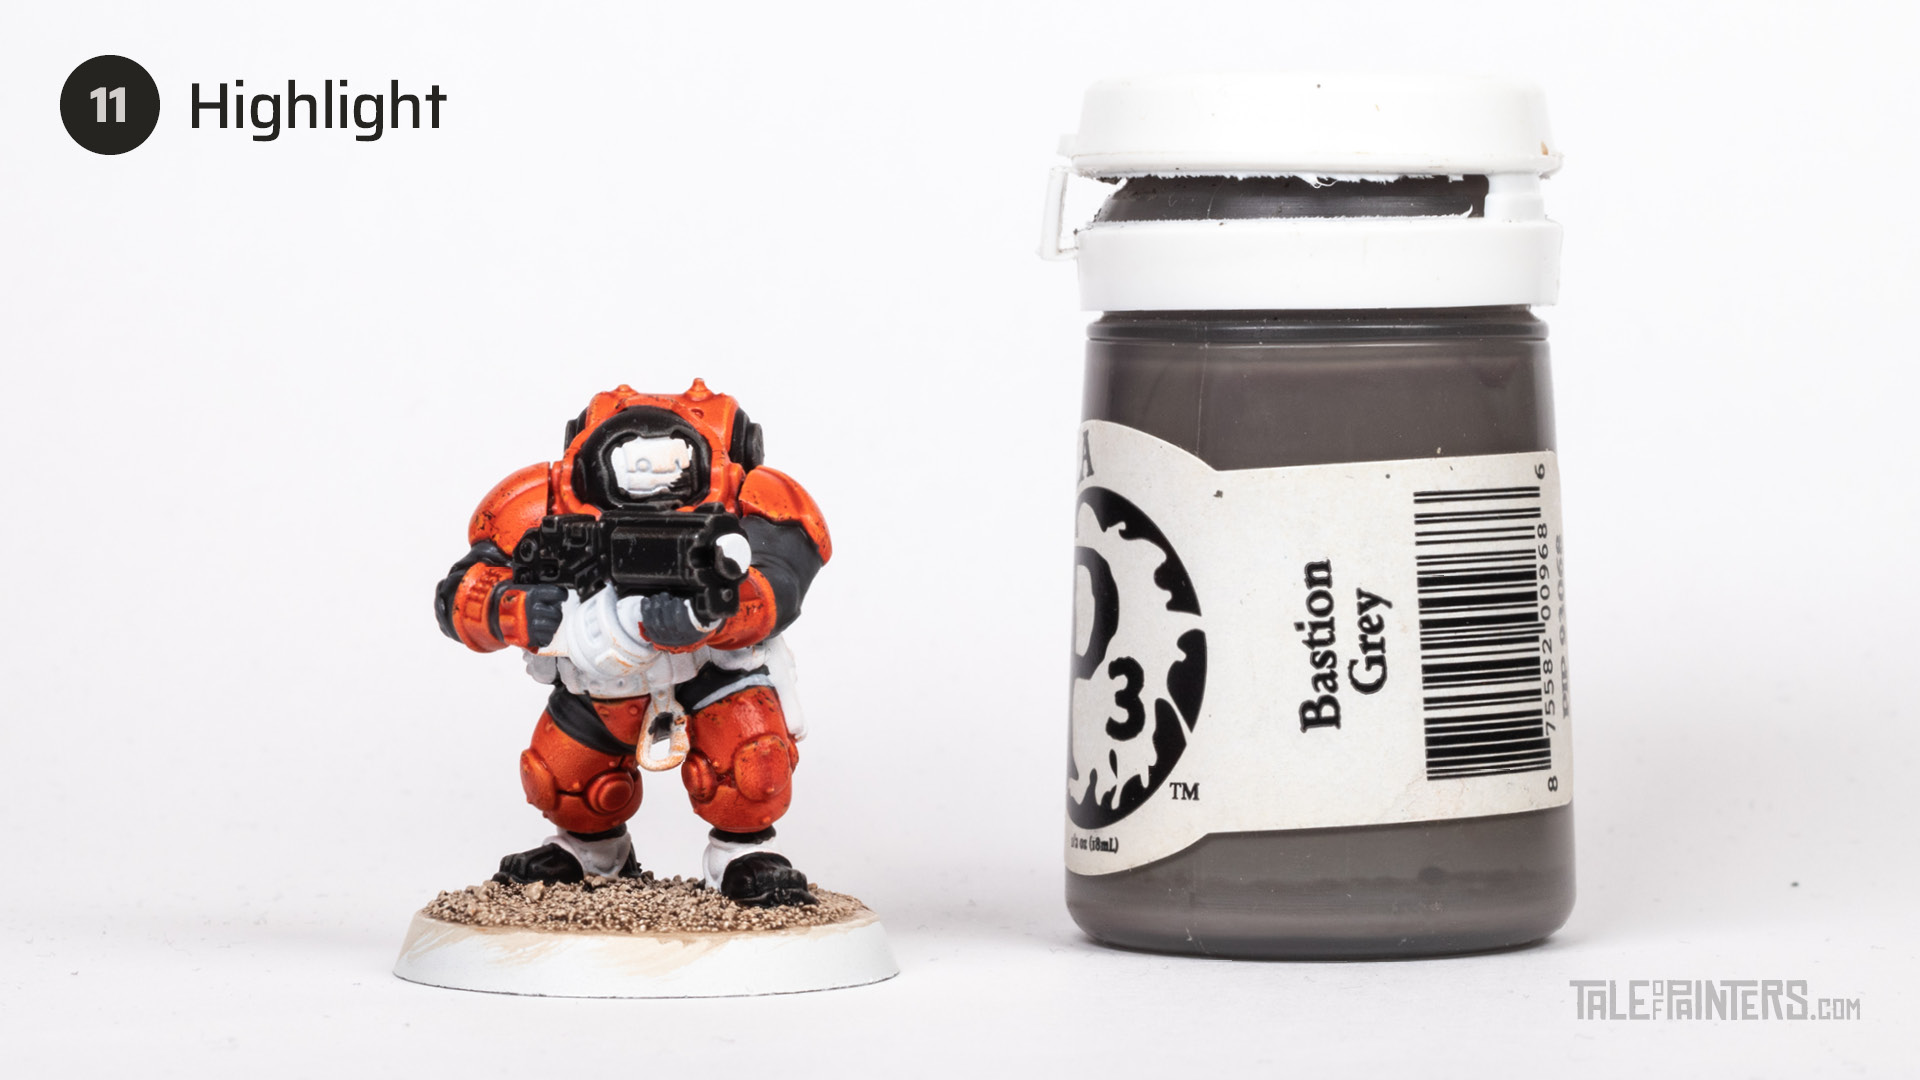

Refine the highlights on the black armour panels with Formula P3 Bastion Grey [or Stormvermin Fur] where needed, and also add a few tiny scratches here and there.
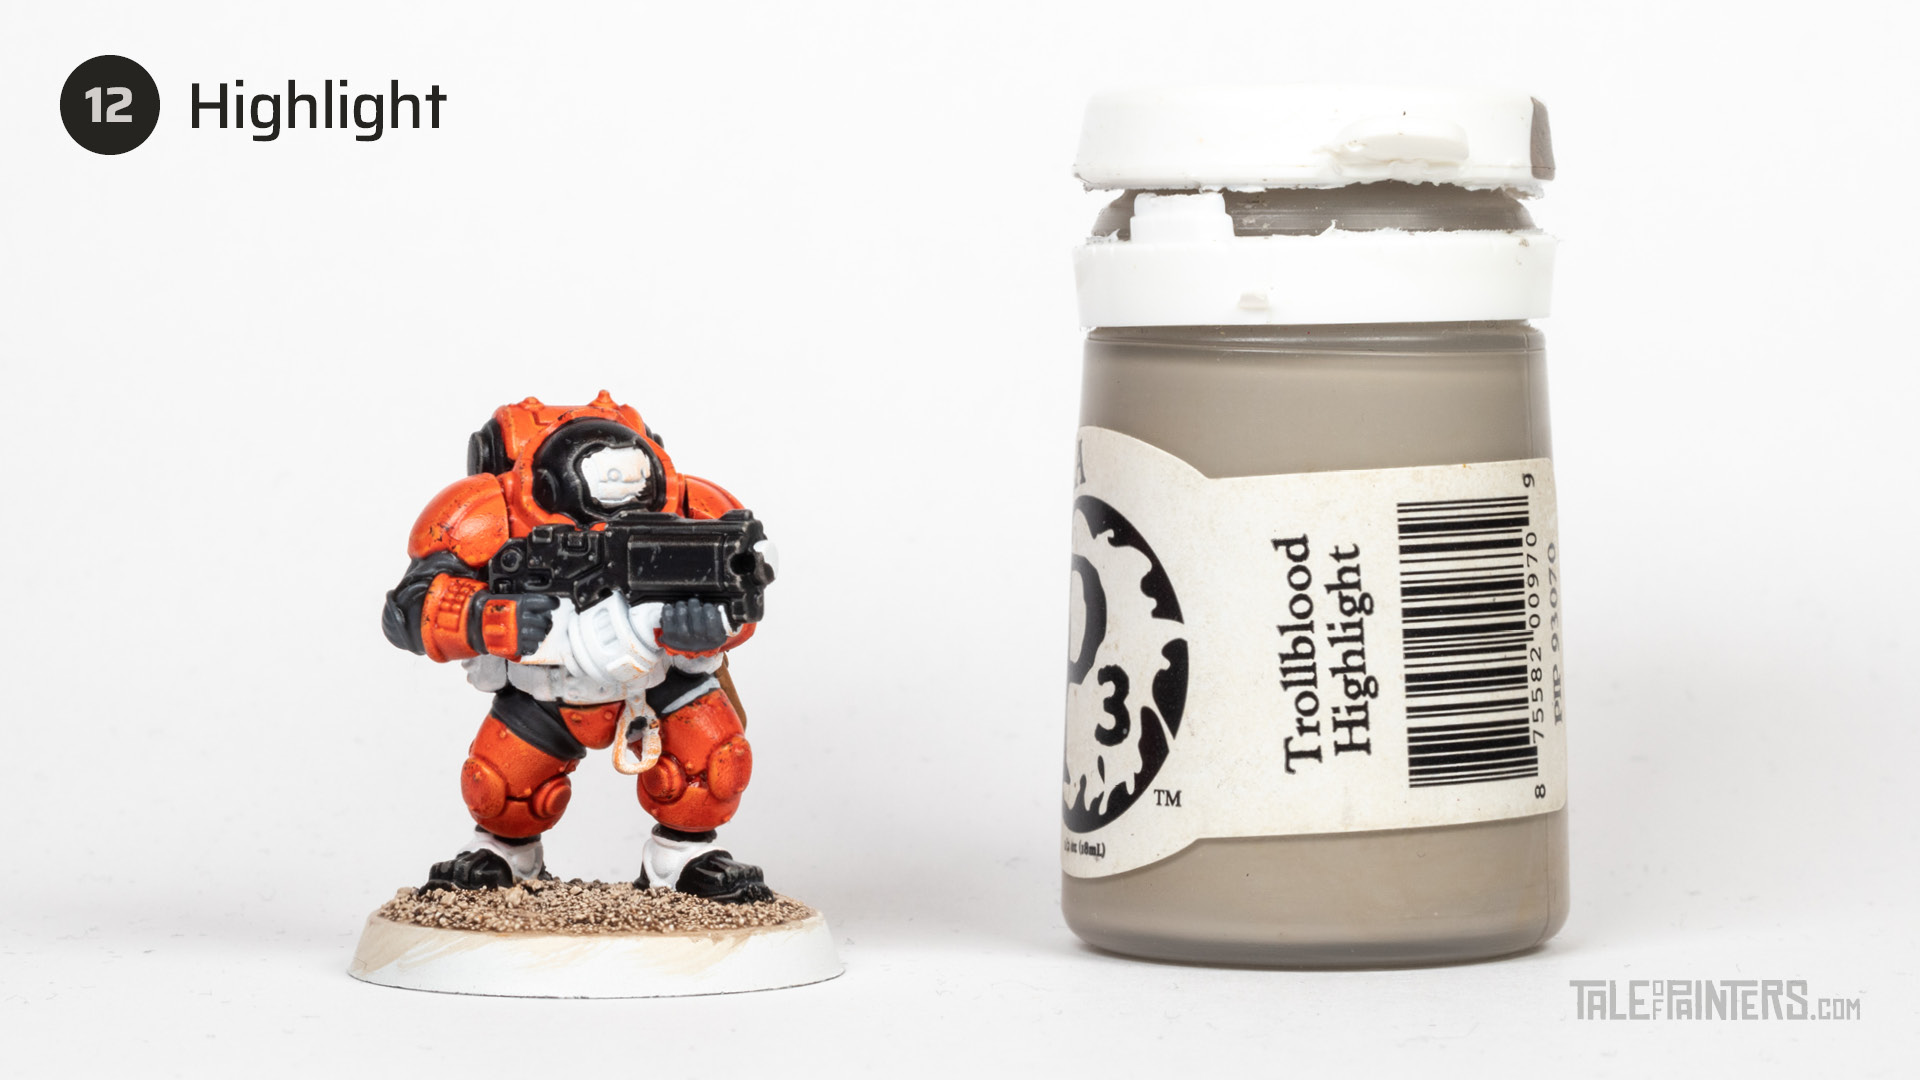

Apply little dots of Formula P3 Trollblood Highlight [or Stormvermin Fur mixed with a little bit of Corax White] to the rivets and sharpest corners of the black armour pieces.
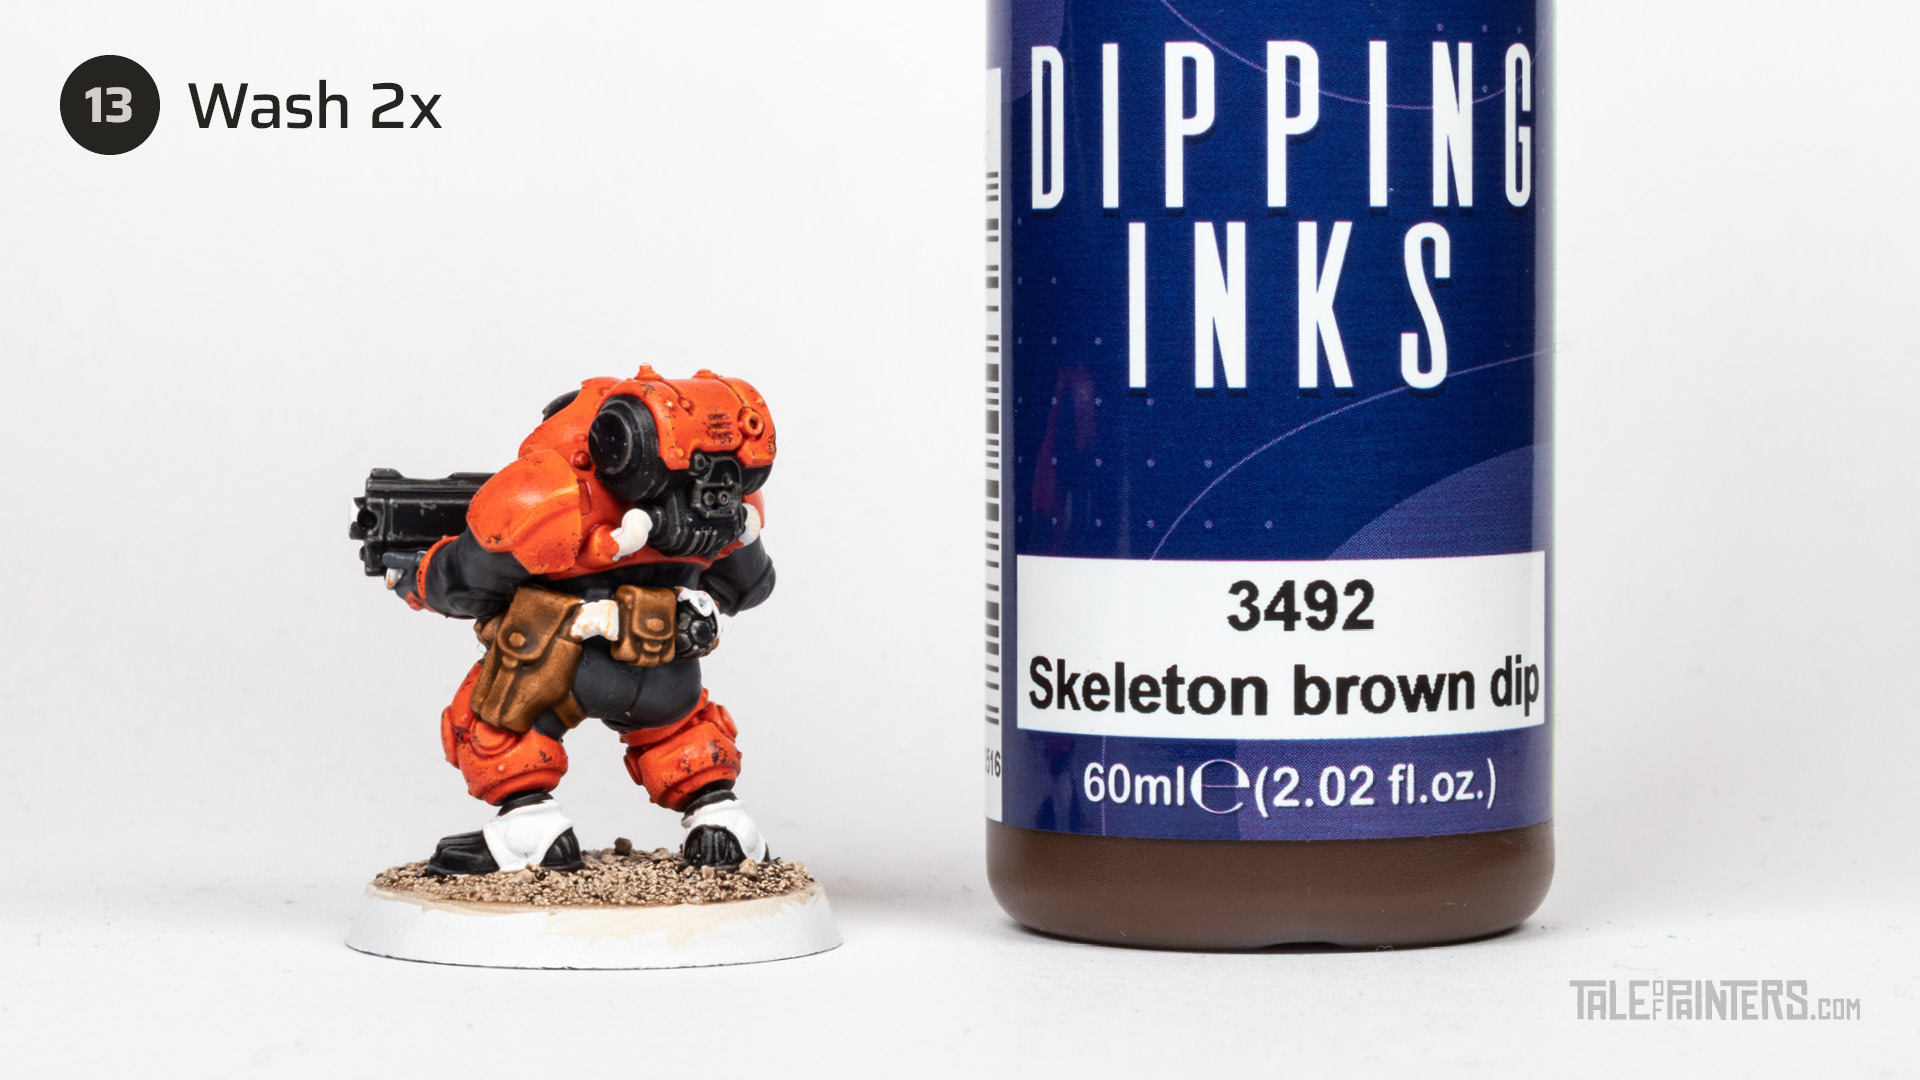

Wash the leather with two coats of Skeleton Brown Dipping Ink from Green Stuff World [or Agrax Earthshade].
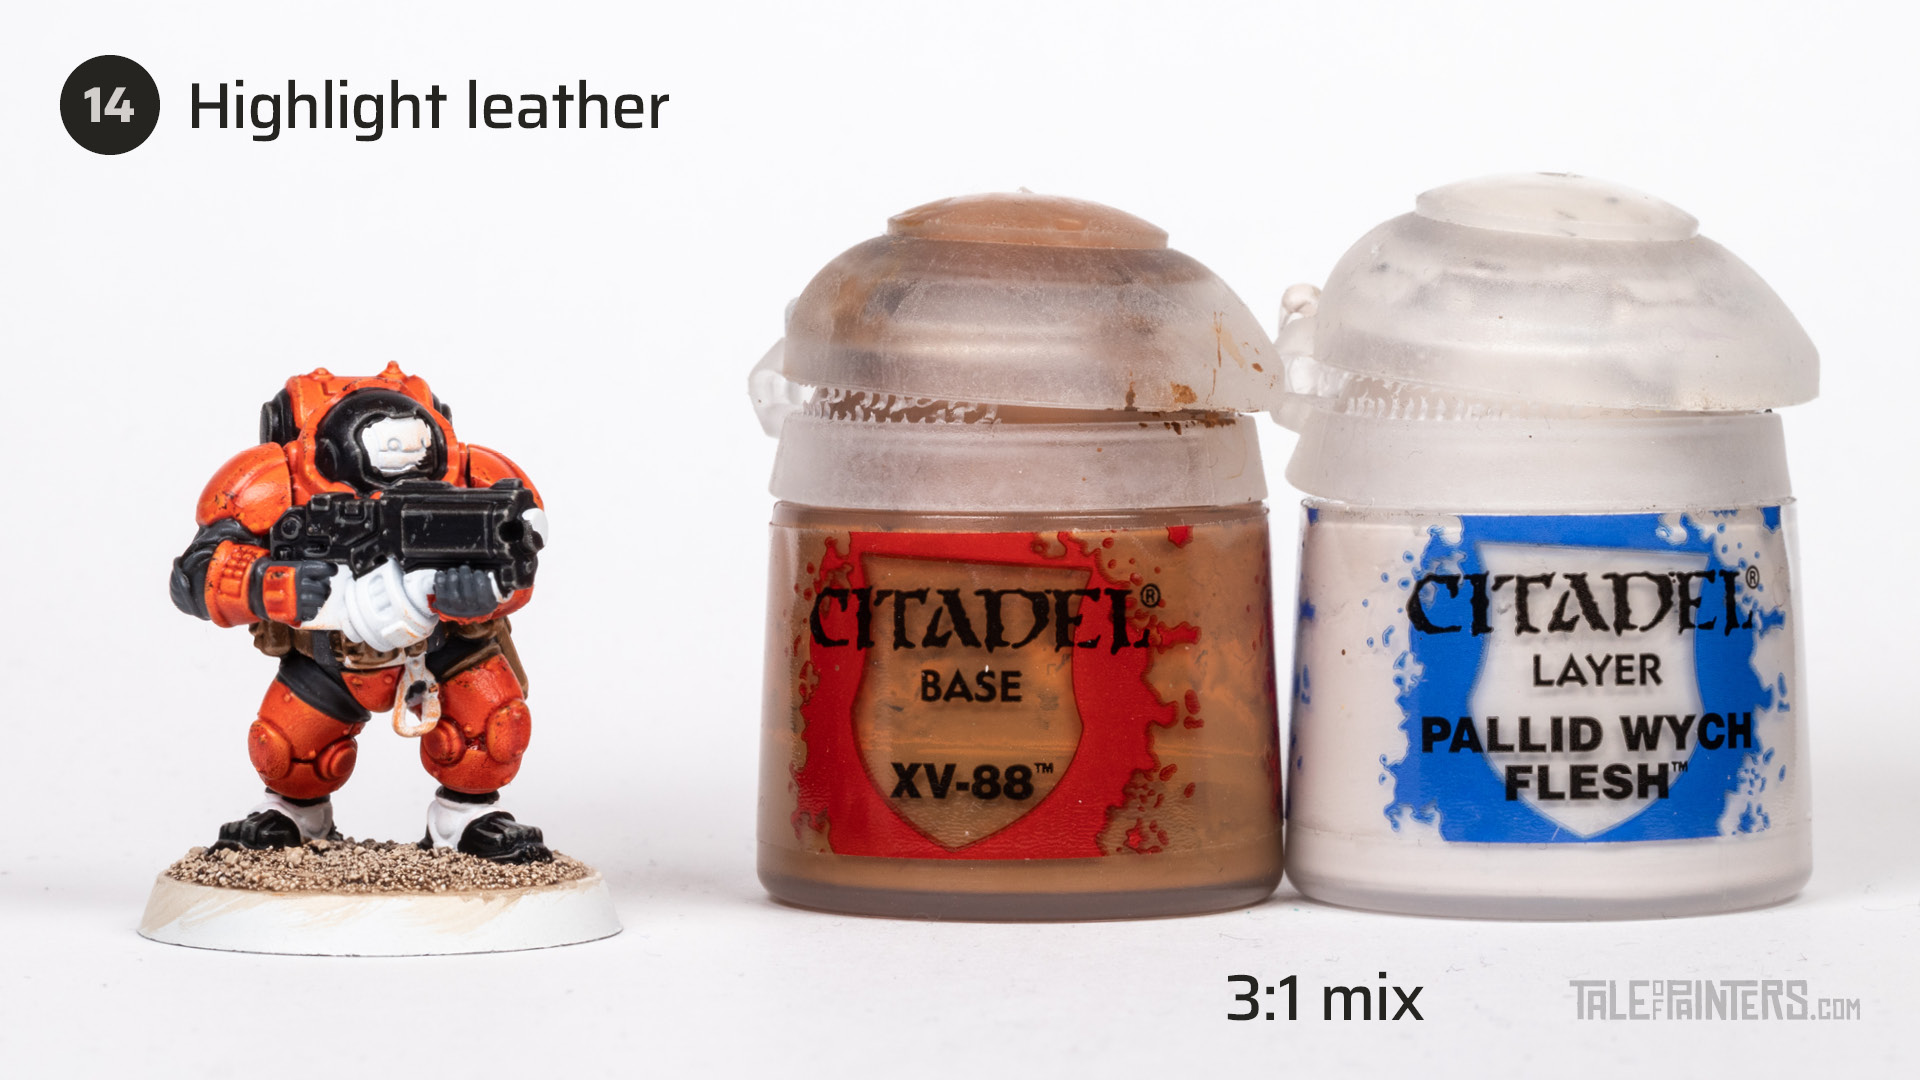

Highlight the leather with a mix of XV-88 mixed with a little bit of Pallid Wych Flesh (sorry, I photographed the wrong angle of the model, check the pictures of the finish model at the end of this post for reference).
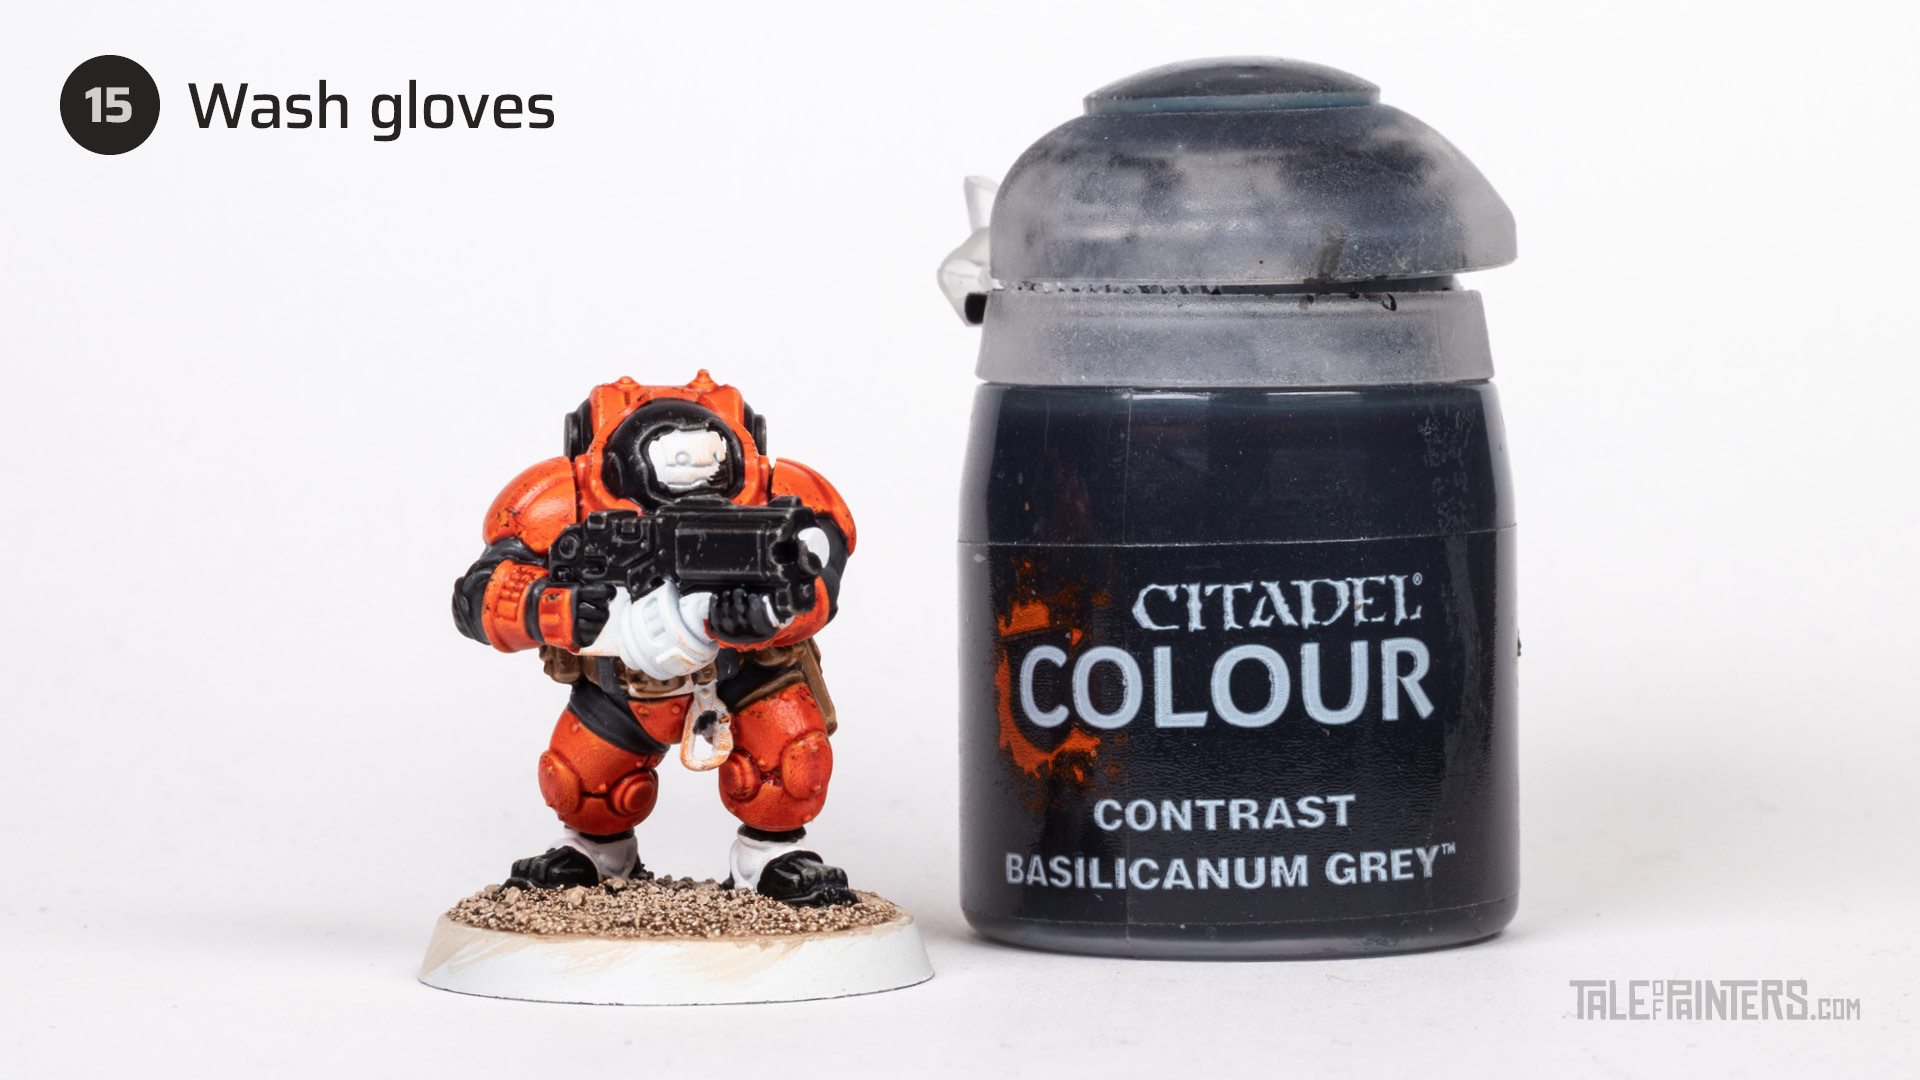

Wash the gloves you painted with Mechanicus Standard Grey in step 8 with a coat of Basilicanum Grey.
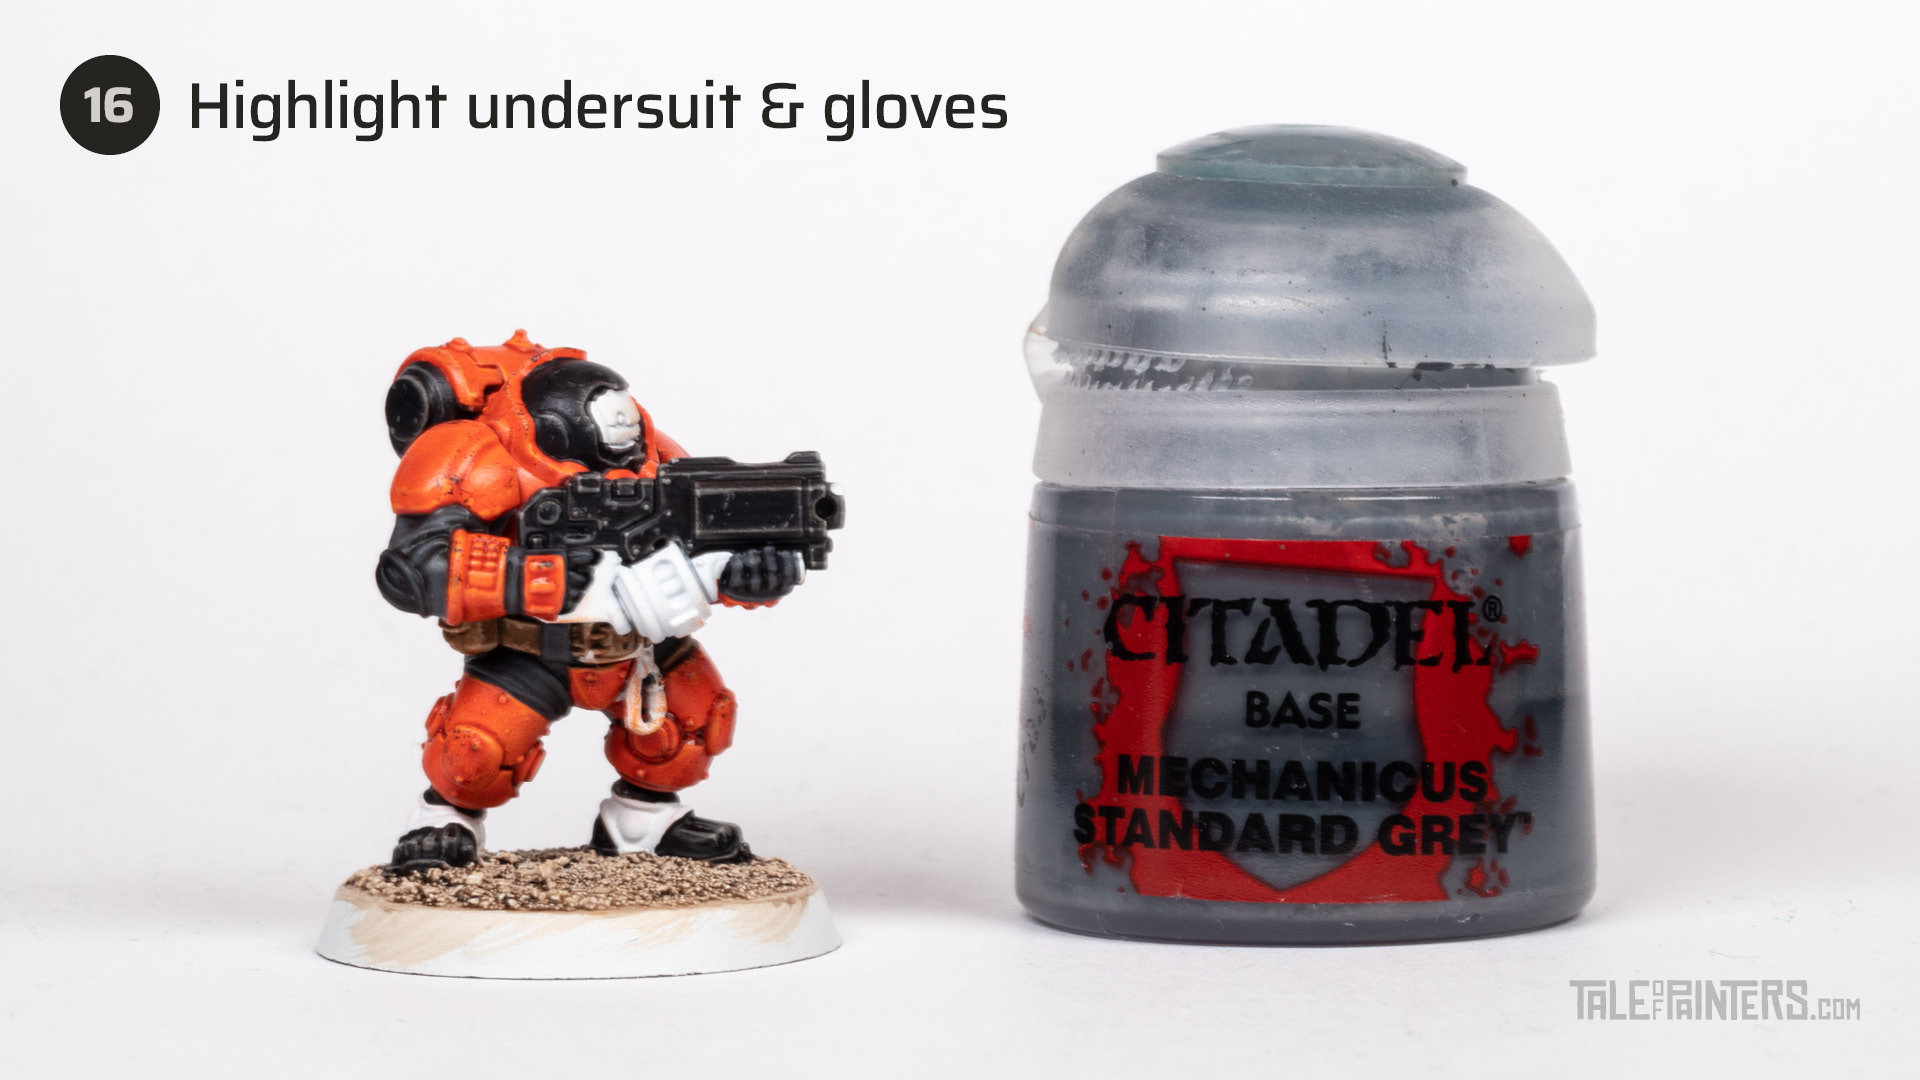

Highlight the fingers, knuckles, and creases and seams of the undersuit with Mechanicus Standard Grey.
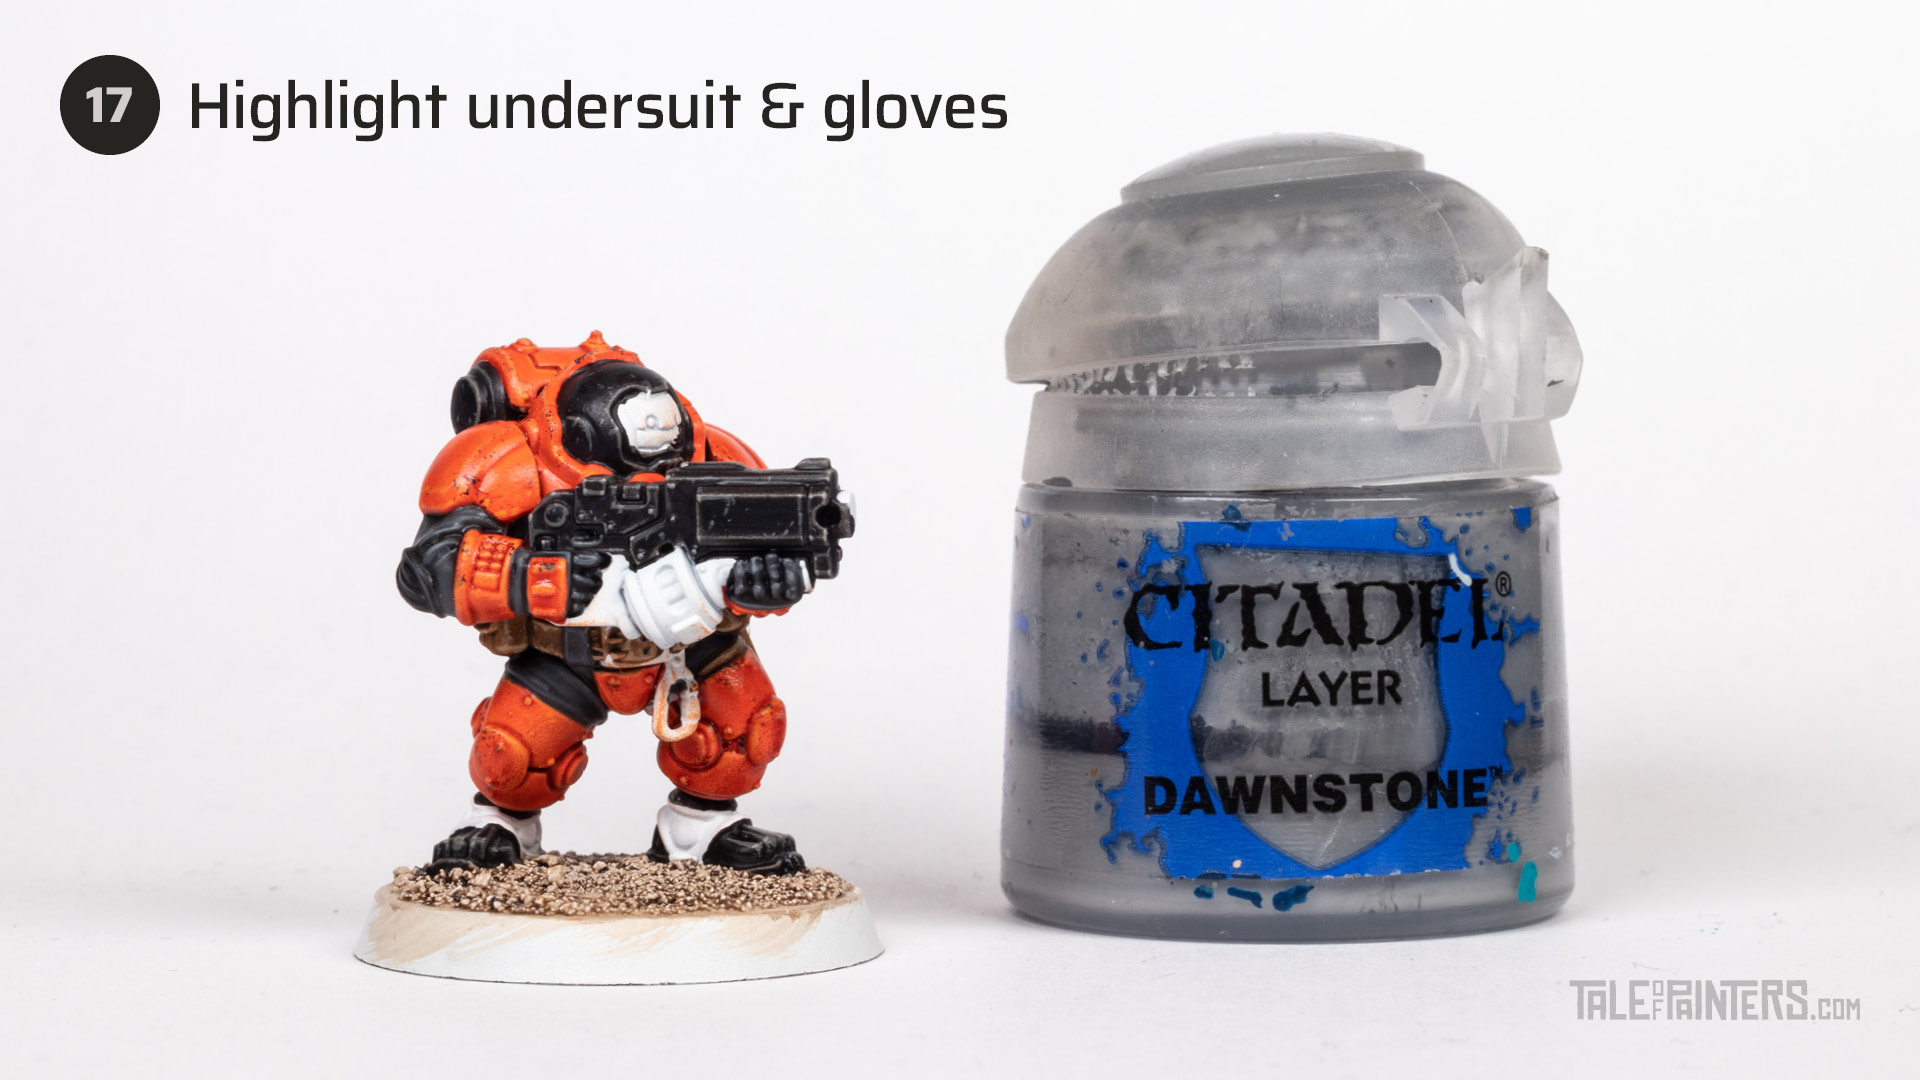

Apply another highlight of Dawnstone, but concentrate on the fingers, knuckles, and sharpest creases only.
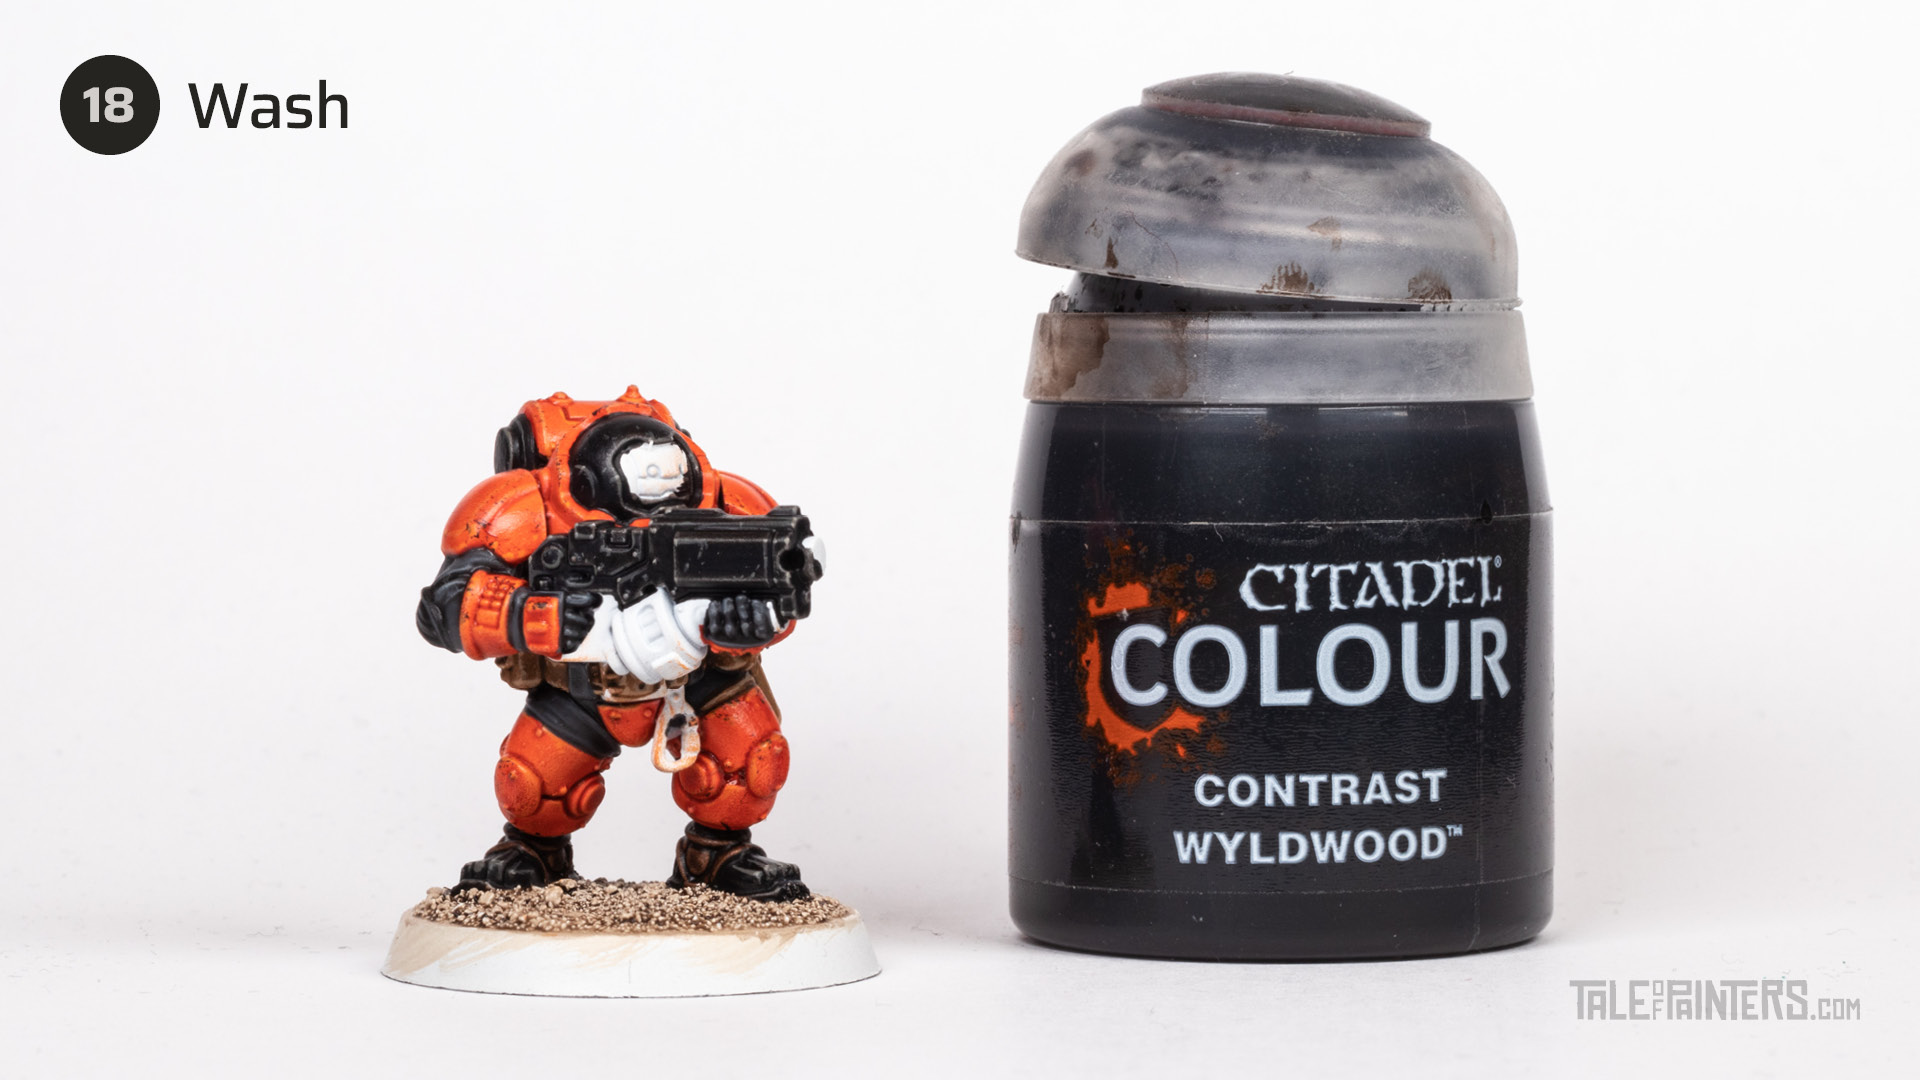

Wash the gaiters with a generous coat of Wyldwood.
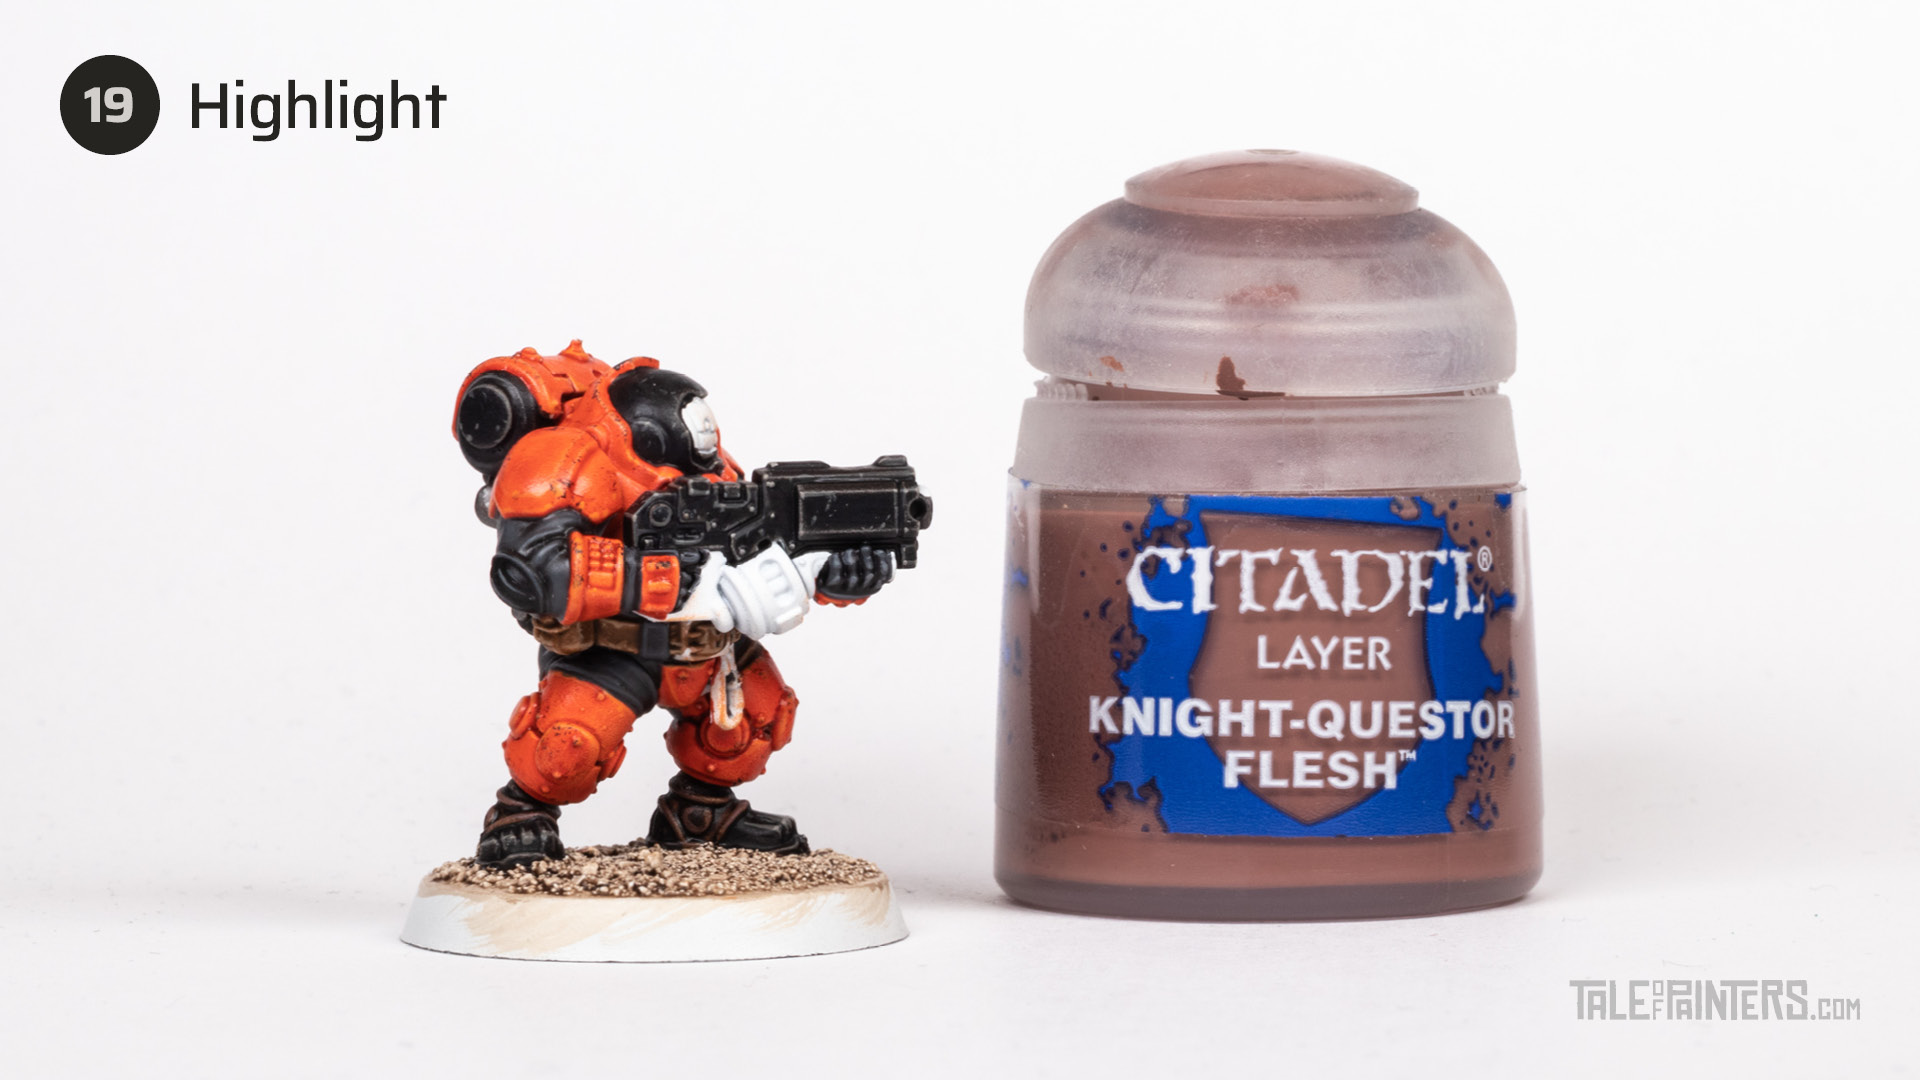

Highlight the brown leather of the Hearthkyn Warrior’s gaiters with Knight-Questor Flesh.
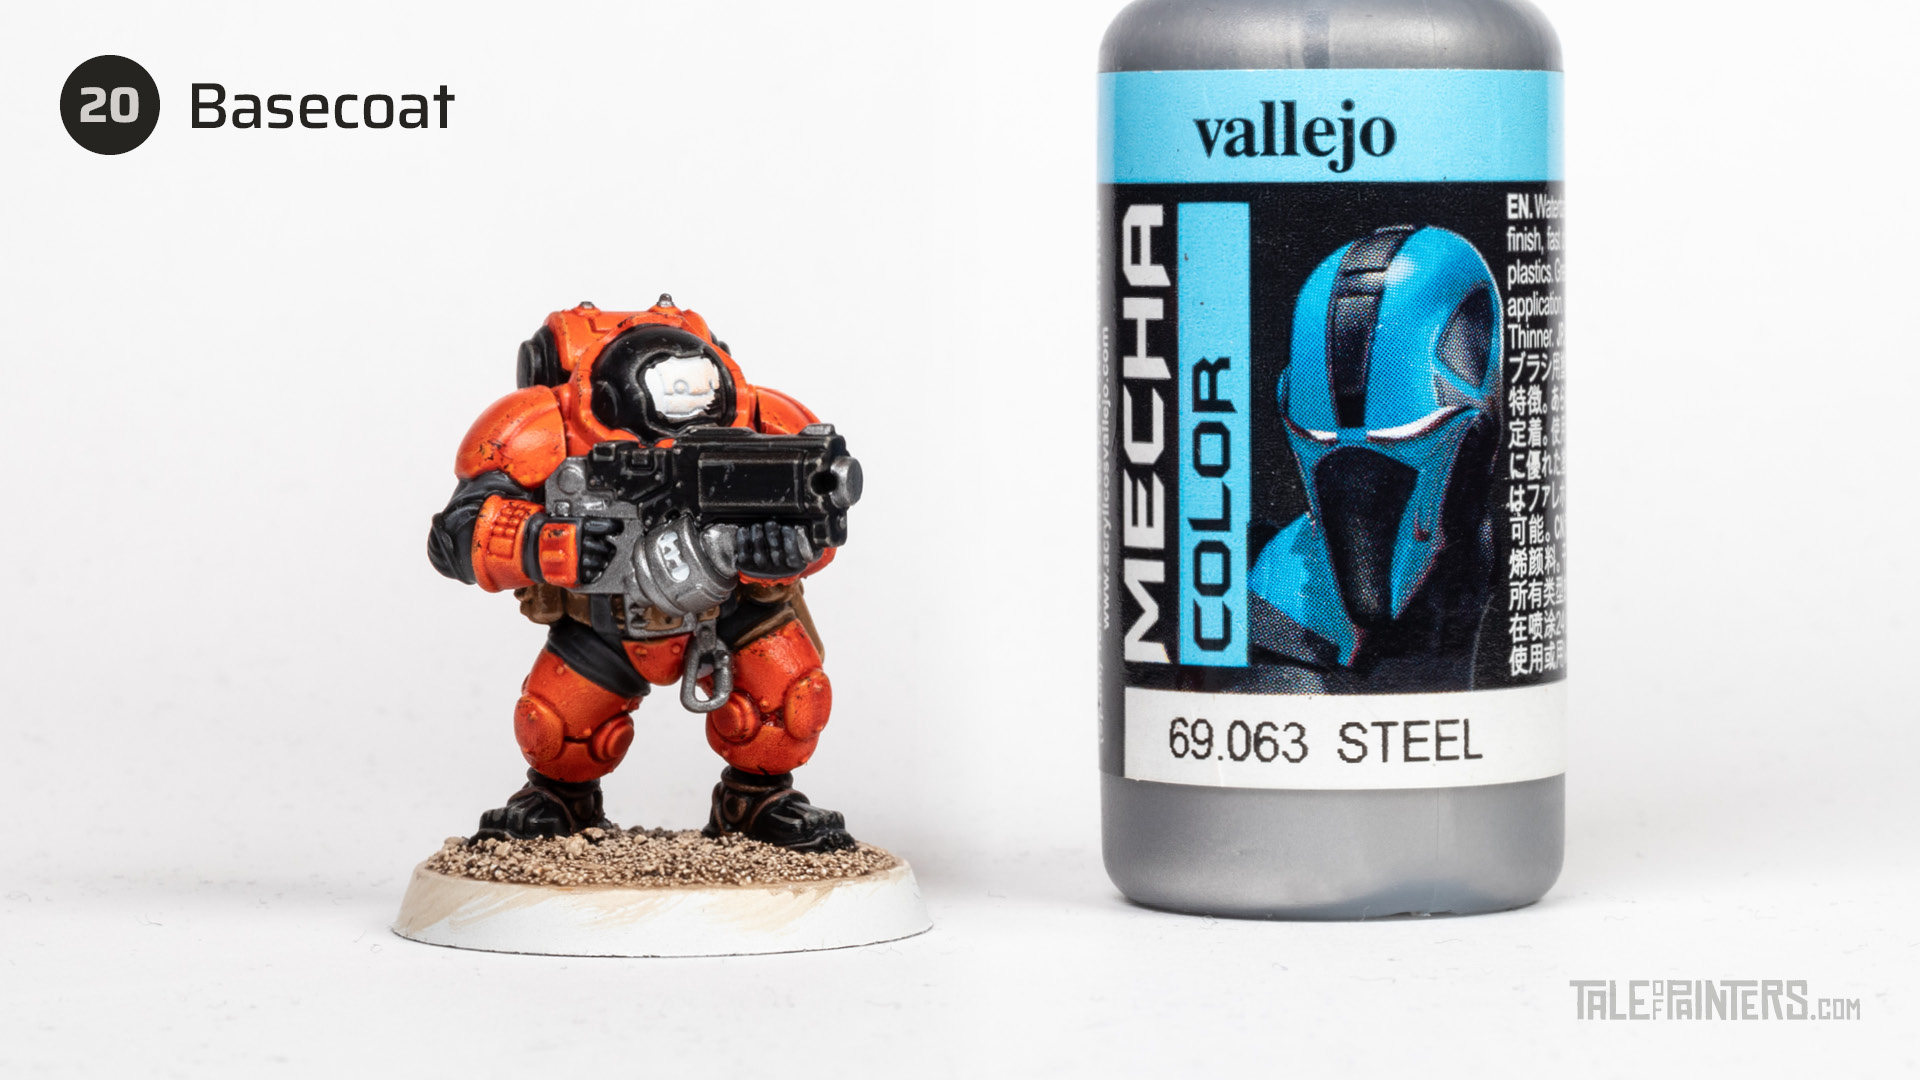

Basecoat the steel areas with Vallejo Mecha Color Steel [or Iron Hands Steel].
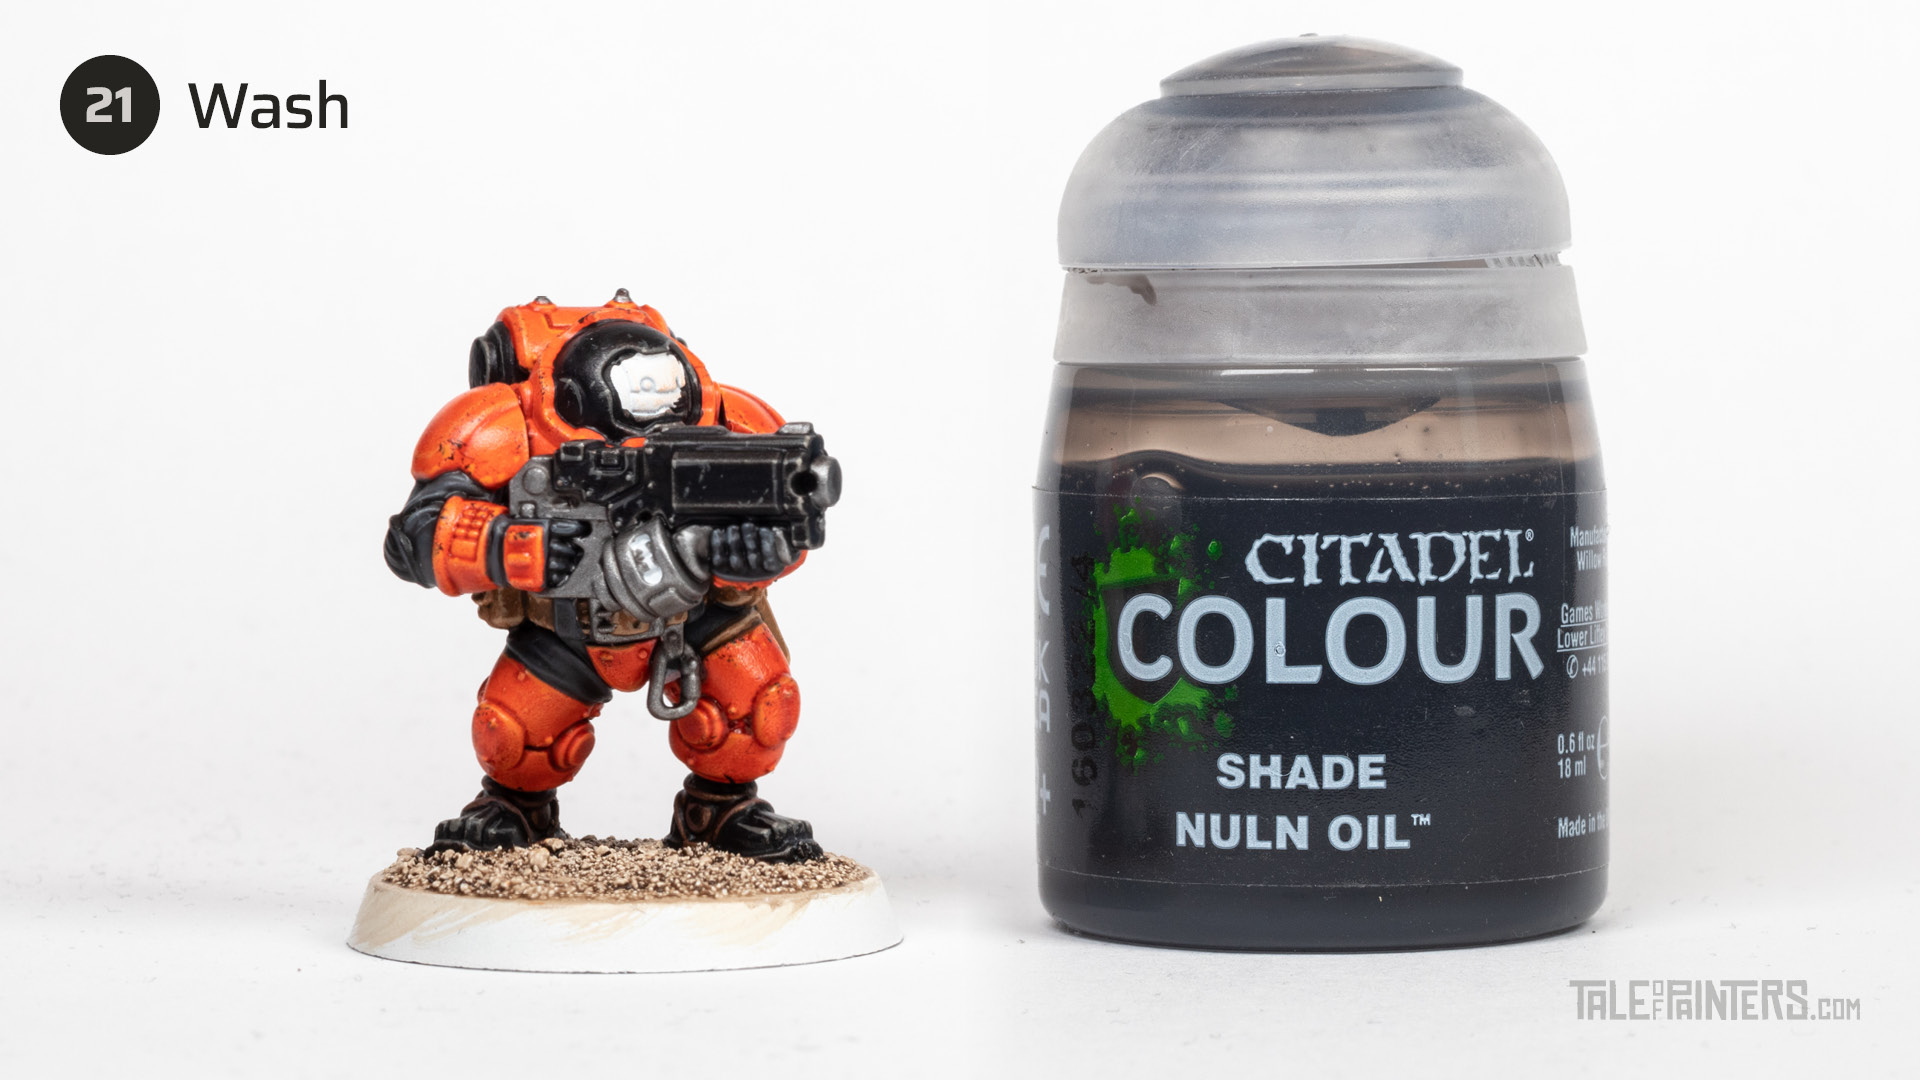

Then, give the metal a wash of Nuln Oil.
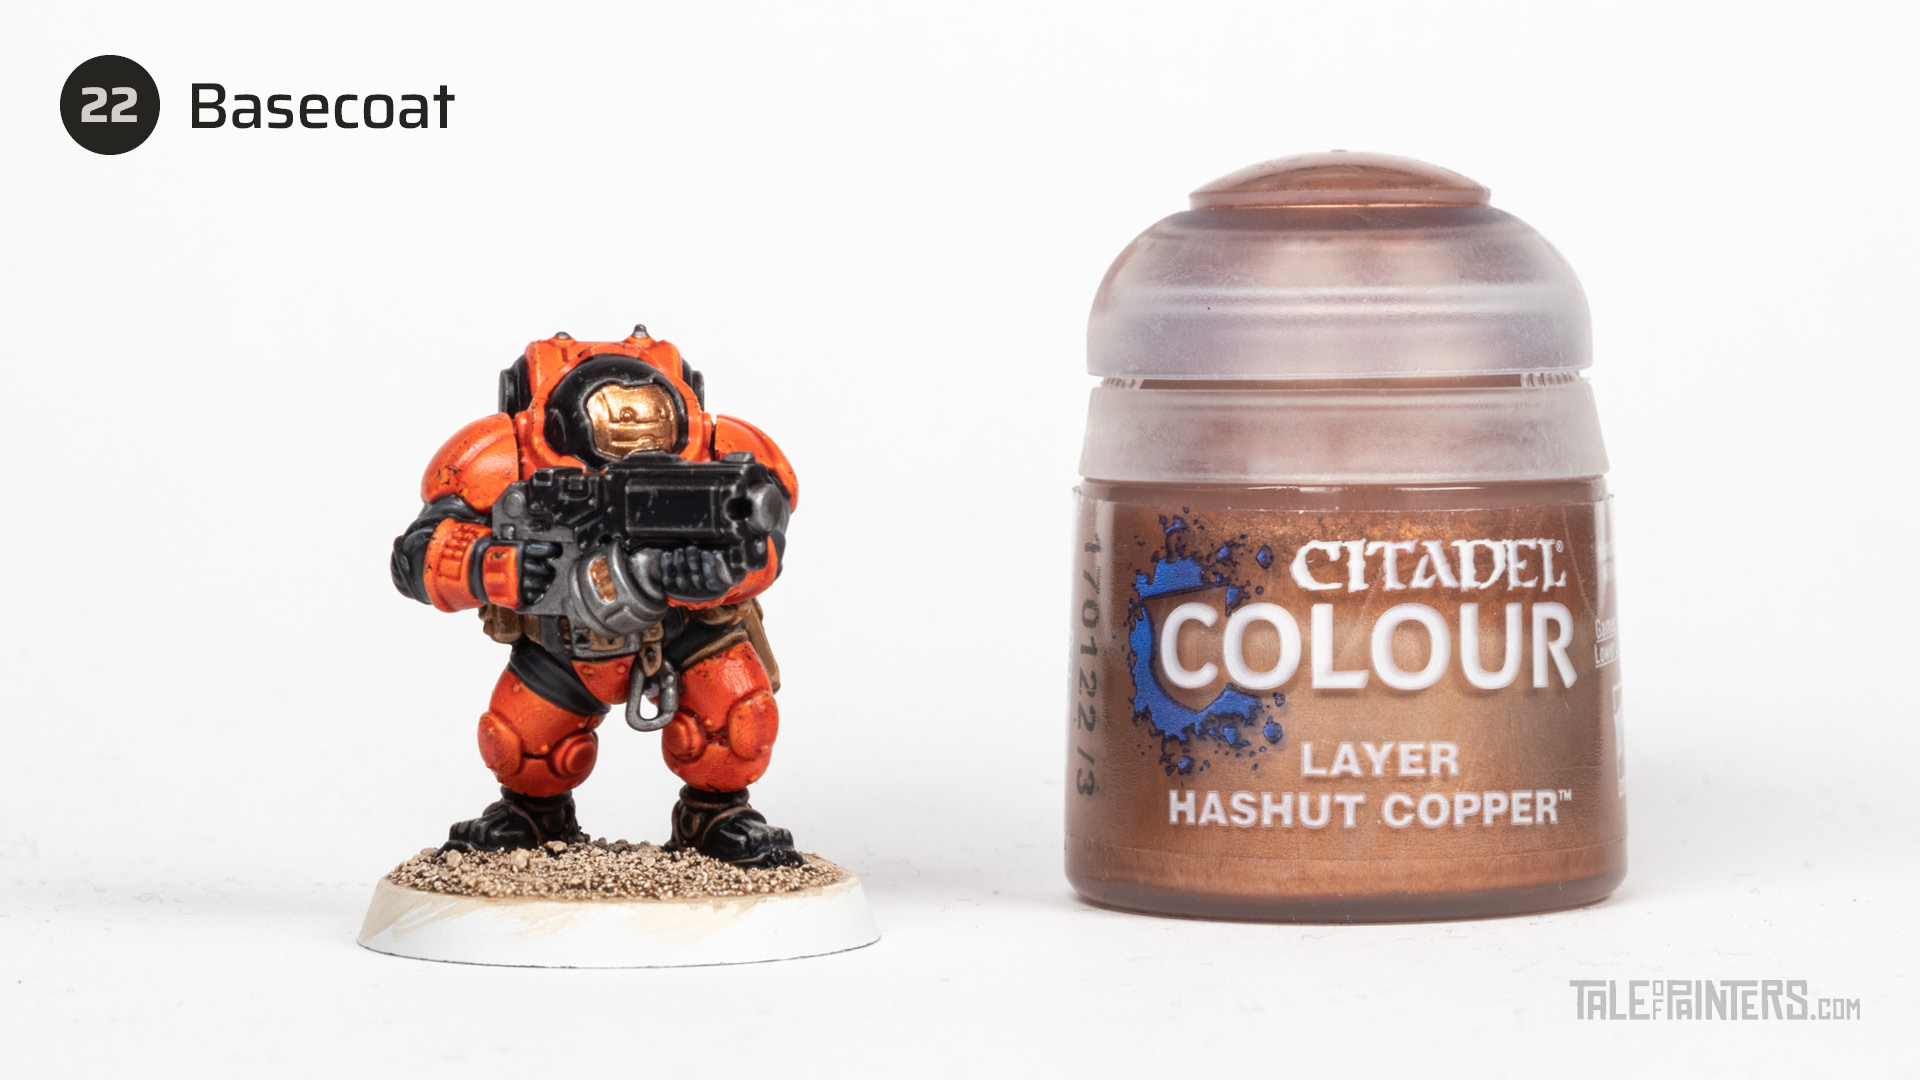

Basecoat the visor of the exo-suit’s helmet and the bullet rounds in the clip with Hashut Copper.
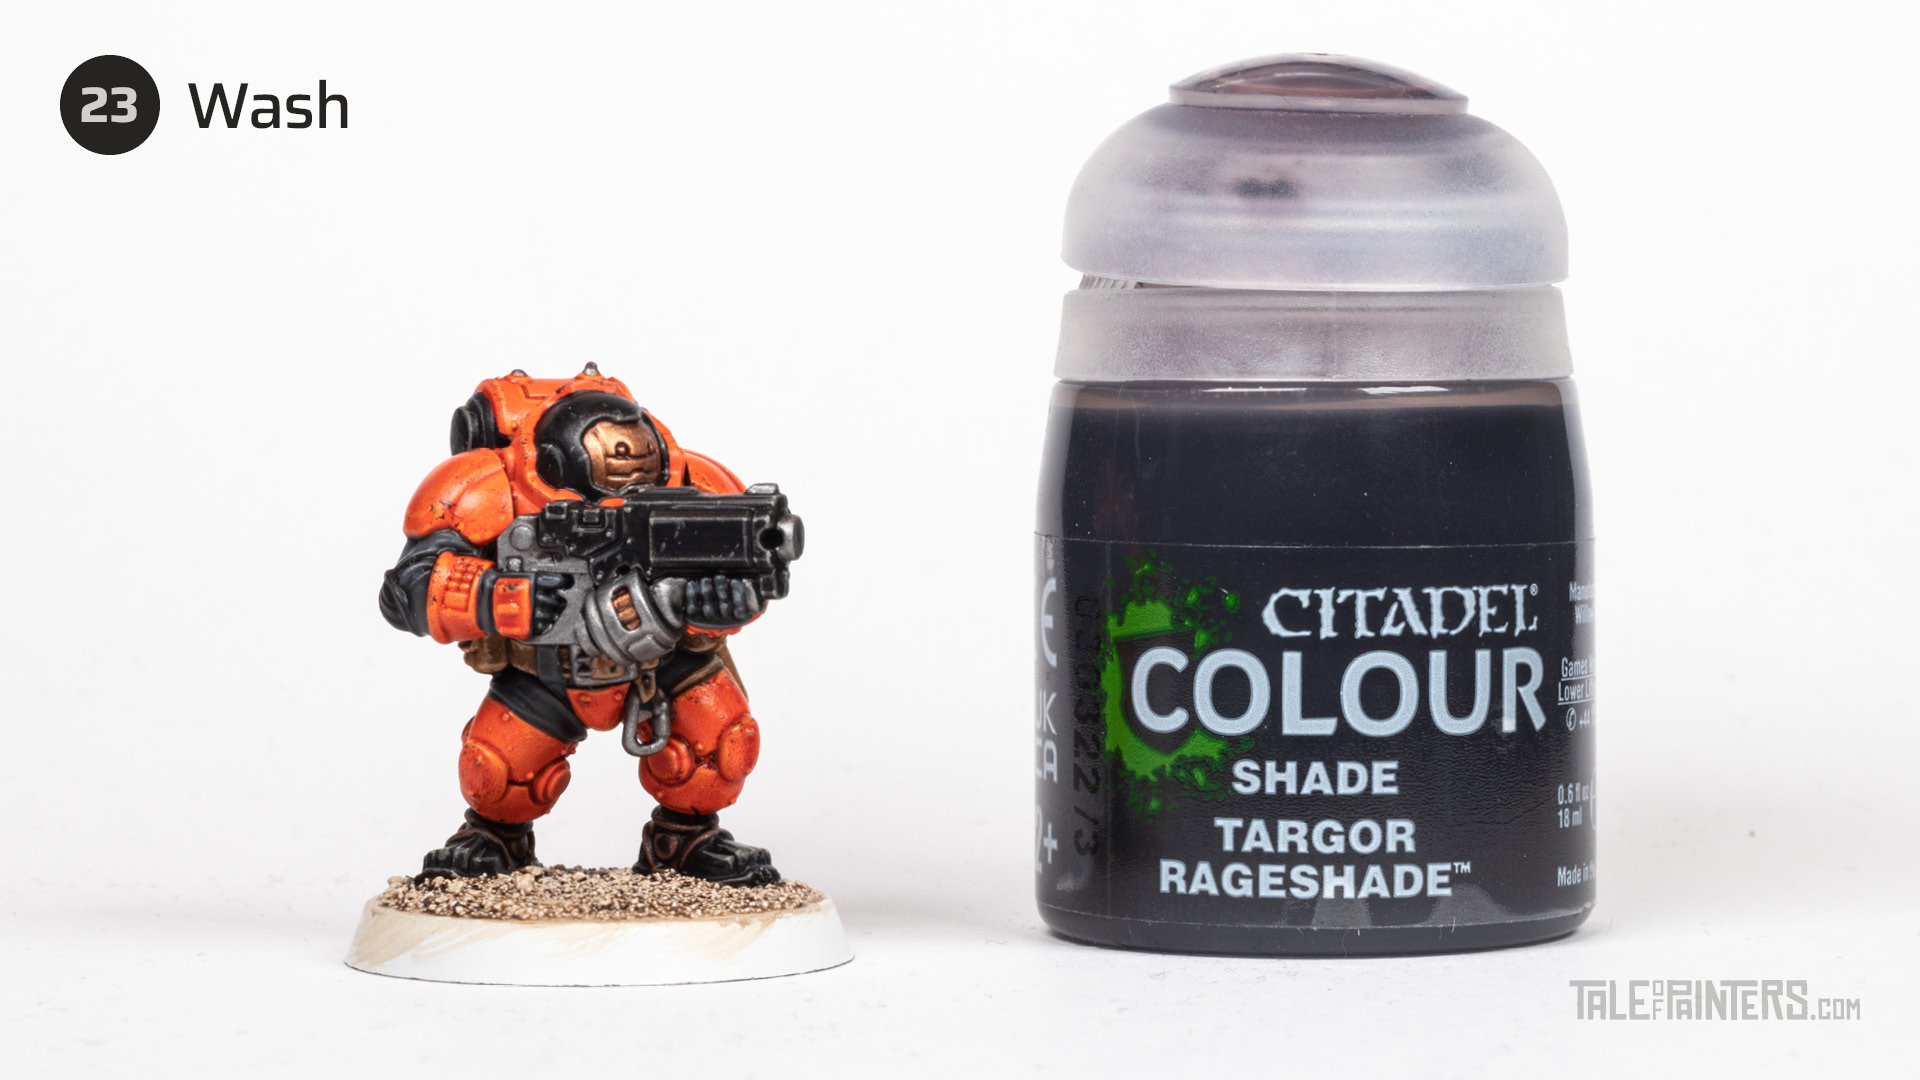

Wash the copper details with Targor Rageshade.
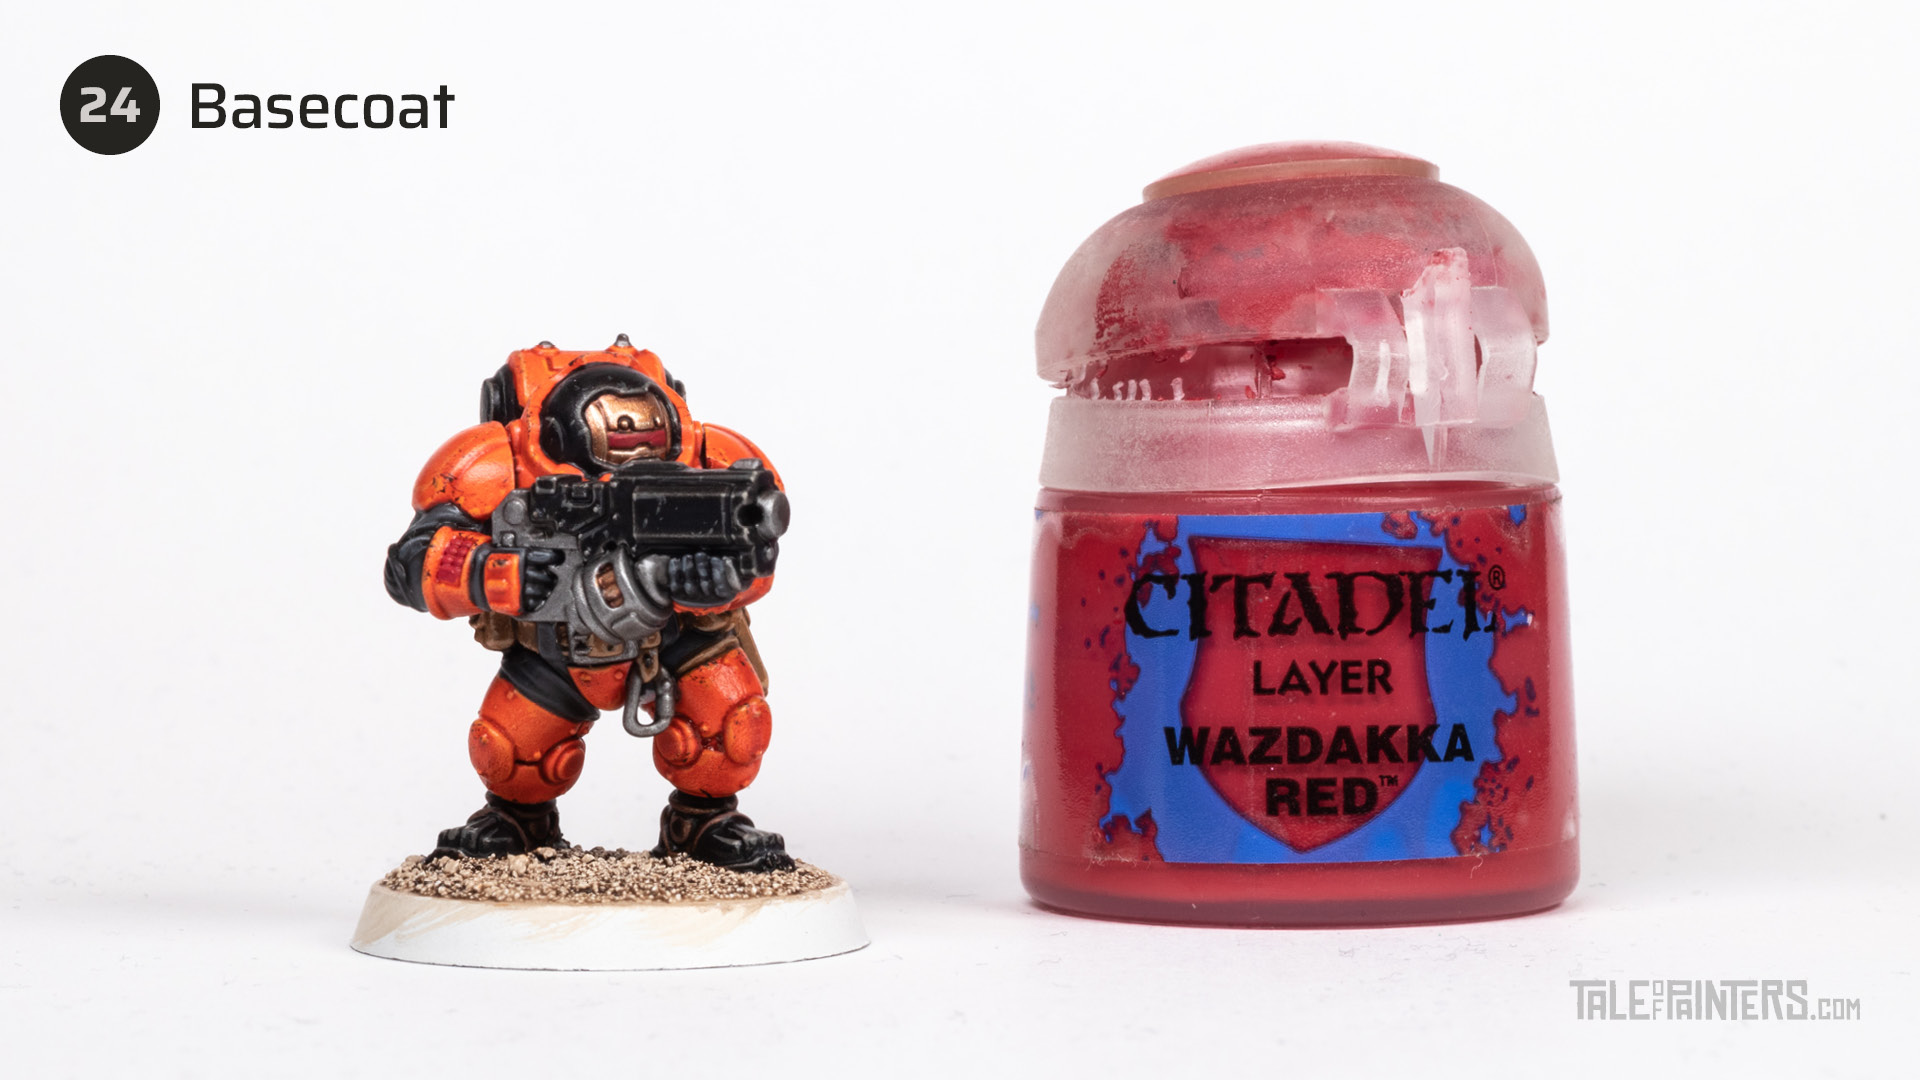

Basecoat the visor and the keyboard on the arm with Wazdakka Red.
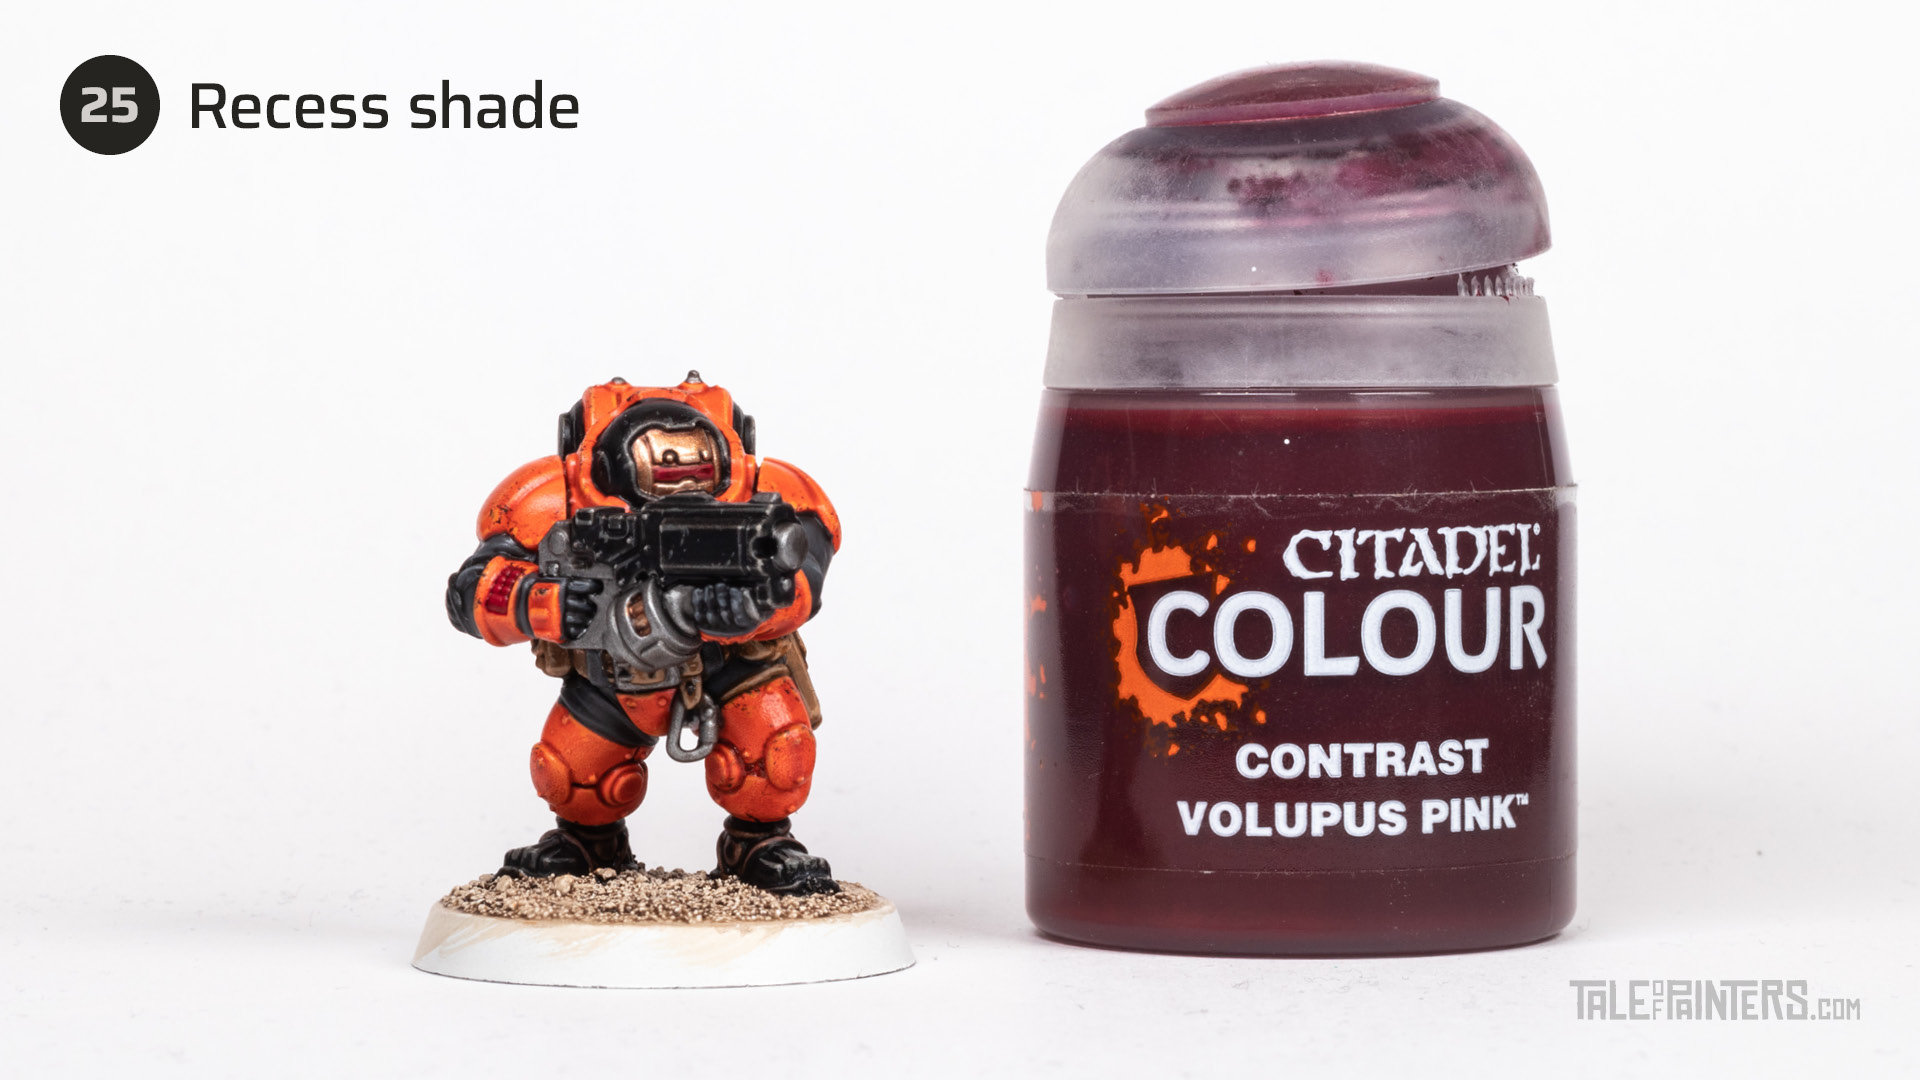

Add a recess shade of Volupus Pink to the recesses of the keyboards, and also glaze the visor. Restore the base colour with a coat of Wazdakka Red if needed.


Layer the keys with Pink Horror, leaving the recesses dark, and also highlight with edges of the visor with a chunky highlight of Pink Horror as well.
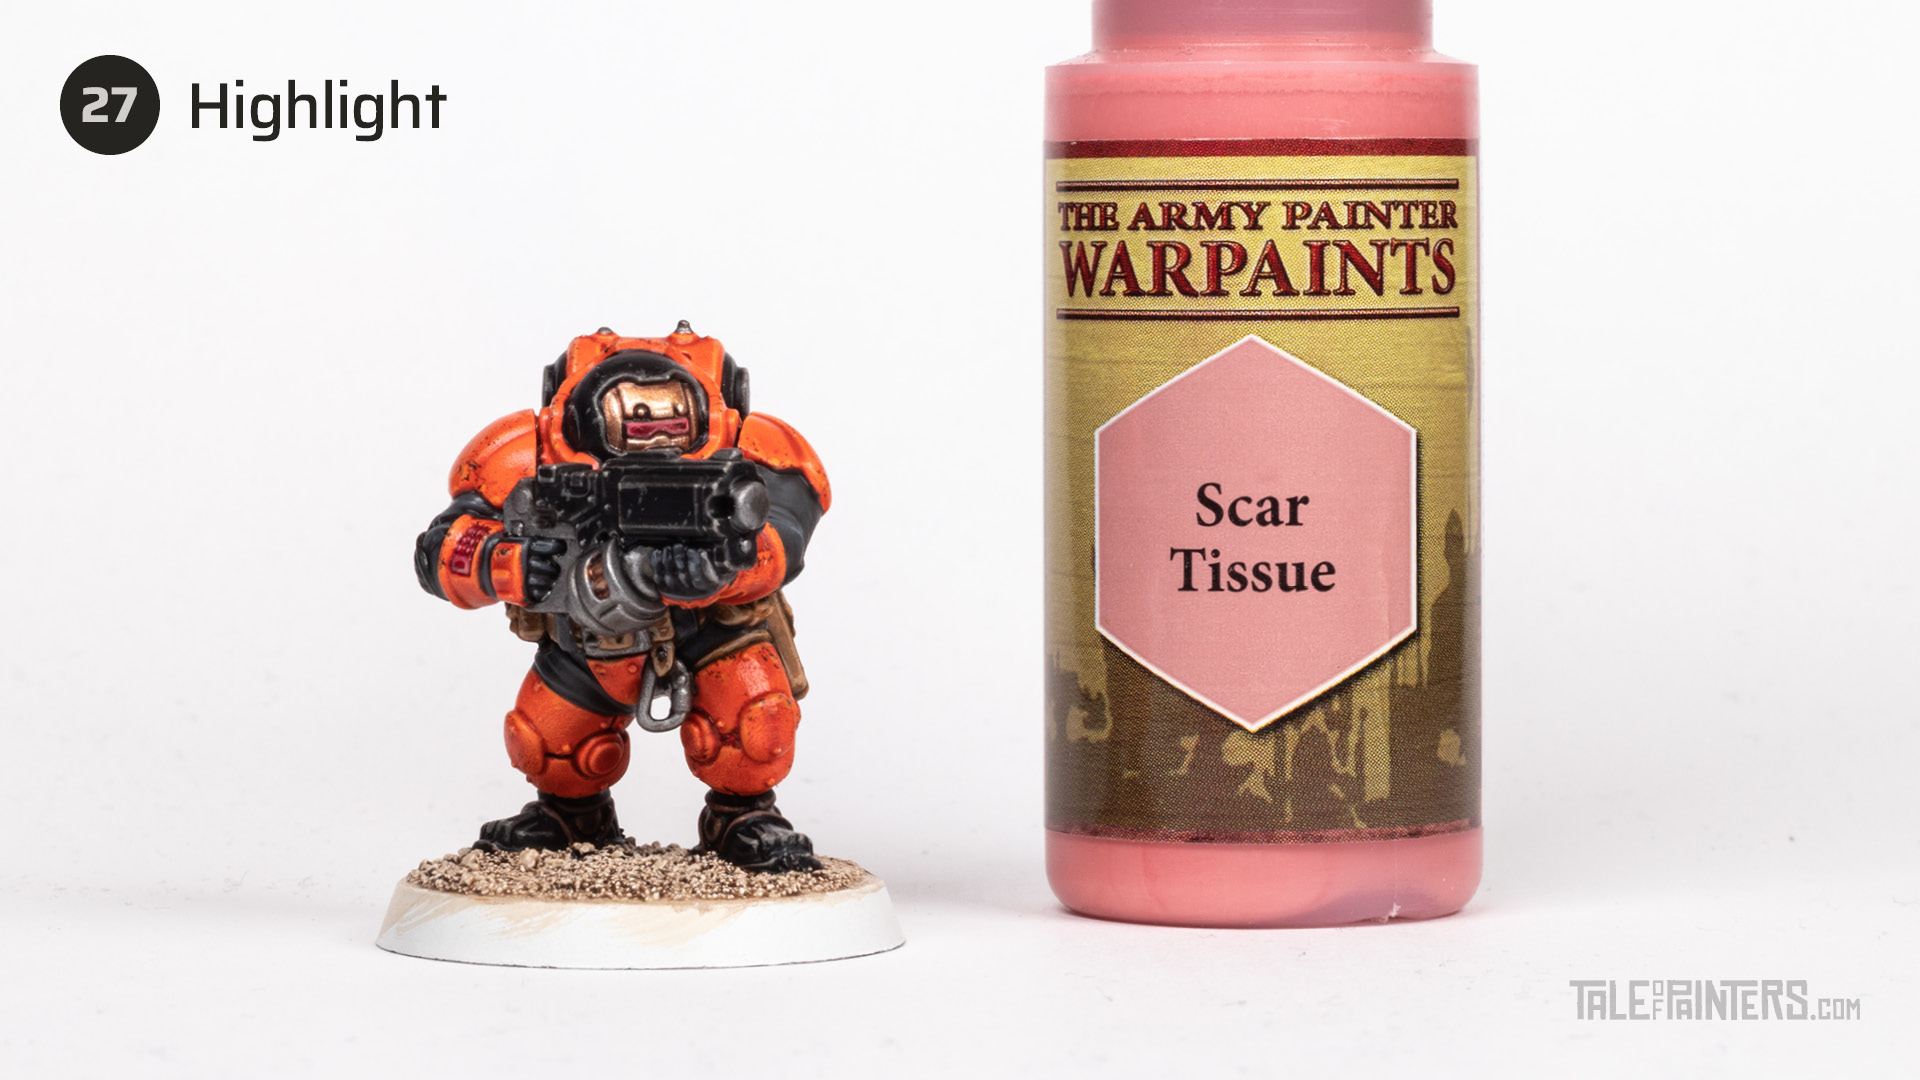

Highlight the lower right edges of the keys and visor with Warpaints Scar Tissue [or use a mix of Pink Horror and a little bit of Wraithbone].
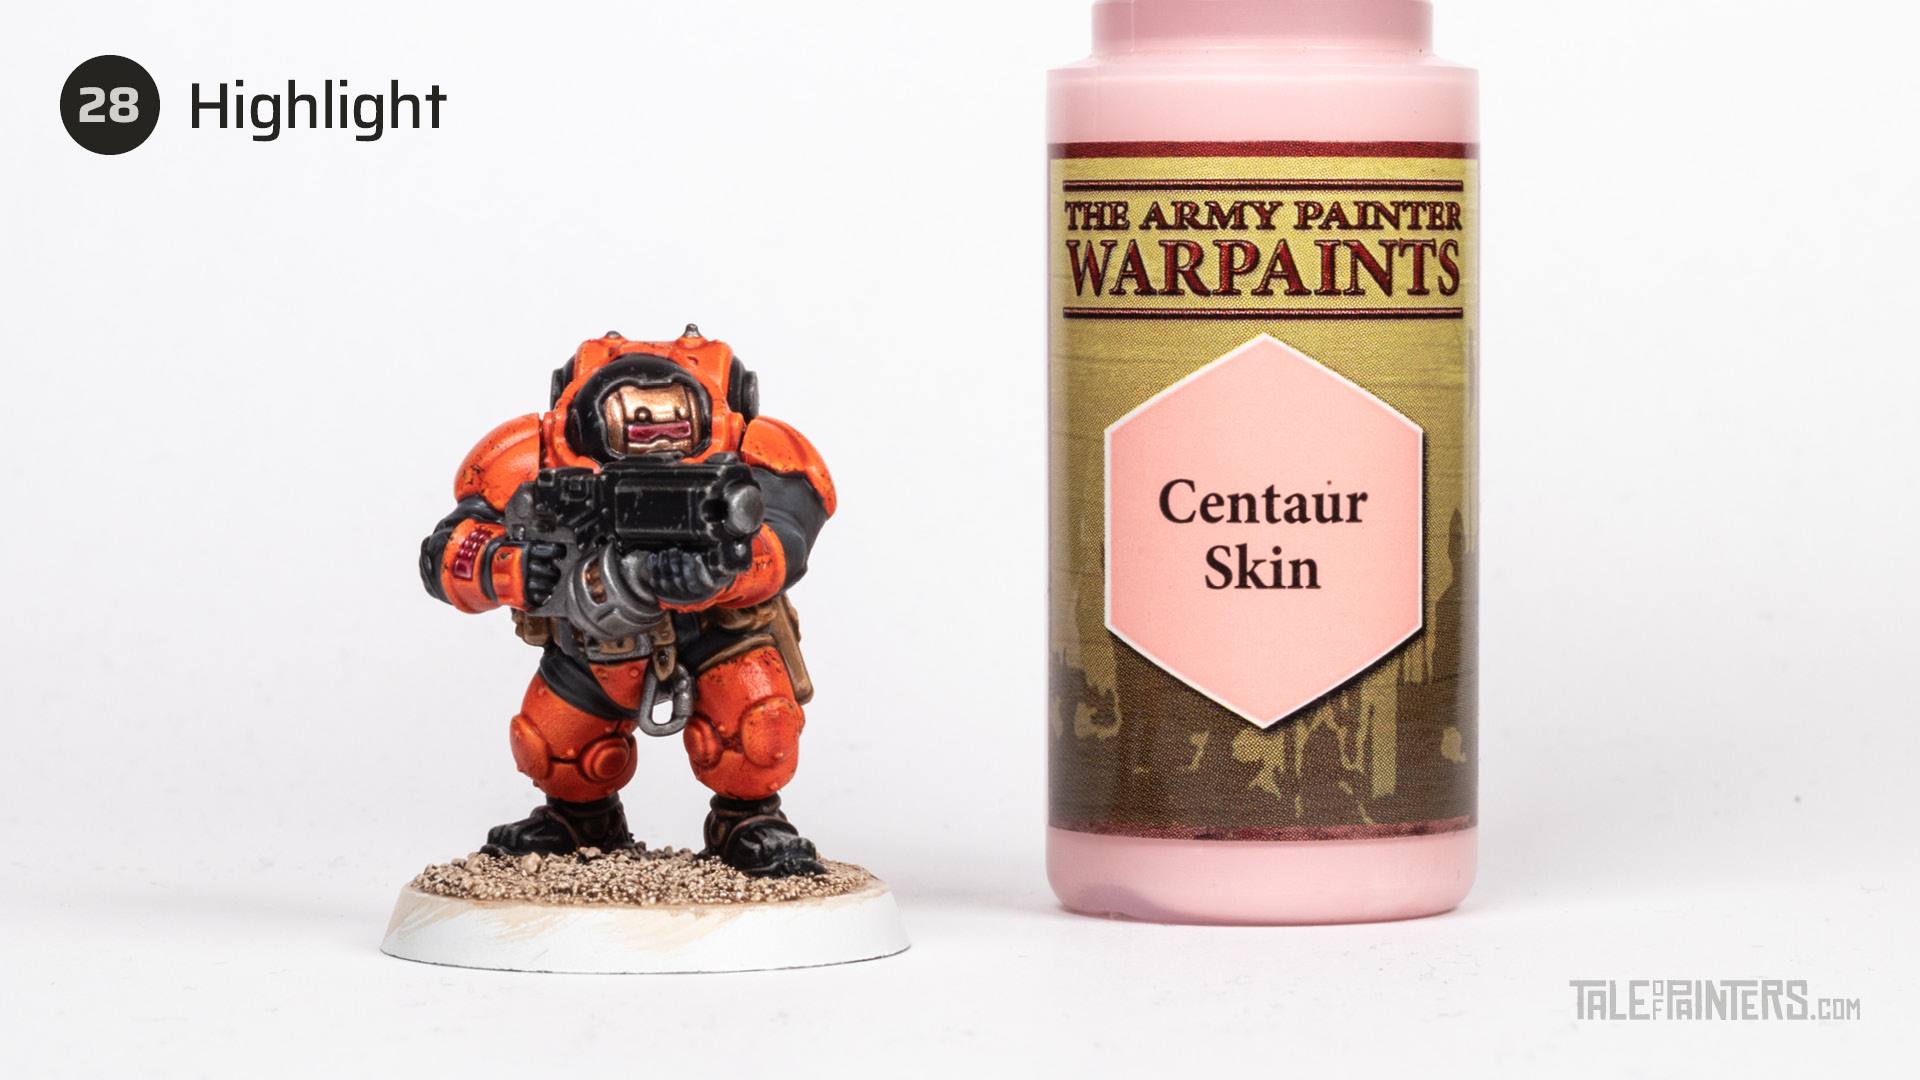

Apply a very thin highlight of Warpaints Centaur Skin [or add more Wraithbone to your Pink Horror mix] to the lower right corner of the keys and visor, and also add a dot highlight of Centaur Skin to the top left corner of the visor and keys.
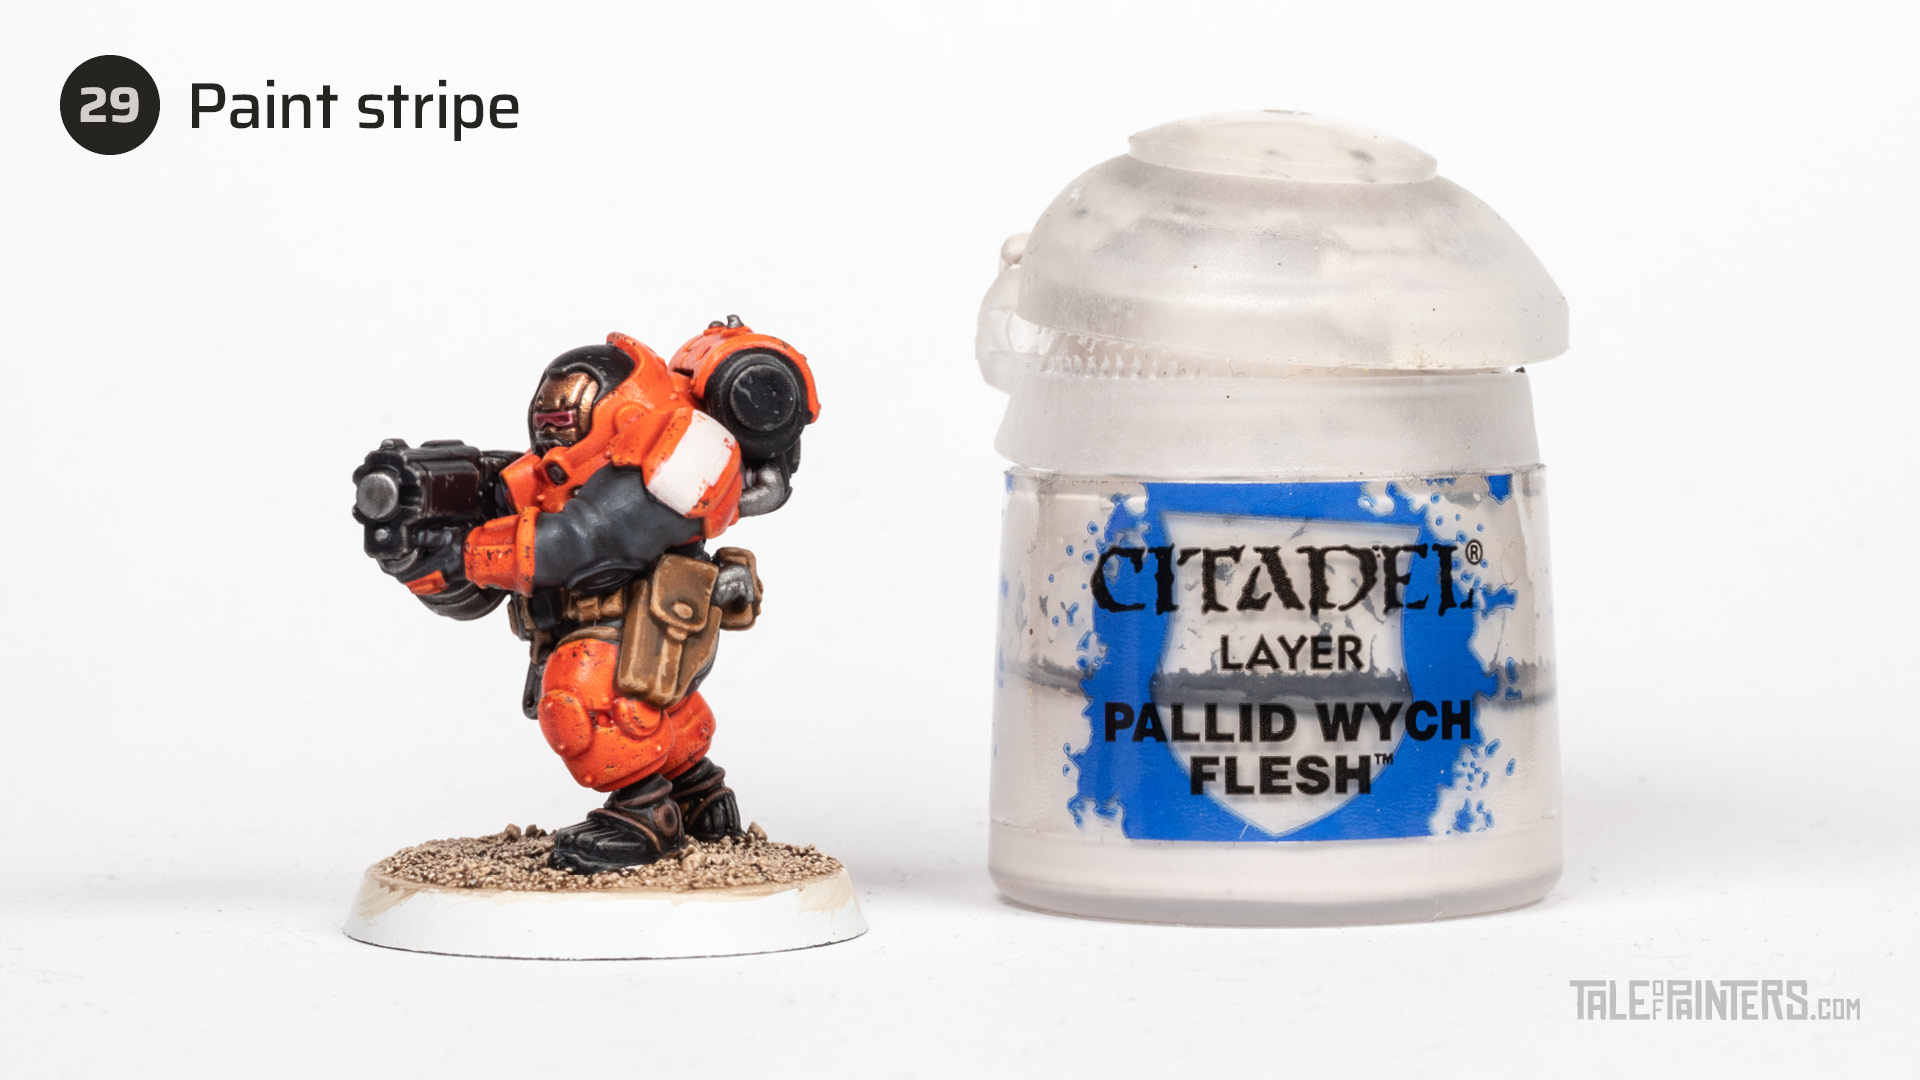

Add a white stripe to the shoulder pads with a few thin coats of Pallid Wych Flesh. As you can see, I also added a few scratches with a Wild Rider Red / Fire Dragon Bright mix that matches the base colour of the armour.
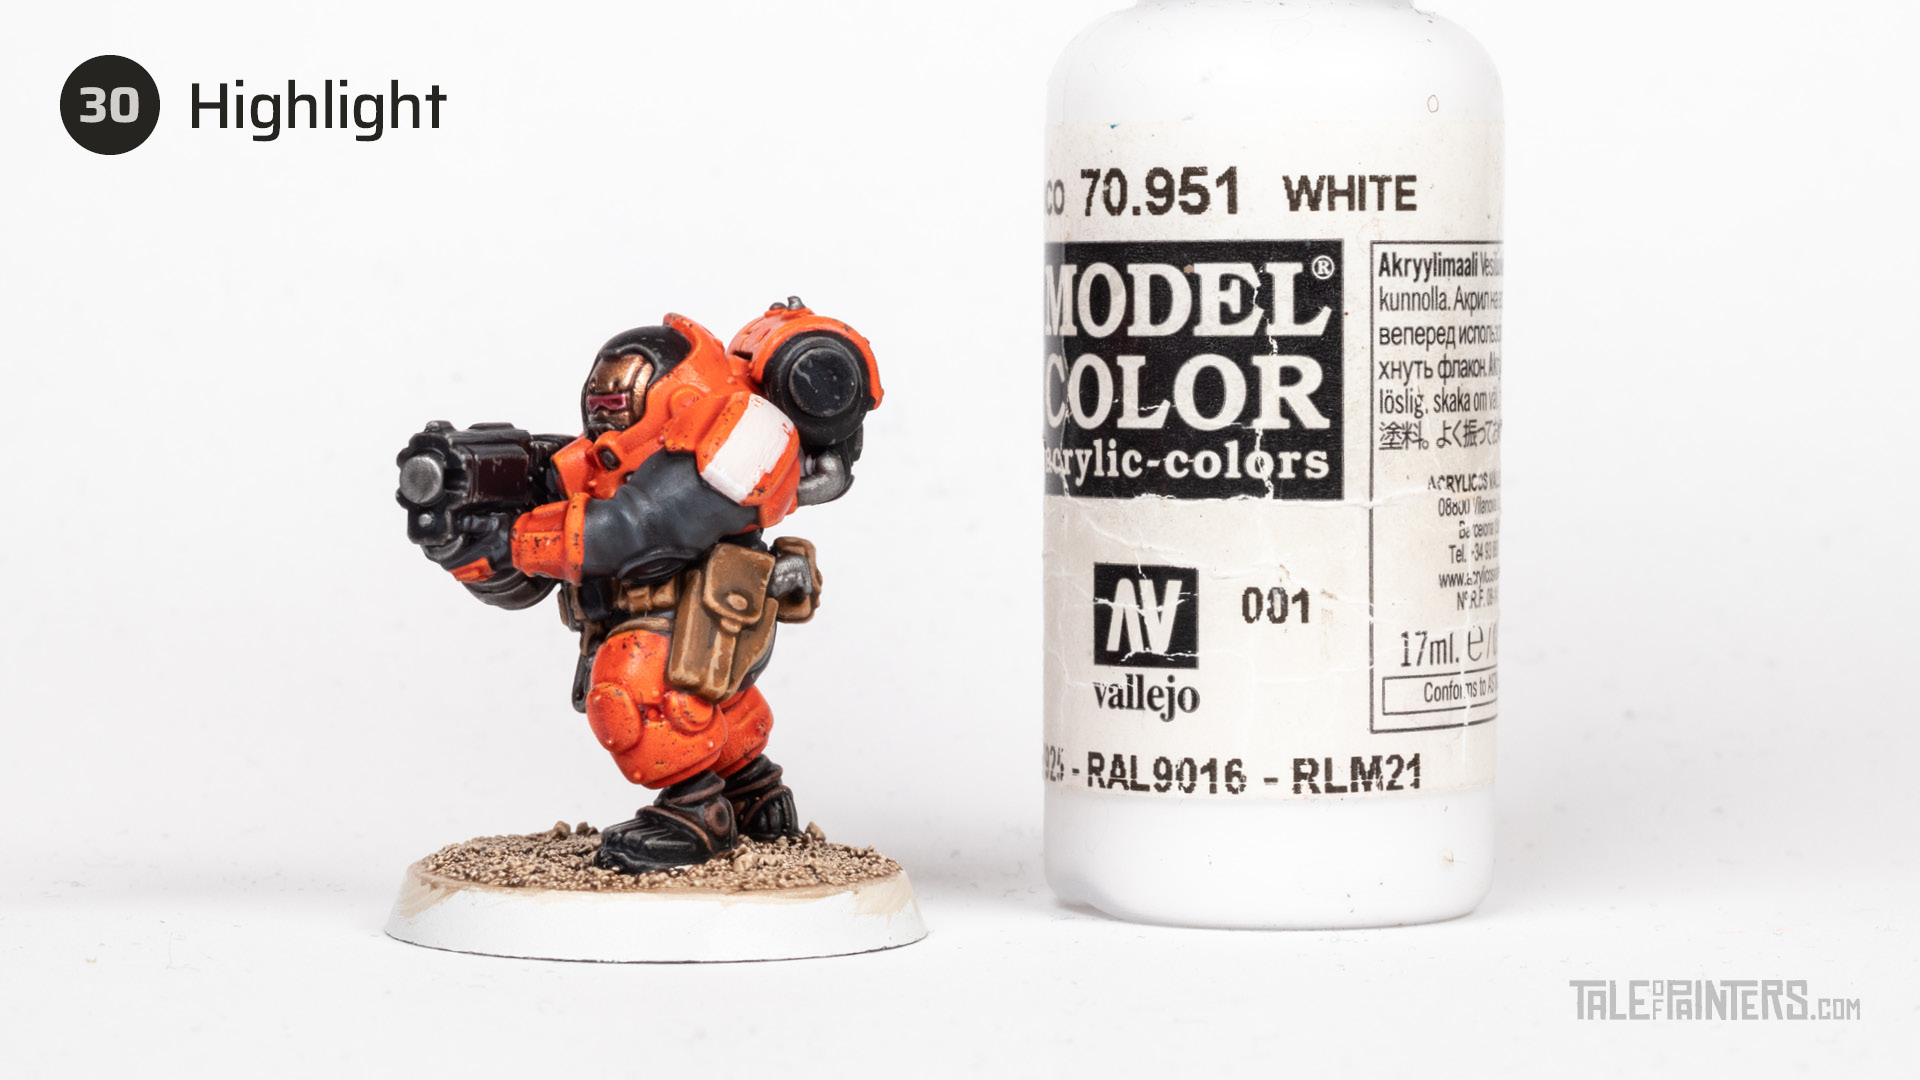

Highlight the edges of the white stripe with Vallejo Model Color White [or White Scar].


Next add the decals by preparing the surfaces with a coat of Warpaints Gloss Varnish. Once dry, put the decal in place and seal it with Microsol. You can find a more detailed tutorial for perfectly applying decals here.
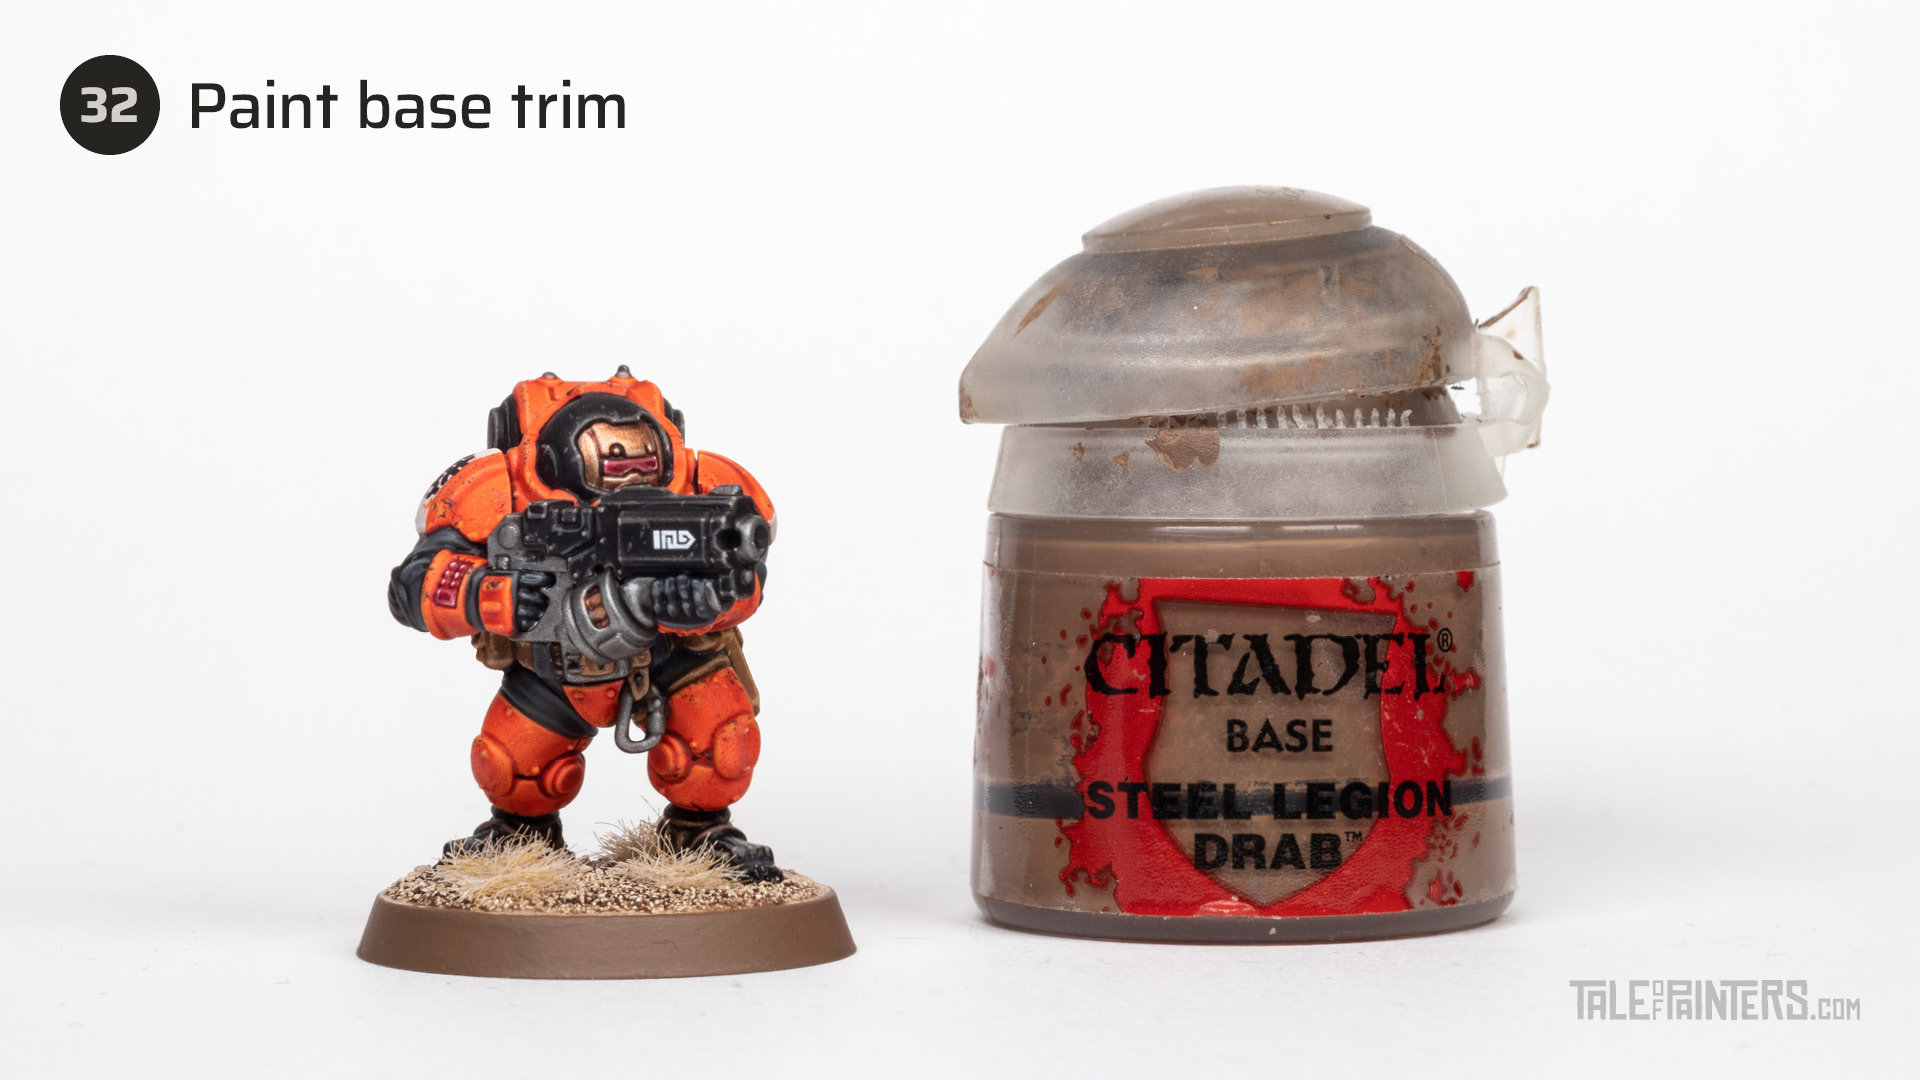

Finally, paint the trim of the base with Steel Legion Drab, and add some bleached static grass with a drop of PVA glue. I used Arid Grass from Gale Force 9, but Mordian Corpsegrass or any other bleached tufts are fine as well.
Finally, I sealed the model with a coat of my favourite matt varnish, Mr Topcoat Premium Flat. If you struggle to find the perfect matt varnish, I’ve compiled a few of my favourites here.
Finished Trans-hyperion Alliance Hearthkyn Warrior


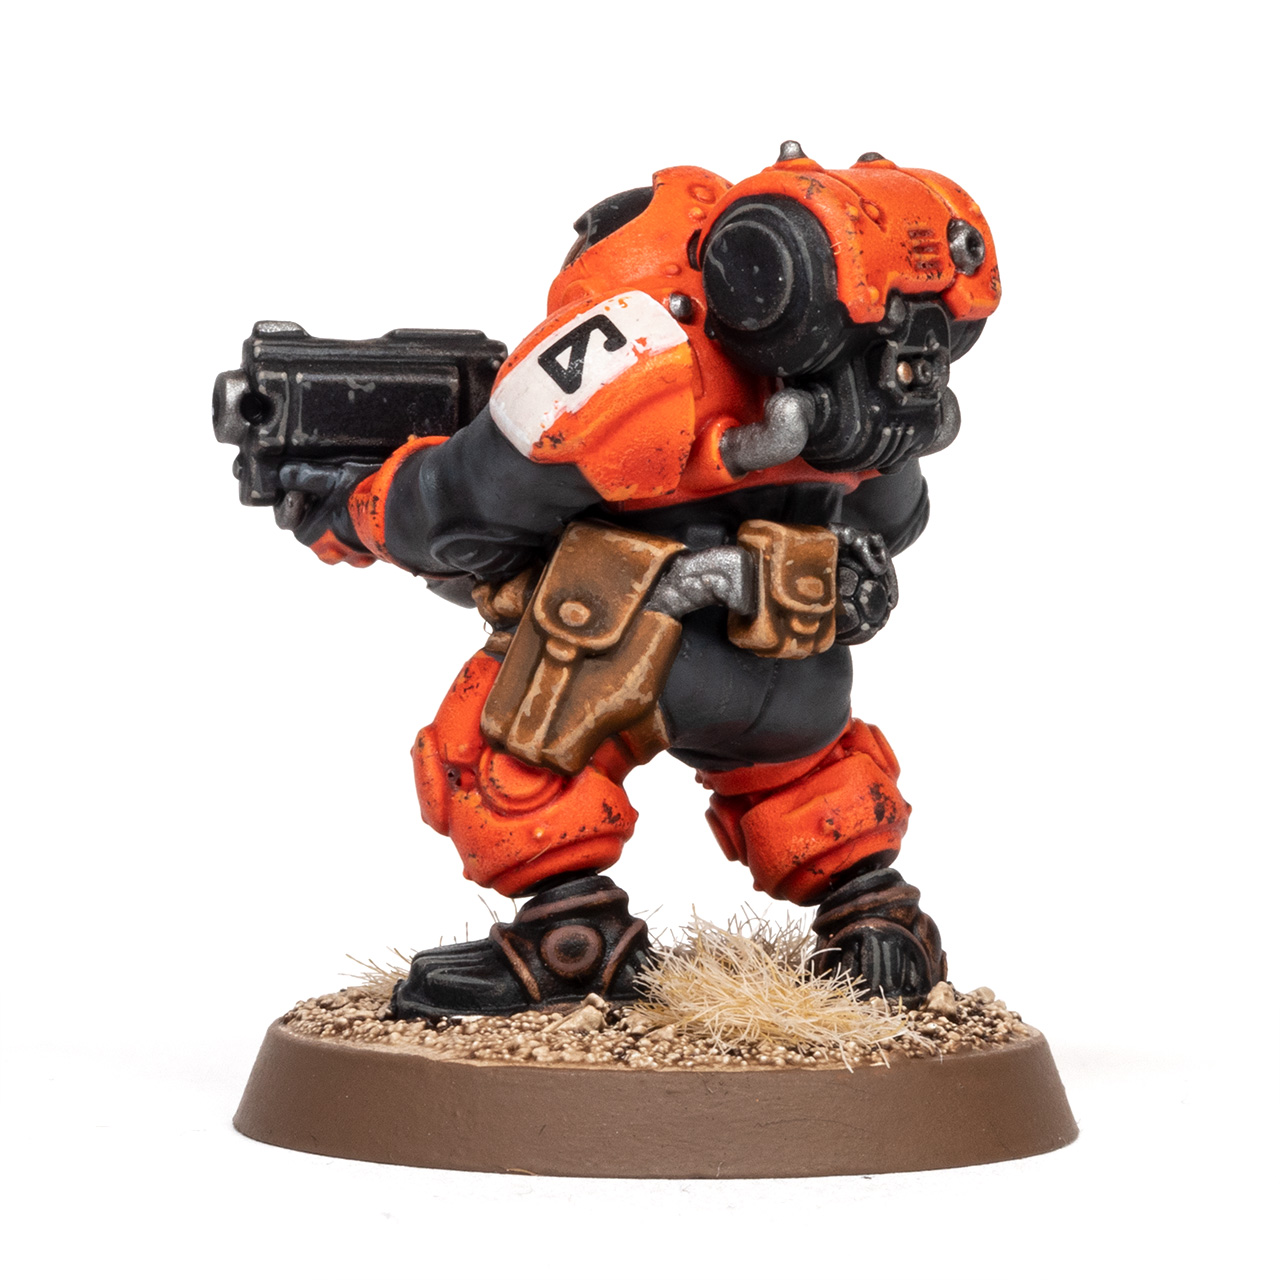

And here are a few more pictures of the Trans-hyperion Hearthkyn Warrior for your reference. This model has a closed visor, but many Leagues of Votann models feature beautifully expressive faces. You can find tutorials for a variety of skin tones here on Tale of Painters:
Paints you will need for this tutorial:
Citadel (Games Workshop)
White Scar spray
Lugganath Orange
Fire Dragon Bright
Pink Horror
Wazdakka Red
Wraithbone
Pallid Wych Flesh
XV-88
Steel Legion Drab
Knight-Questor Flesh
Rhinox Hide
Dawnstone
Mechanicus Standard Grey
Hashut Copper
Agrax Earthshade
Targor Rageshade
Nuln Oil
Magmadroth Flame (Contrast)
Gryph-hound Orange (Contrast)
Volupus Pink (Contrast)
Wyldwood (Contrast)
Basilicanum Grey (Contrast)
Black Legion (Contrast)
Contrast Medium
The Army Painter Warpaints
Warpaints Centaur Skin [or Wraithbone/Pink Horror mix]
Scar Tissue [or Wraithbone/Pink Horror mix]
Gloss Varnish [or ‘Ardcoat]
Vallejo Model Color
White [or White Scar]
Vallejo Mecha Color
Steel [or Iron Hands Steel]
Formula P3
Bastion Grey [or Stormvermin Fur]
Trollblood Highlight [or Stormvermin Fur mixed with a little bit of Corax White]
Green Stuff World
Skeleton Bone Dipping Ink
Other
Microscale Microsol
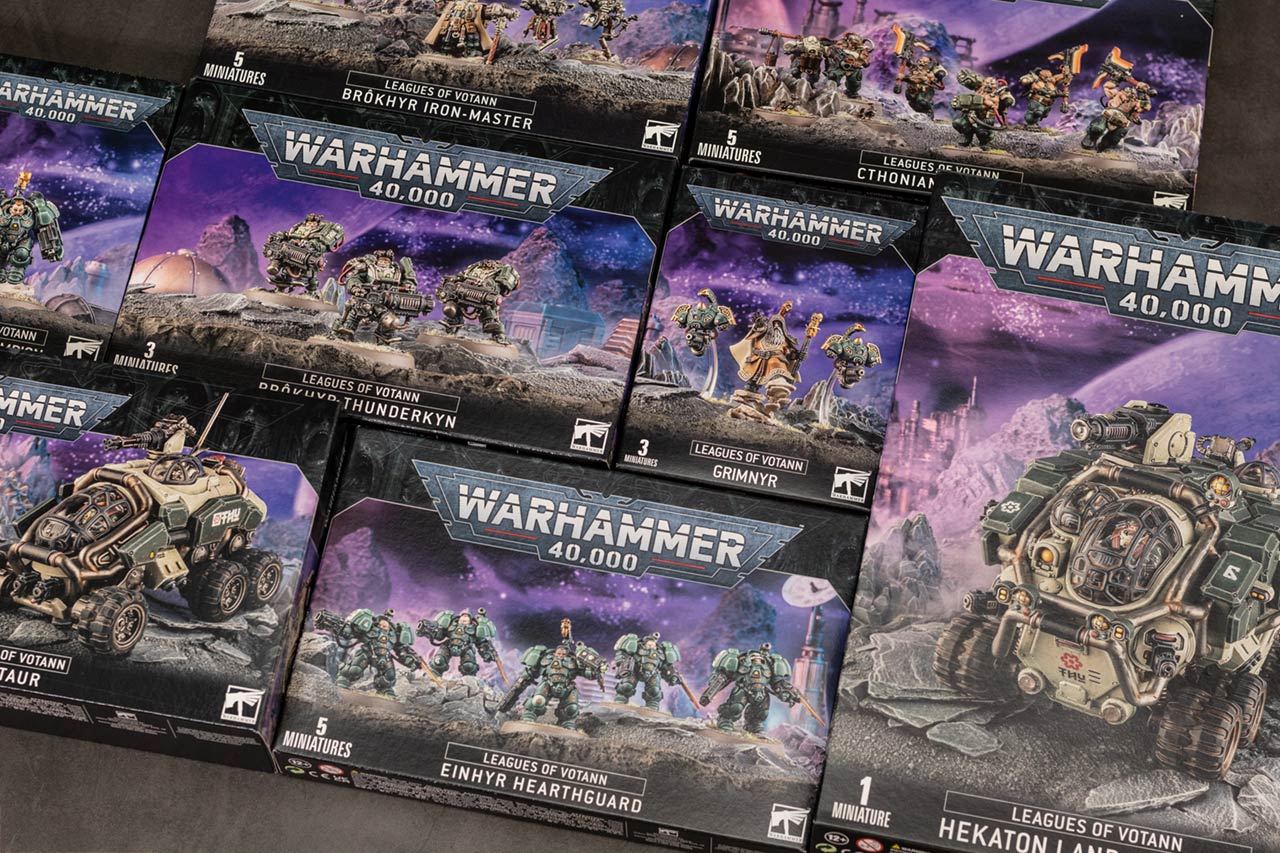

If you like this tutorial and want to start or expand your own Leagues of Votann collection, please consider our partner stores Wayland Games, Element Games and Taschengelddieb, which all offer a welcome discount of up to 20% over RRP. Using our links supports Tale of Painters at no extra cost to you:
Hope you enjoyed this tutorial. If so, leave a comment or reaction below, and if you got any questions, leave them here so I can answer them for you.


