
In this tutorial, I share my procedure for making decals and transfer adhere perfectly to curved areas like Space Marine shoulder pads and irregular surfaces. It’s easy, and even if you hated decals before, my technique will change your mind.
This tutorial assumes you know the basic grips of painting Warhammer miniatures. Step by step I explain all the paints and techniques I used. I have a rather eclectic paint collection, so when I use a paint that is not from Games Workshop (or out of production), I’ll try to provide you with suitable alternatives from the current Citadel paint range [in brackets]. However, if you want to achieve exactly the same result as shown, I recommend expanding your paint collection. You’ll find a list of all the paints used in this tutorial at the end of the post.
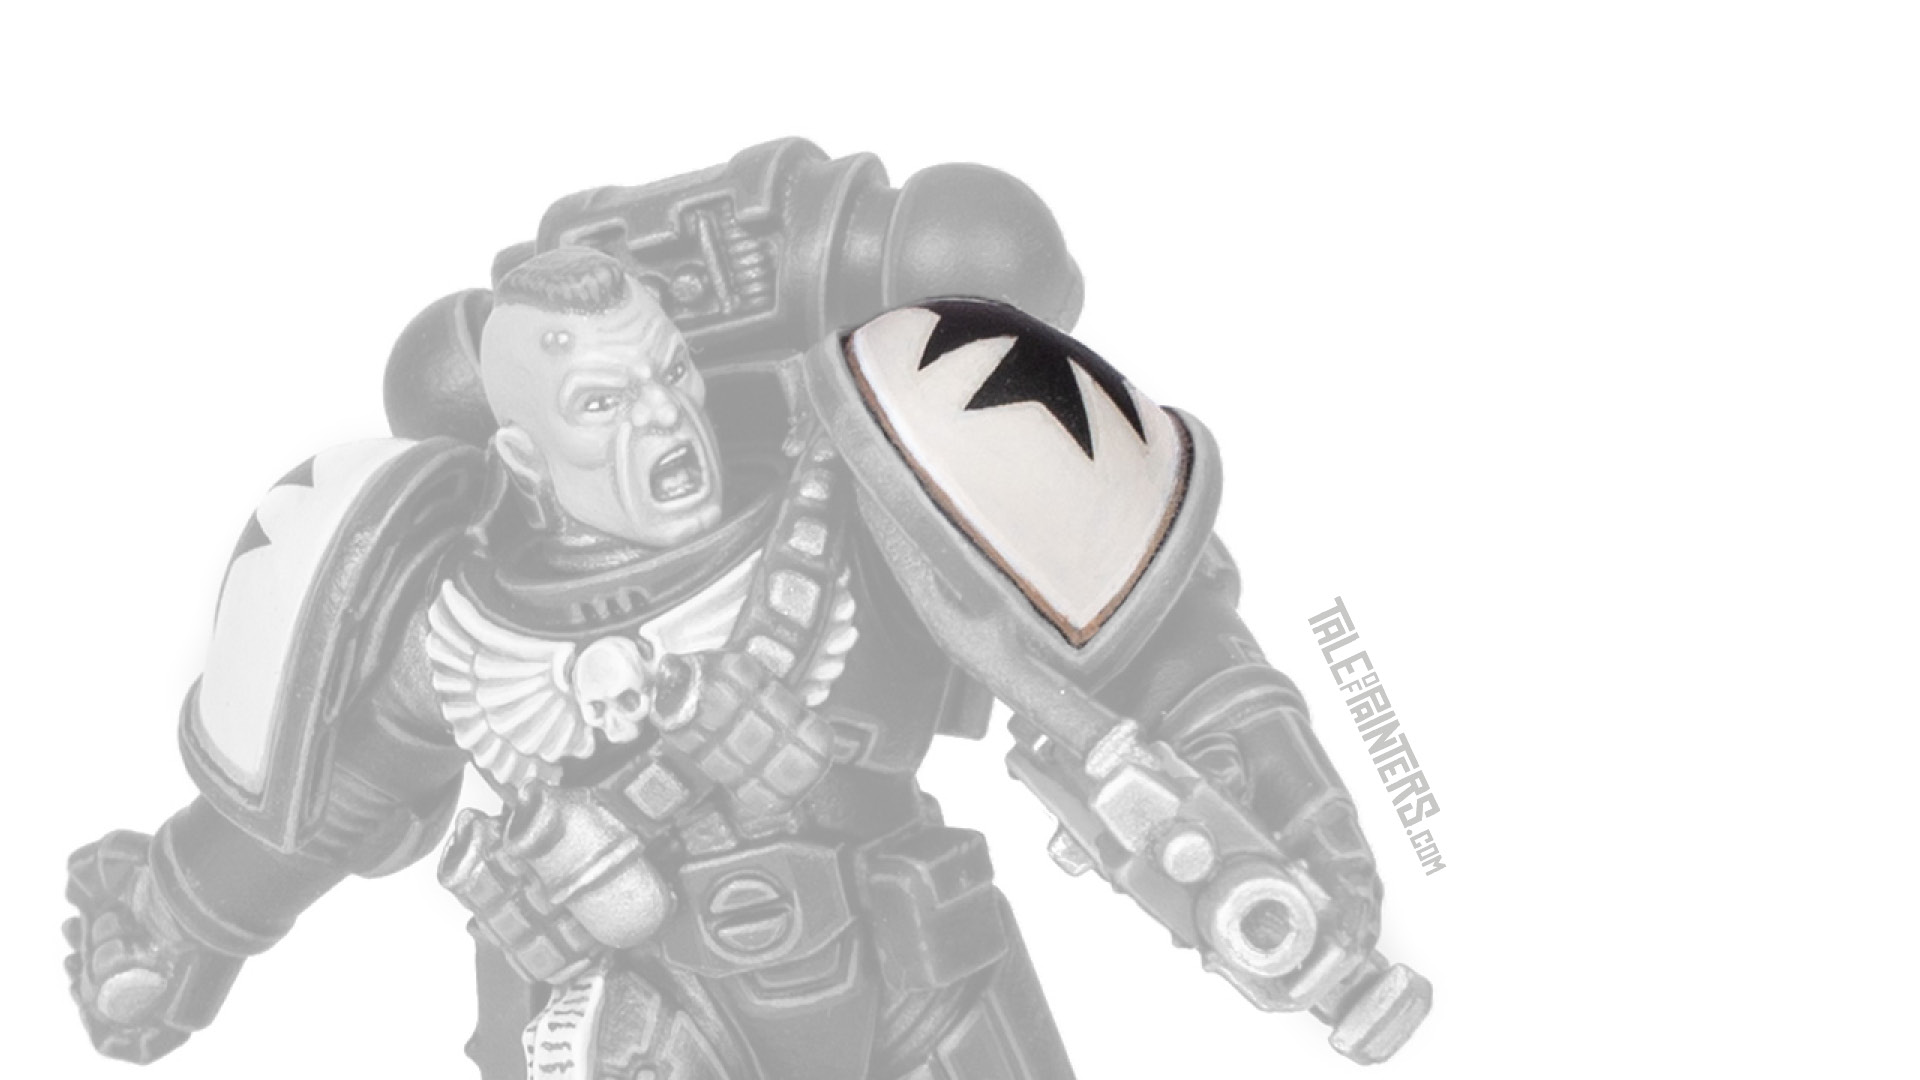
How to apply decals to curved surfaces

Prepare the area you want to attach the decal to with a coat of gloss varnish, for example, Warpaints Gloss Varnish [or ‘Ardcoat].
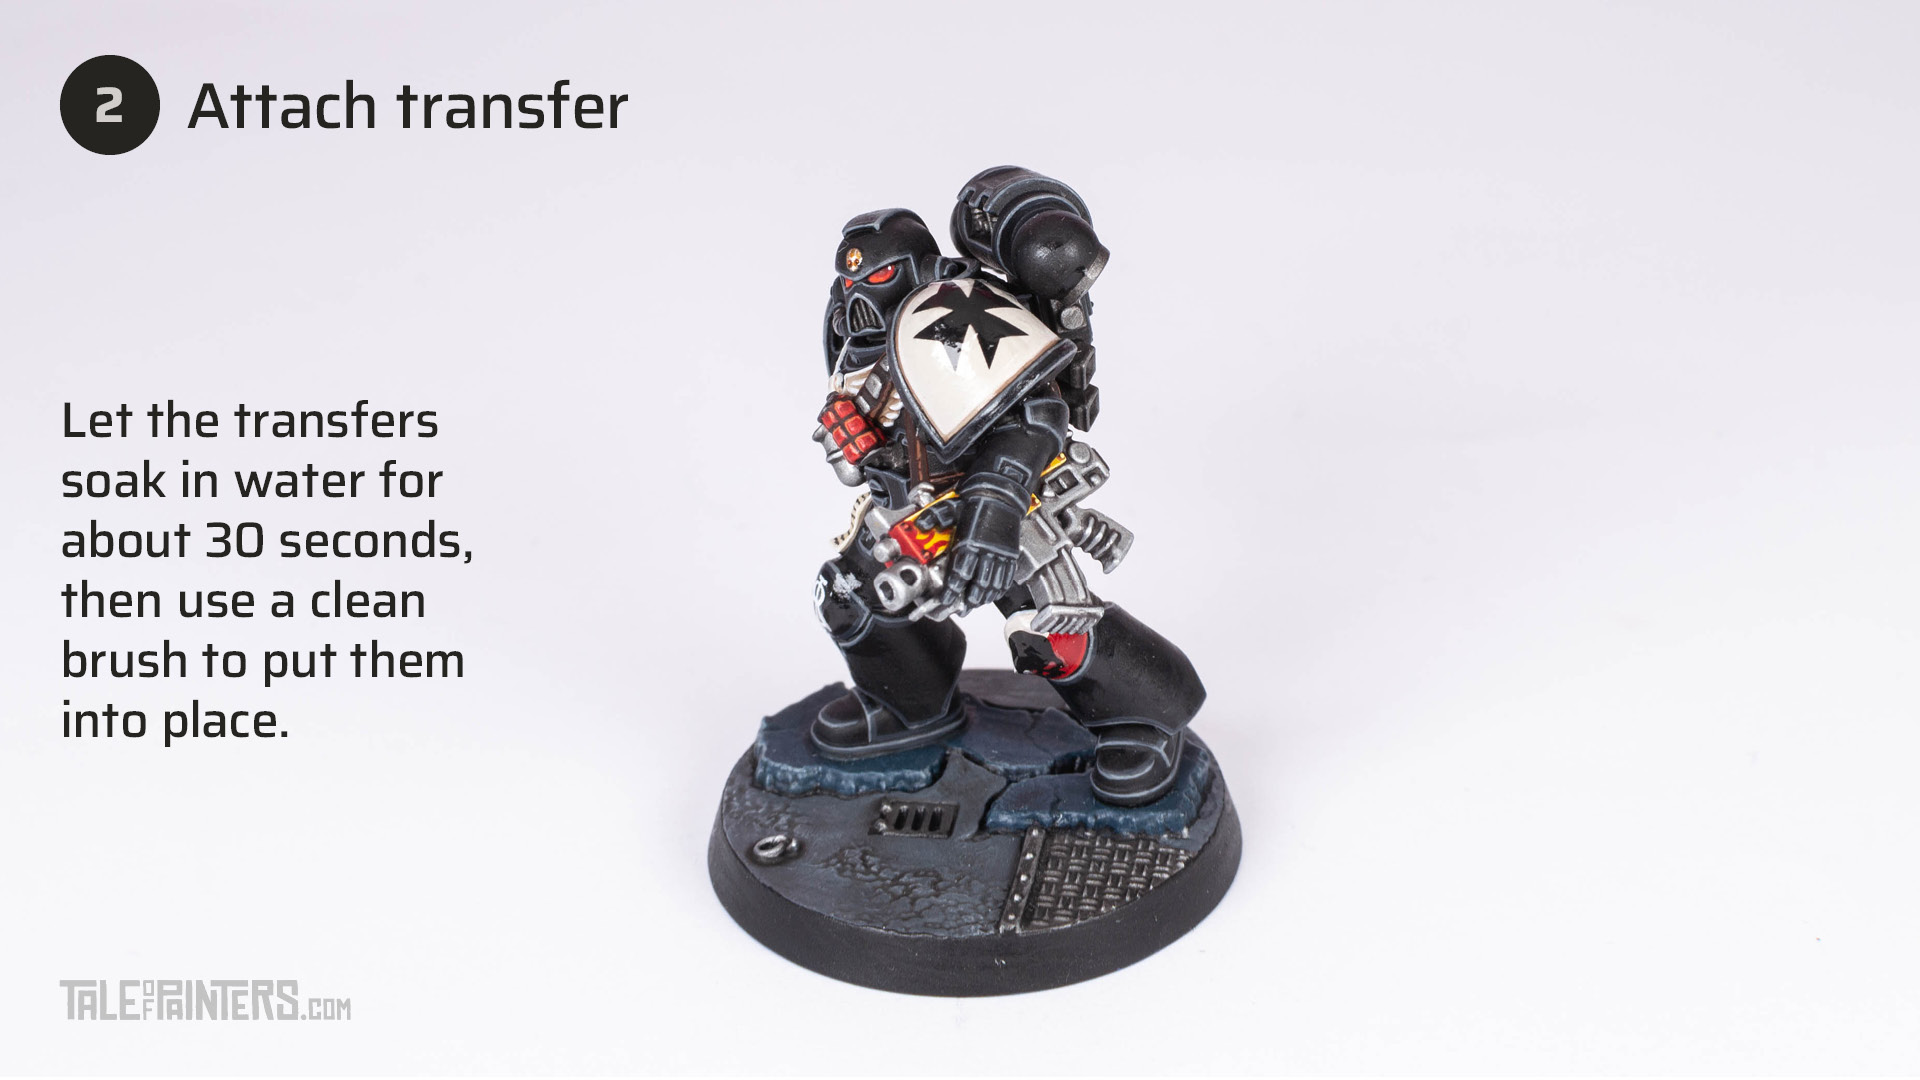
Cut out the transfer from the sheet and let it soak in water for about 30 seconds. Once the moisture has released the decal from the decal paper, use small tweezers to place the transfer on the model and use a clean brush to put it into place.
You can use a decal setting solution like Microset to achieve a better bond, but I don’t find this very necessary so I usually skip this step.
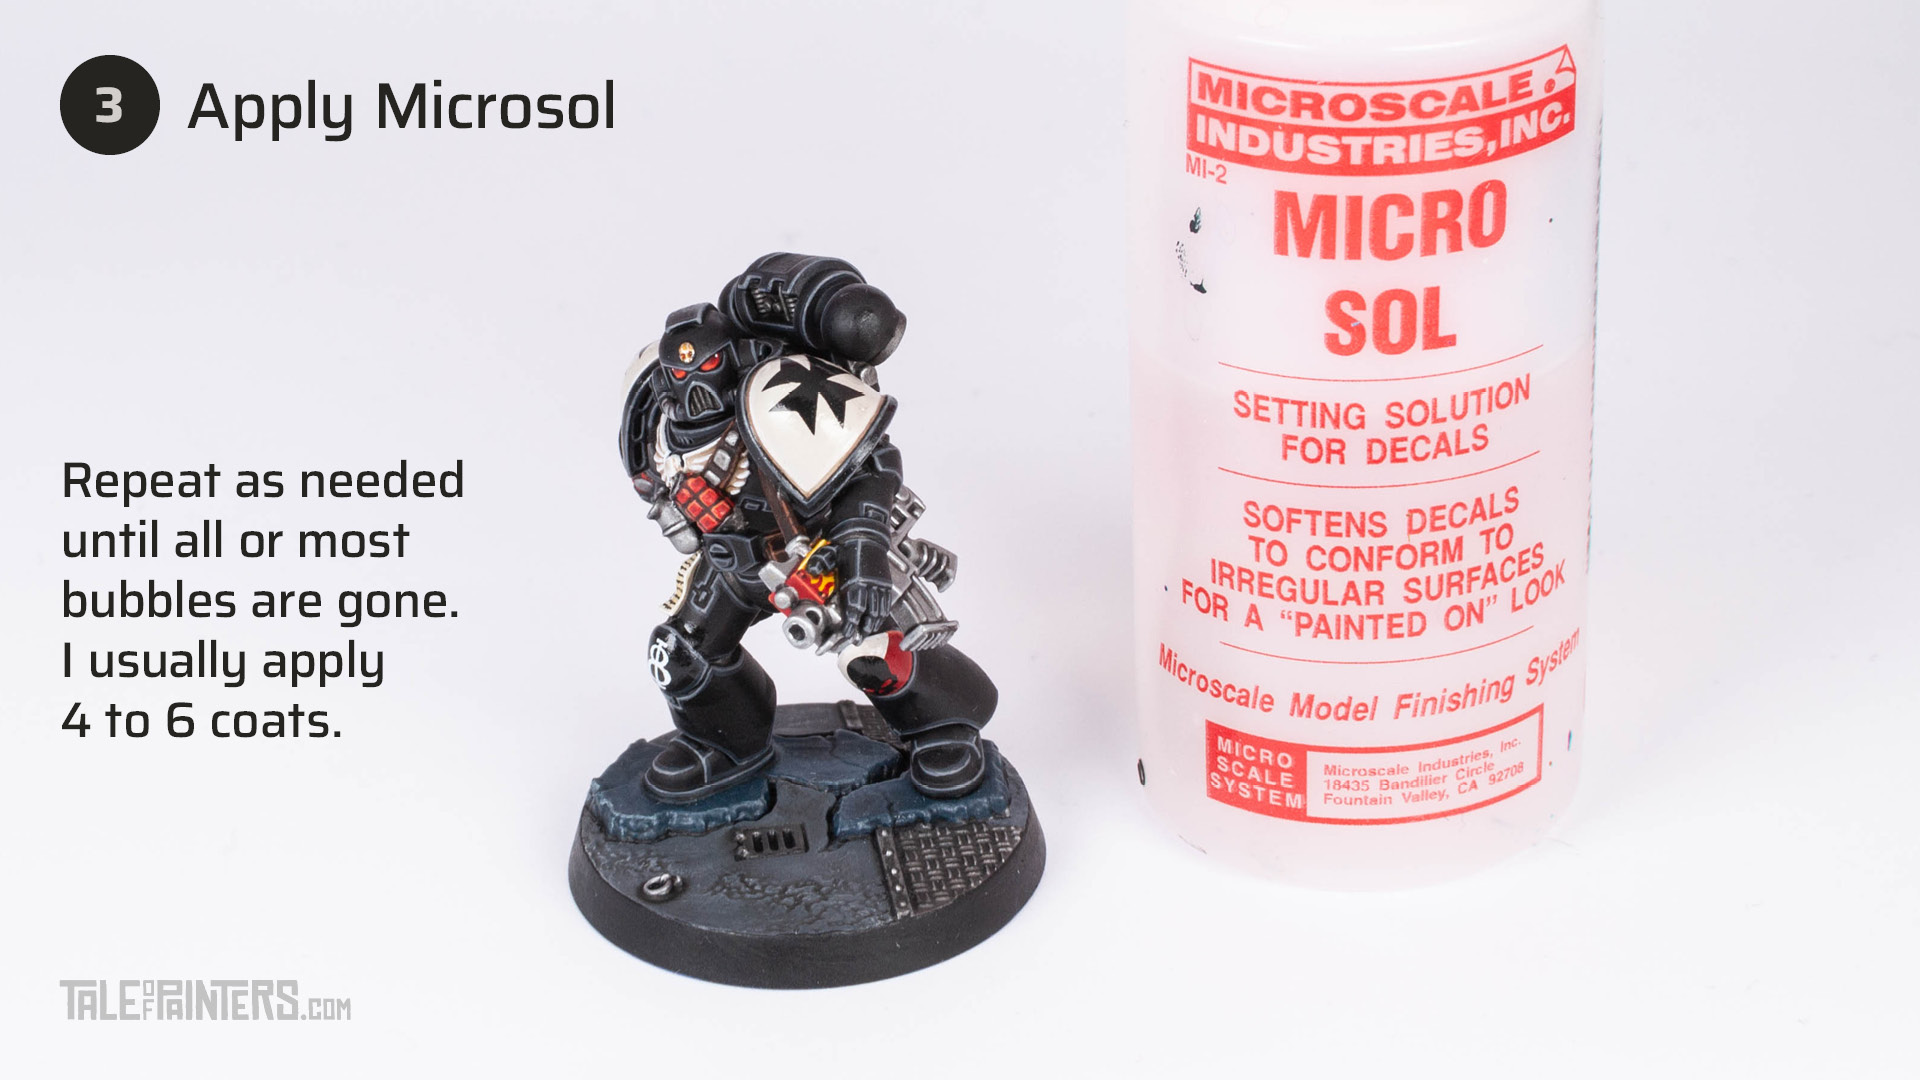
Once the decal has dried, apply a coat of Microsol to soften the decal so it can adhere to the curved surface. Wait until dry, and repeat this step as needed. For a Space Marine shoulder pad, I usually apply 4 to 6 coats until I’m happy with the result.
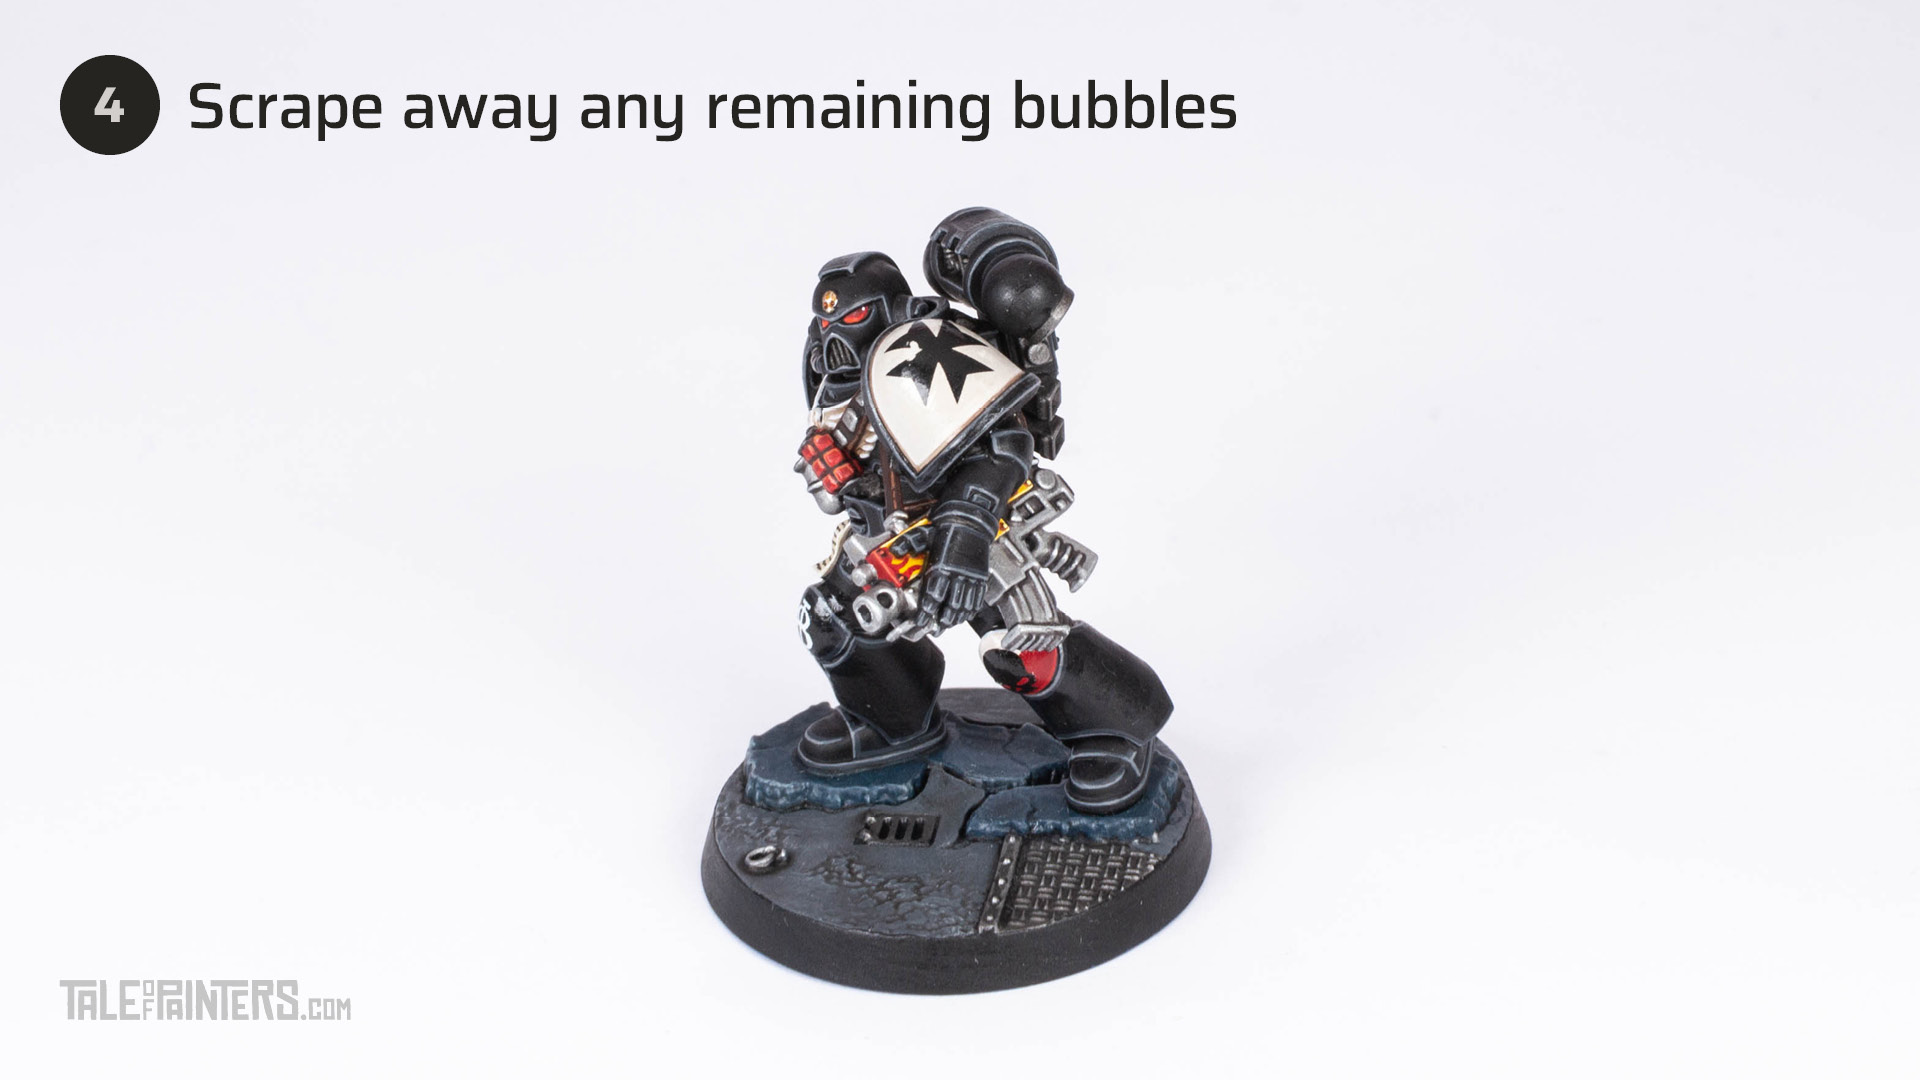
If there are still any bubbles or wrinkles left, carefully scrape them away with the tip of your hobby knife.
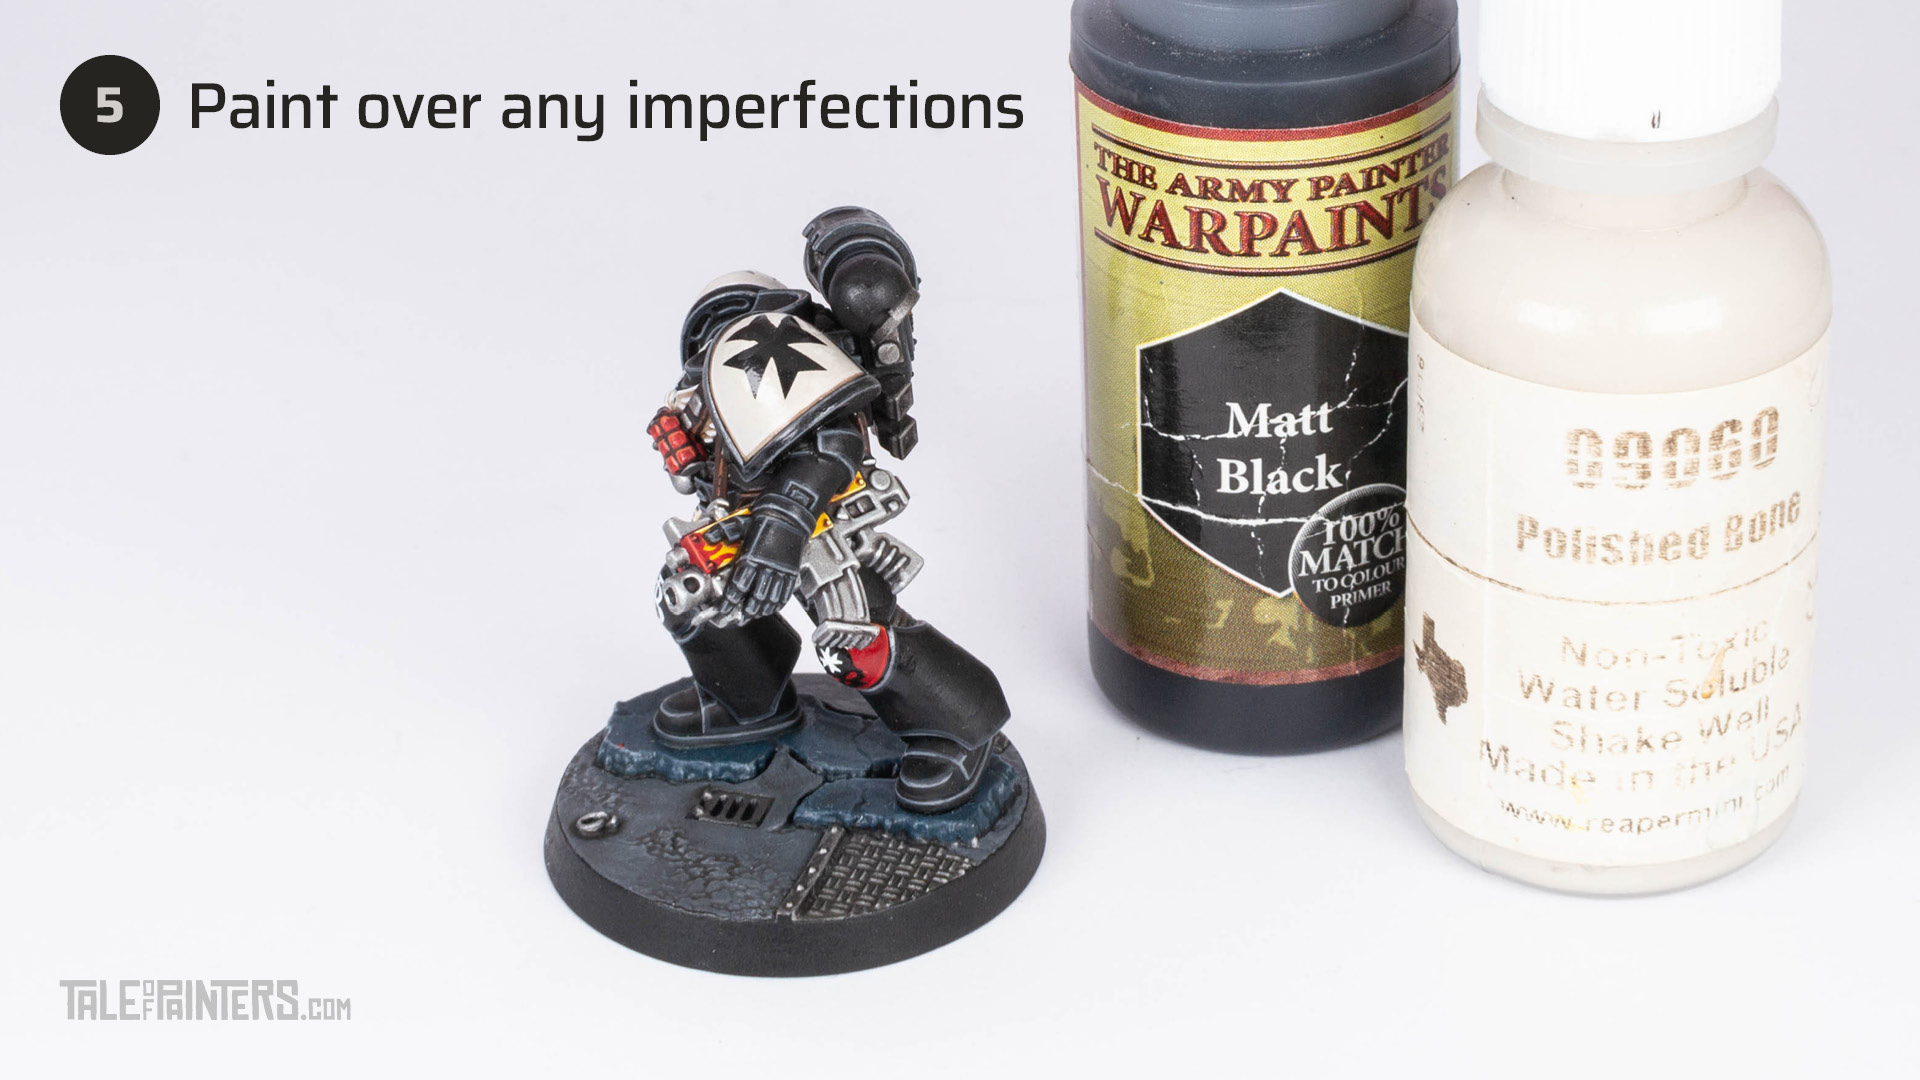
Pick a colour that matches the design of the decal, and paint it over any areas you scraped away. You might need to bring out the base colour as well to hide any imperfections.
Proceed with painting your model, and at the end, apply a coat of matt varnish to remove the glossiness. Here is a list of my favourite matt varnishes for every occasion (spray, airbrush & brush-on). Voila, your decals should now look like painted on and have no visible edges, bubbles or wrinkles.

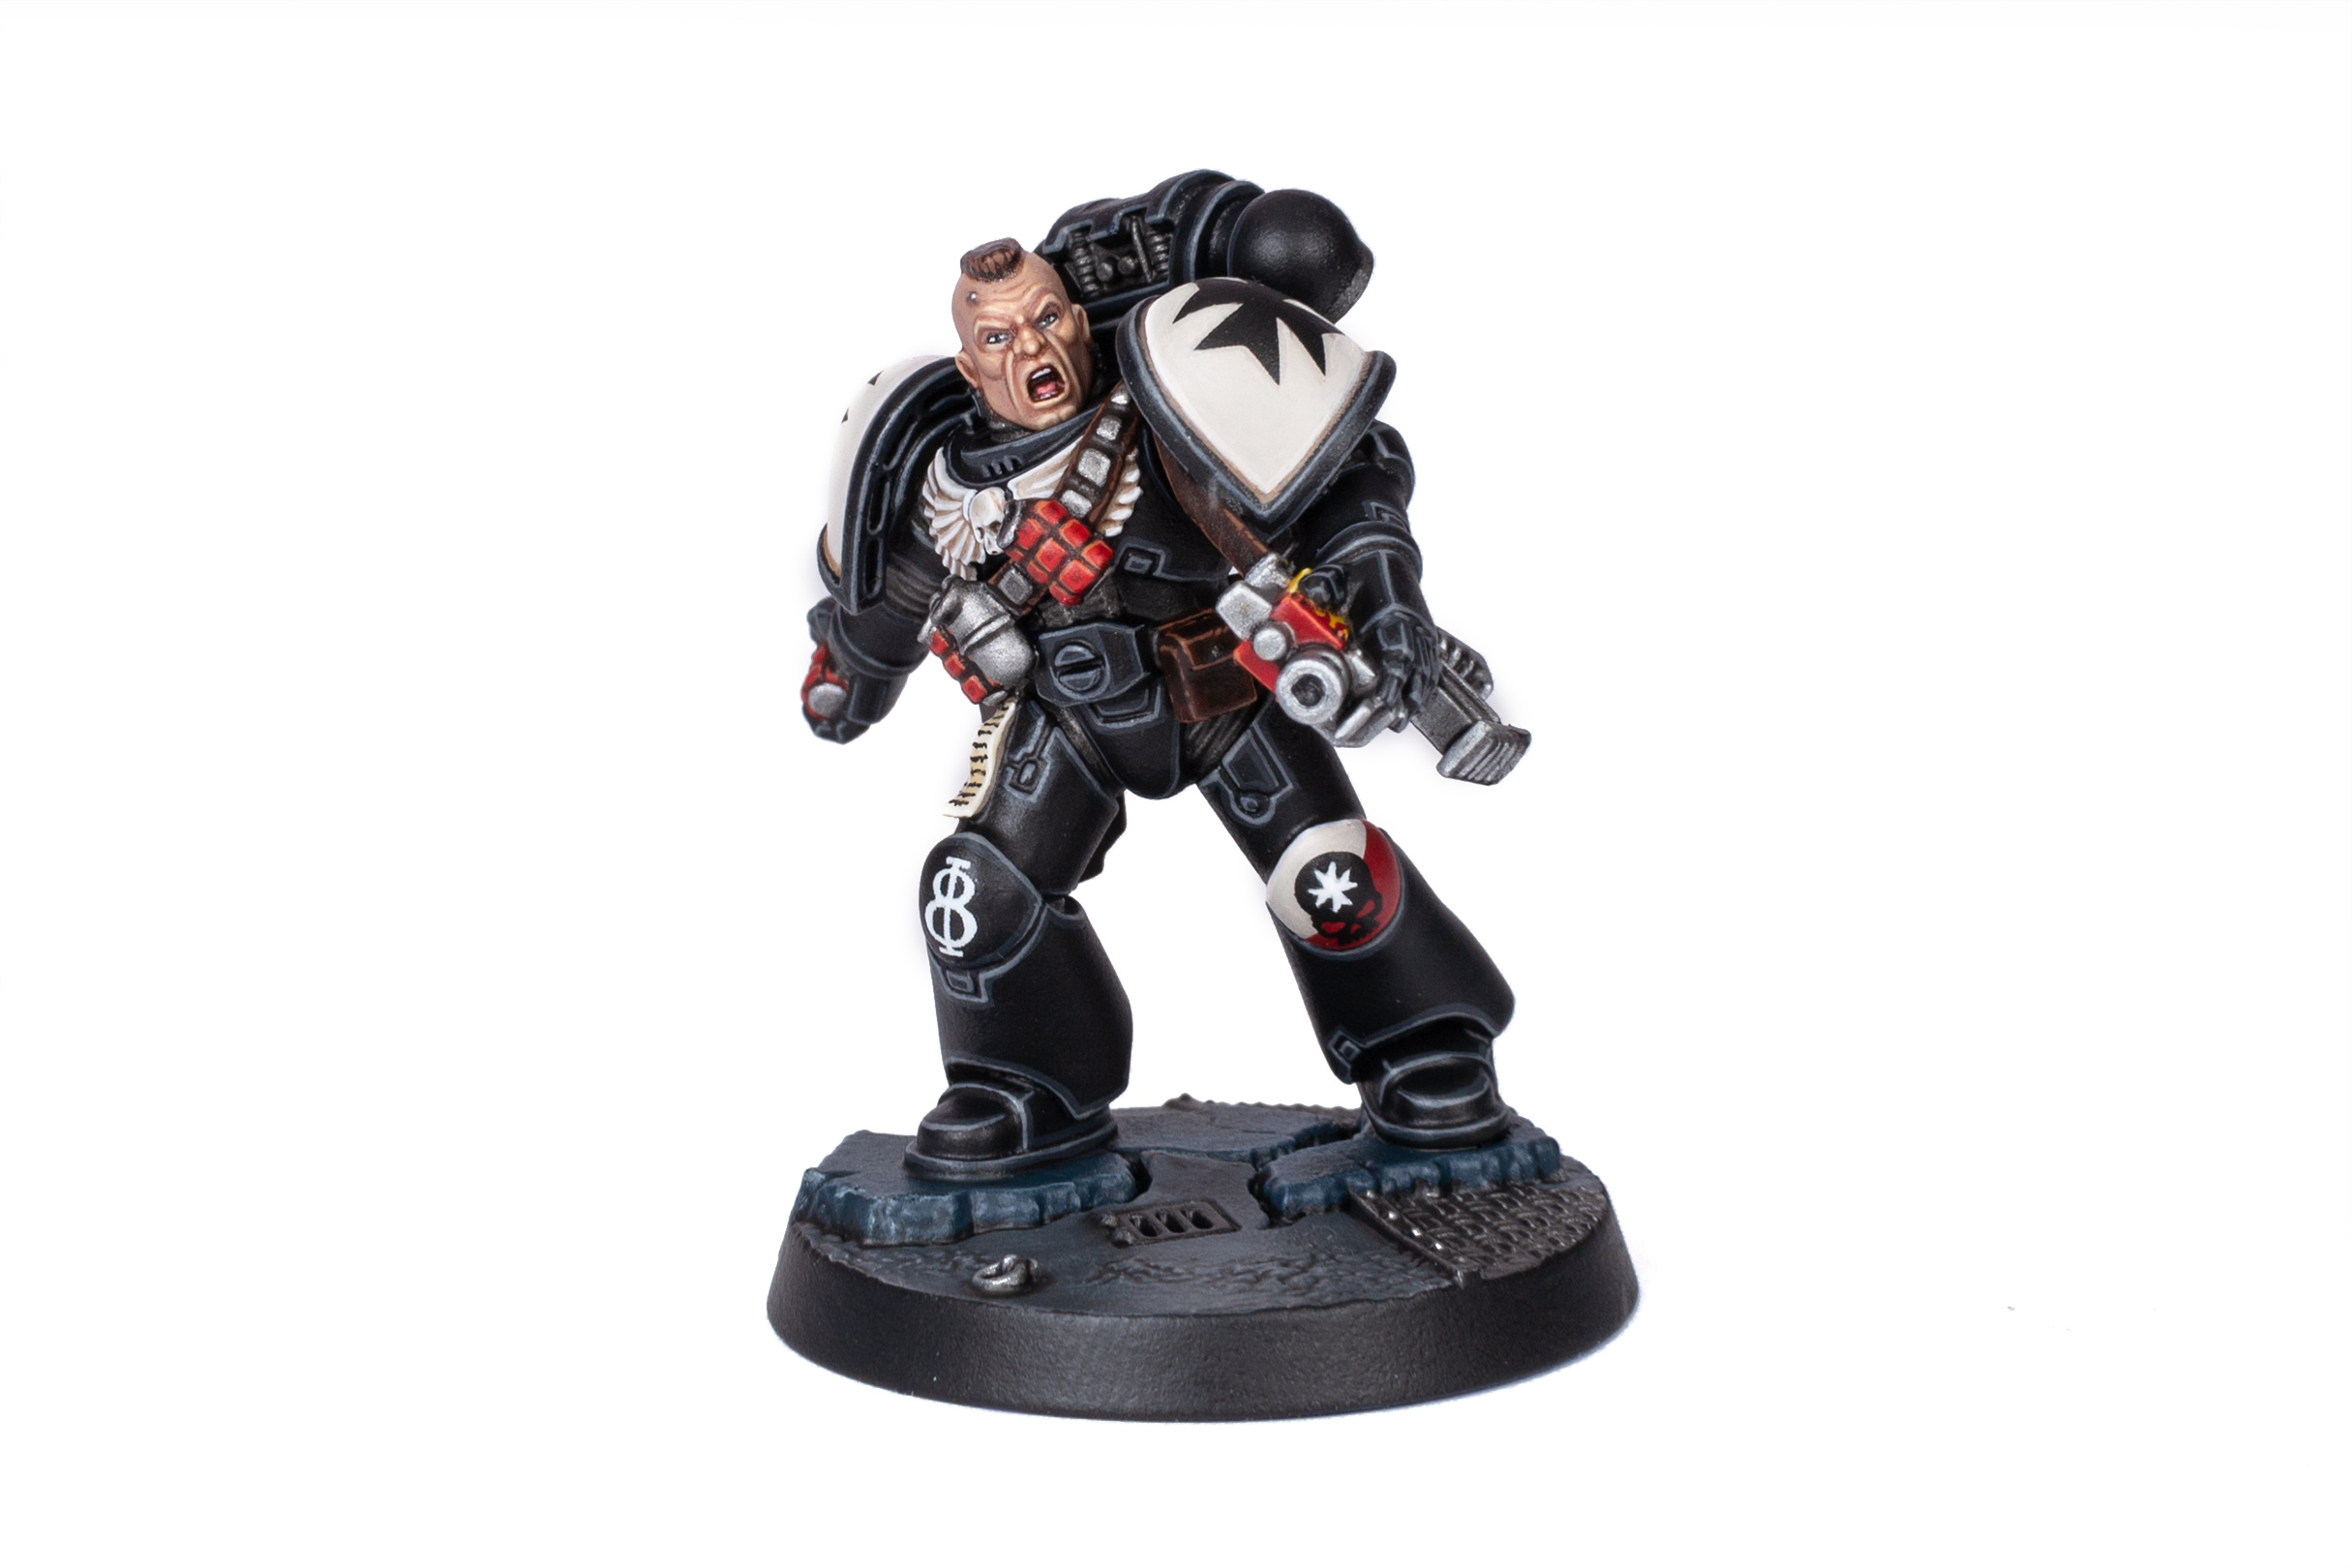
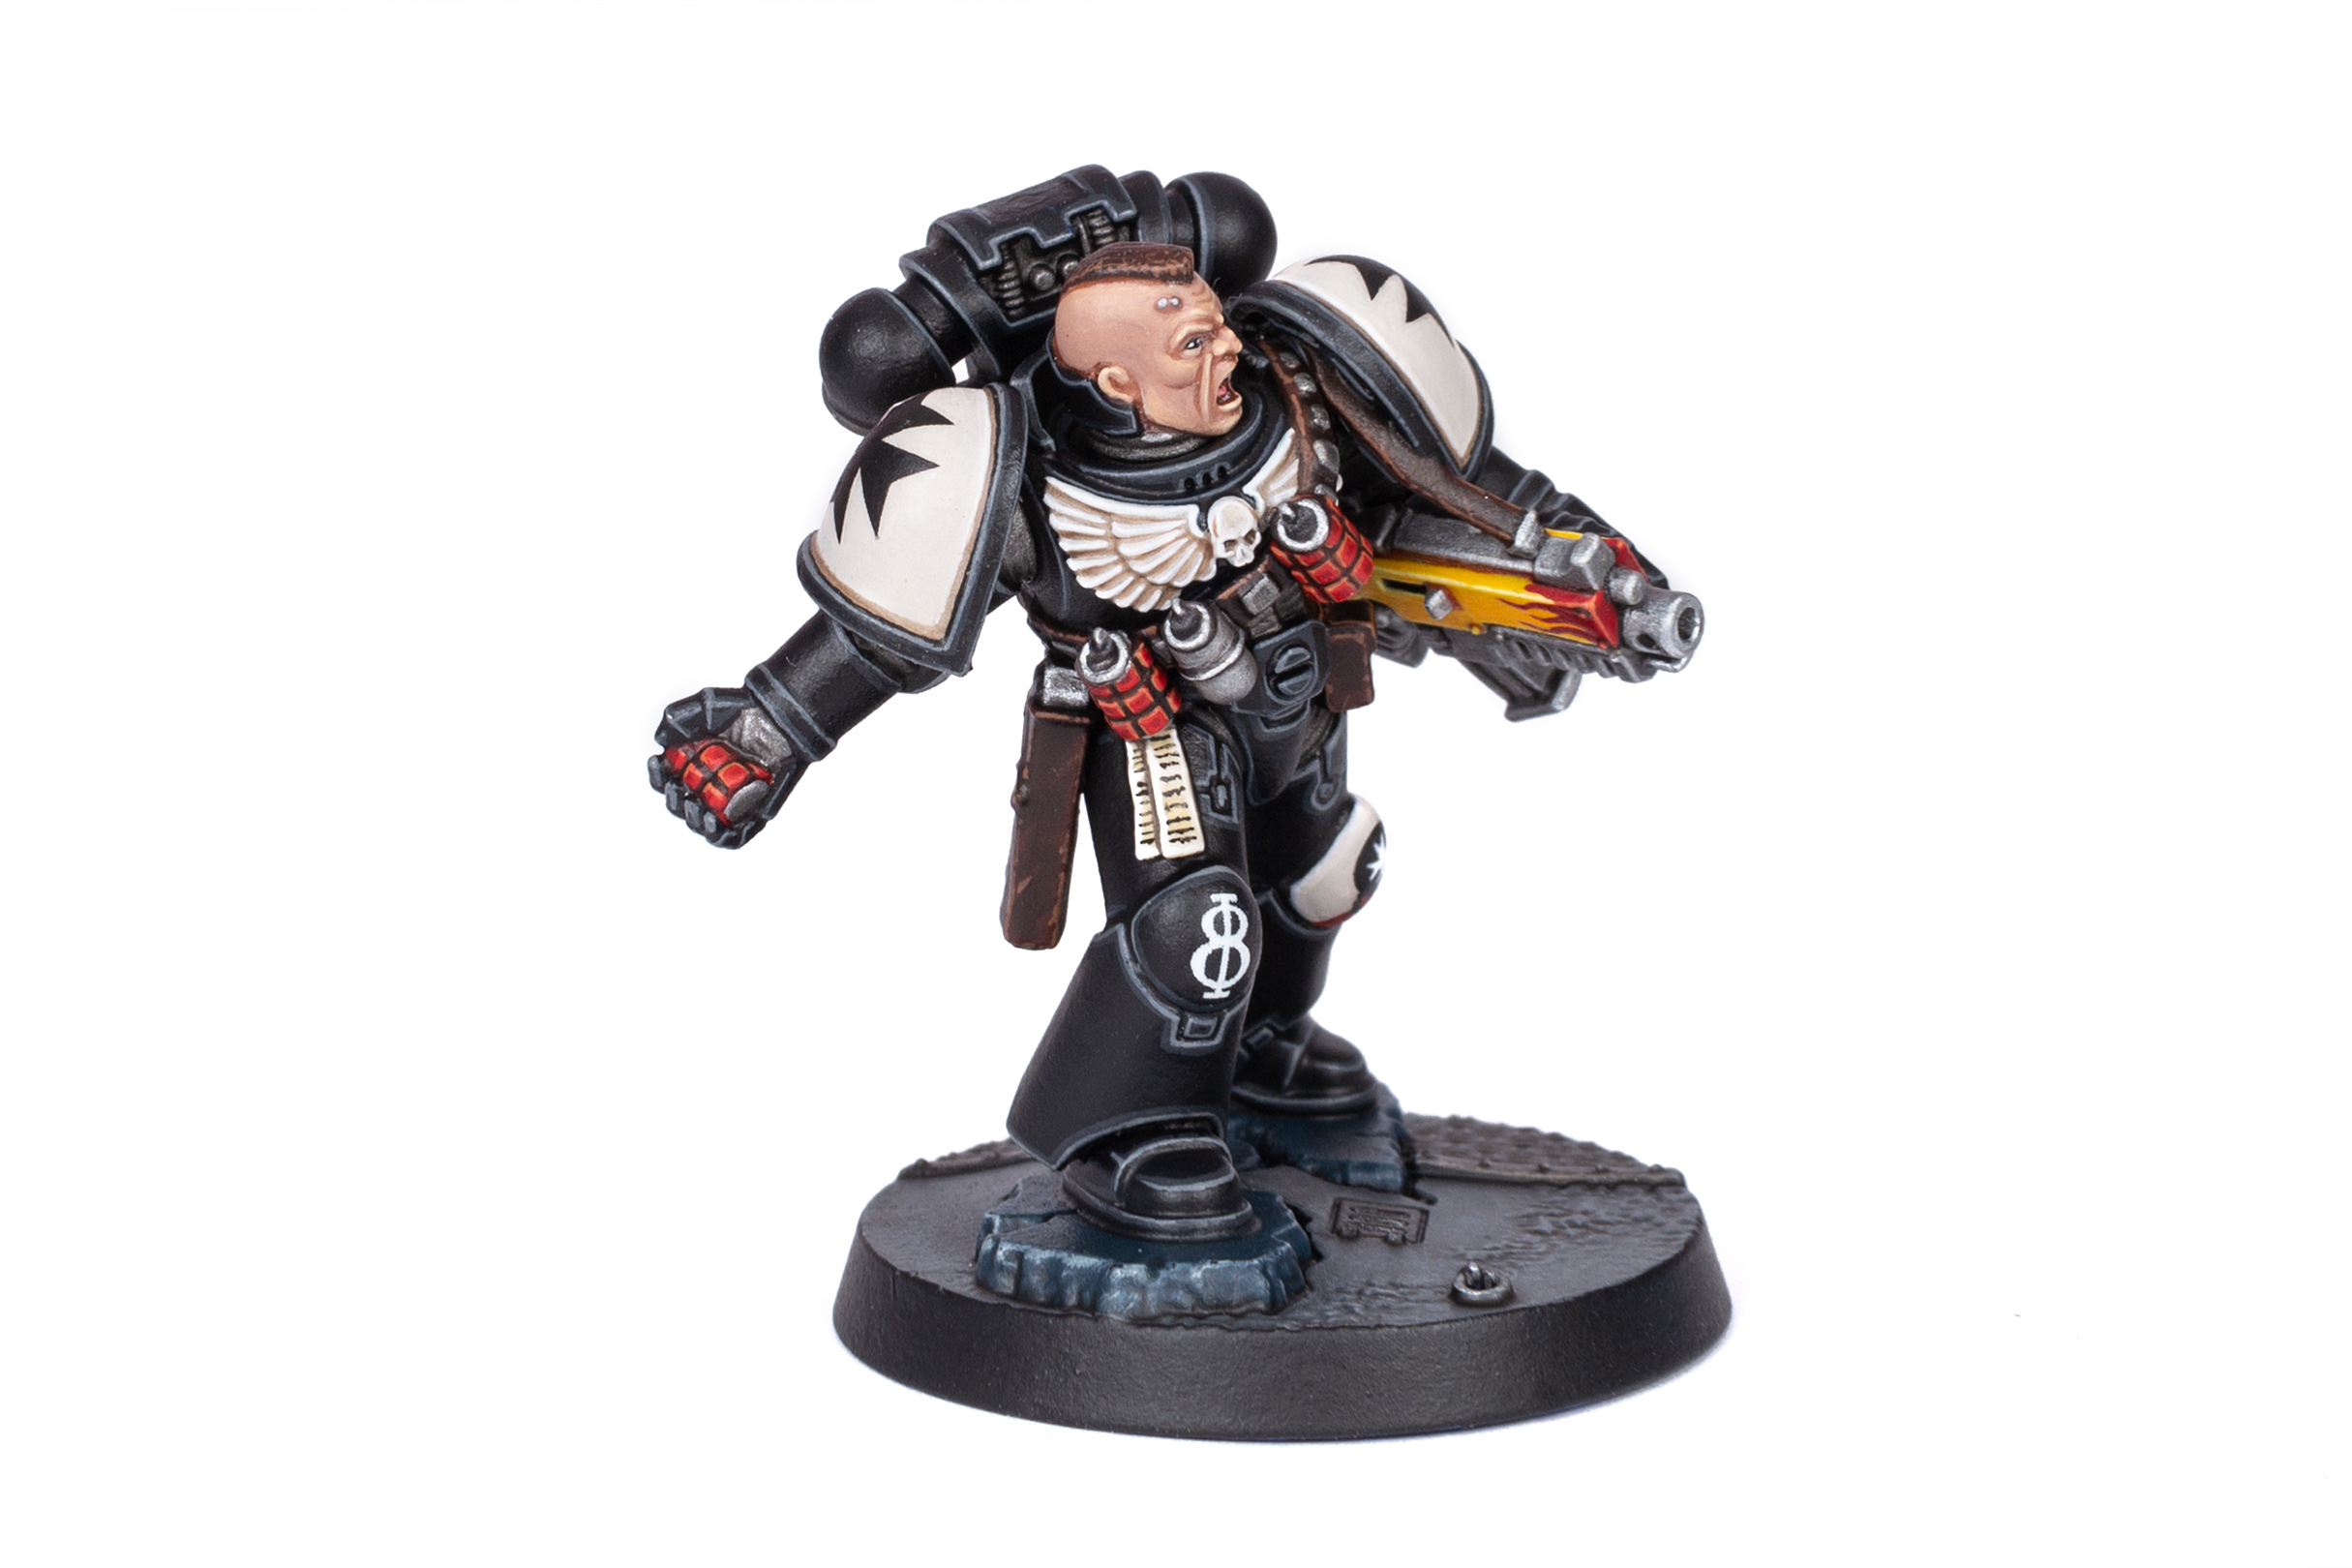
Here you can see the completed model. Both Black Templar crosses, as well as the number and skull on the knees are decals that have been attached by the technique presented above.
You can find more pictures of Brother Vanial from the Space Marine Heroes Series 1 here, and a complete step-by-step tutorial for painting this model here:
Paints and Products you will need for this tutorial:
The Army Painter Warpaints Gloss Varnish
Microscale Microsol
If you need to expand your paint collection to follow the tutorial, check out our partner stores Wayland Games, Element Games, and Taschengelddieb, which offer an amazing range of paints at a discount.
Hope you enjoyed this tutorial. If so, leave a comment or reaction below, and if you got any questions, leave them here or on the Tale of Painters Discord so I can answer them for you.
1 Comment
Leave a Reply
Tale of Painters ist das inoffizielle Warhammer-Onlinemagazin VON Hobbyisten FÜR Hobbyisten. Unterstützt unsere Arbeit, damit wir euch auch weiterhin mit neuem Content versorgen können. Nutzt dazu gerne die Links von unseren 🇩🇪 / 🇦🇹 Partnerläden für euren nächsten Einkauf:


Oder unterstützt uns direkt:


Awesome