
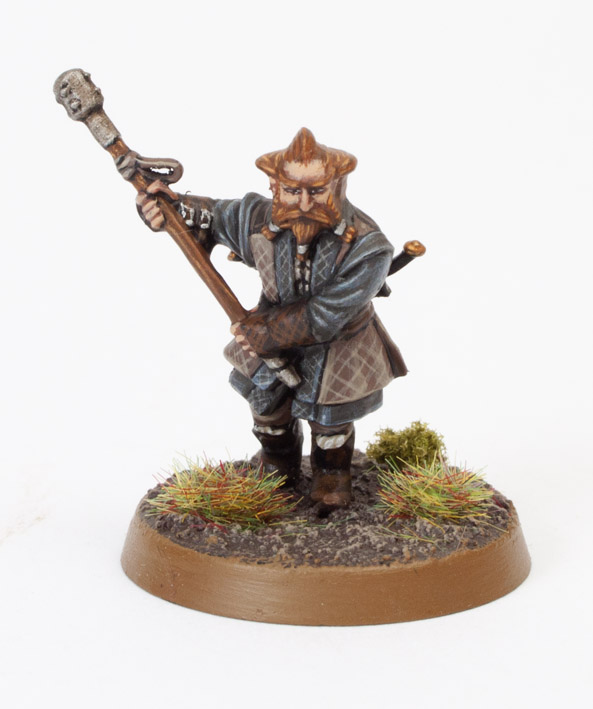
Having completed Nori, I only have four models left to paint for this project; Radaghast, Oin, Bifur and Bofur. This is great news, one final push and I should be done. For now though, I’m pleased to present to you my tutorial to paint Nori.
This tutorial assumes you have a basic understanding of how to paint. For the beginners, I will explain the techniques as I go along. Each picture below shows four chronological steps. Underneath each picture are the corresponding instructions. Each step shows the paint I used during that step. It’s good to have reference material close to hand to check colours. I used google images for film stills and Games Workshop’s 360º pictures on their website were a great help.
Paints you will need for this tutorial:
Black Undercoat (technical)
Cadian Fleshtone (layer)
Bloodletter (glaze)
Rhinox Hide (base)
Kislev Flesh (layer)
Mournfang Brown (layer)
Skrag Brown (layer)
Tau Light Ochre (layer)
Stormvermin Fur (layer)
Russ Grey (layer)
Ulthuan Grey (layer)
Nuln Oil (shade)
Gorthor Brown (layer)
Baneblade Brown (layer)
Karak Stone (layer)
Ironbreaker (layer)
Agrax Earthshade (shade)
Gehenna’s Gold (layer)
Stirland Mud (texture)
XV-88 (base)
In case you need to expand your paint collection, head over to Wayland Games or Slave to Painting, which both stock a huge selection of paints at competitive prices.
Undercoat the model. The details are small, so I hand undercoated the model (rather then use a spray) with Imperial Primer.
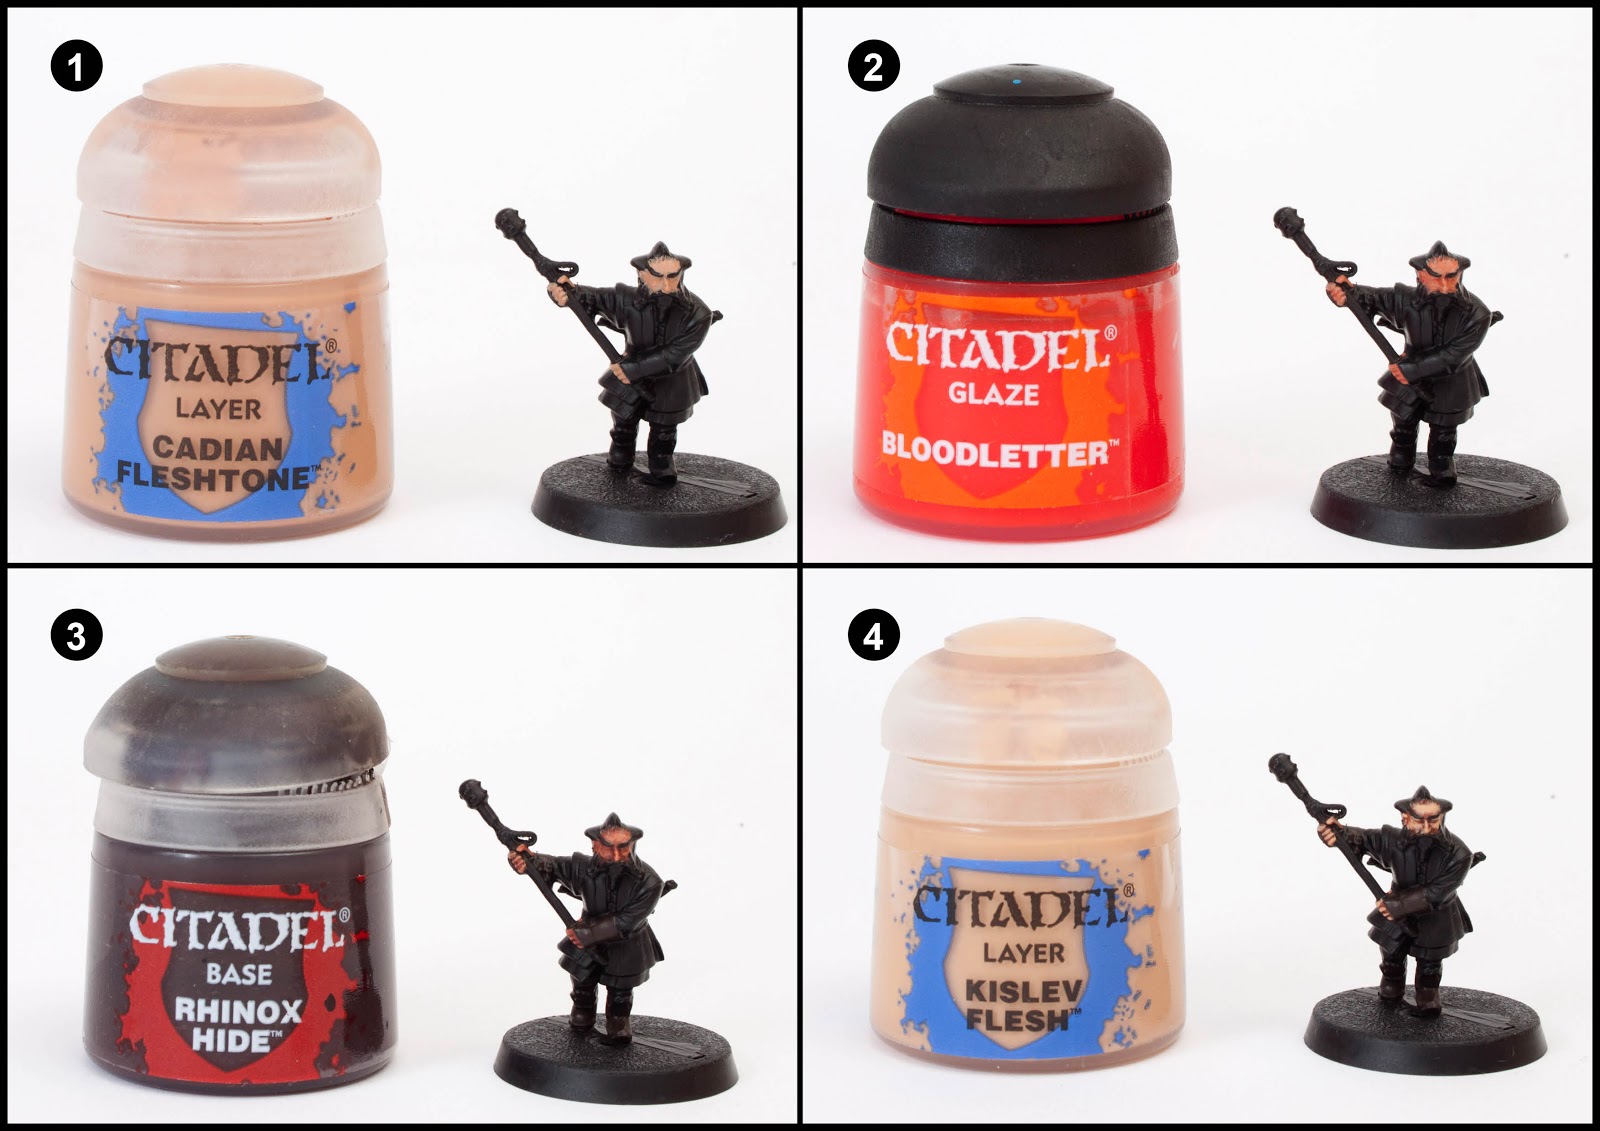
1. I painted the face and fingers with Cadian Fleshtone. I painted around the beard.
2. I changed the hue of the skin using Bloodletter glaze. Dwarves are a little more red in complexion then humans.
3. I watered down Rhinox Hide heavily and then shaded around the eyes, nose, inbetween the fingers and around the face. Then paint the boots, gloves and knife scabbards with Rhinox Hide (don’t water this down)
4. I highlight the face with Kislev Flesh. Also if you’re feeling brave, this is the opportunity to paint the eyes with a thin black line and two white dots.
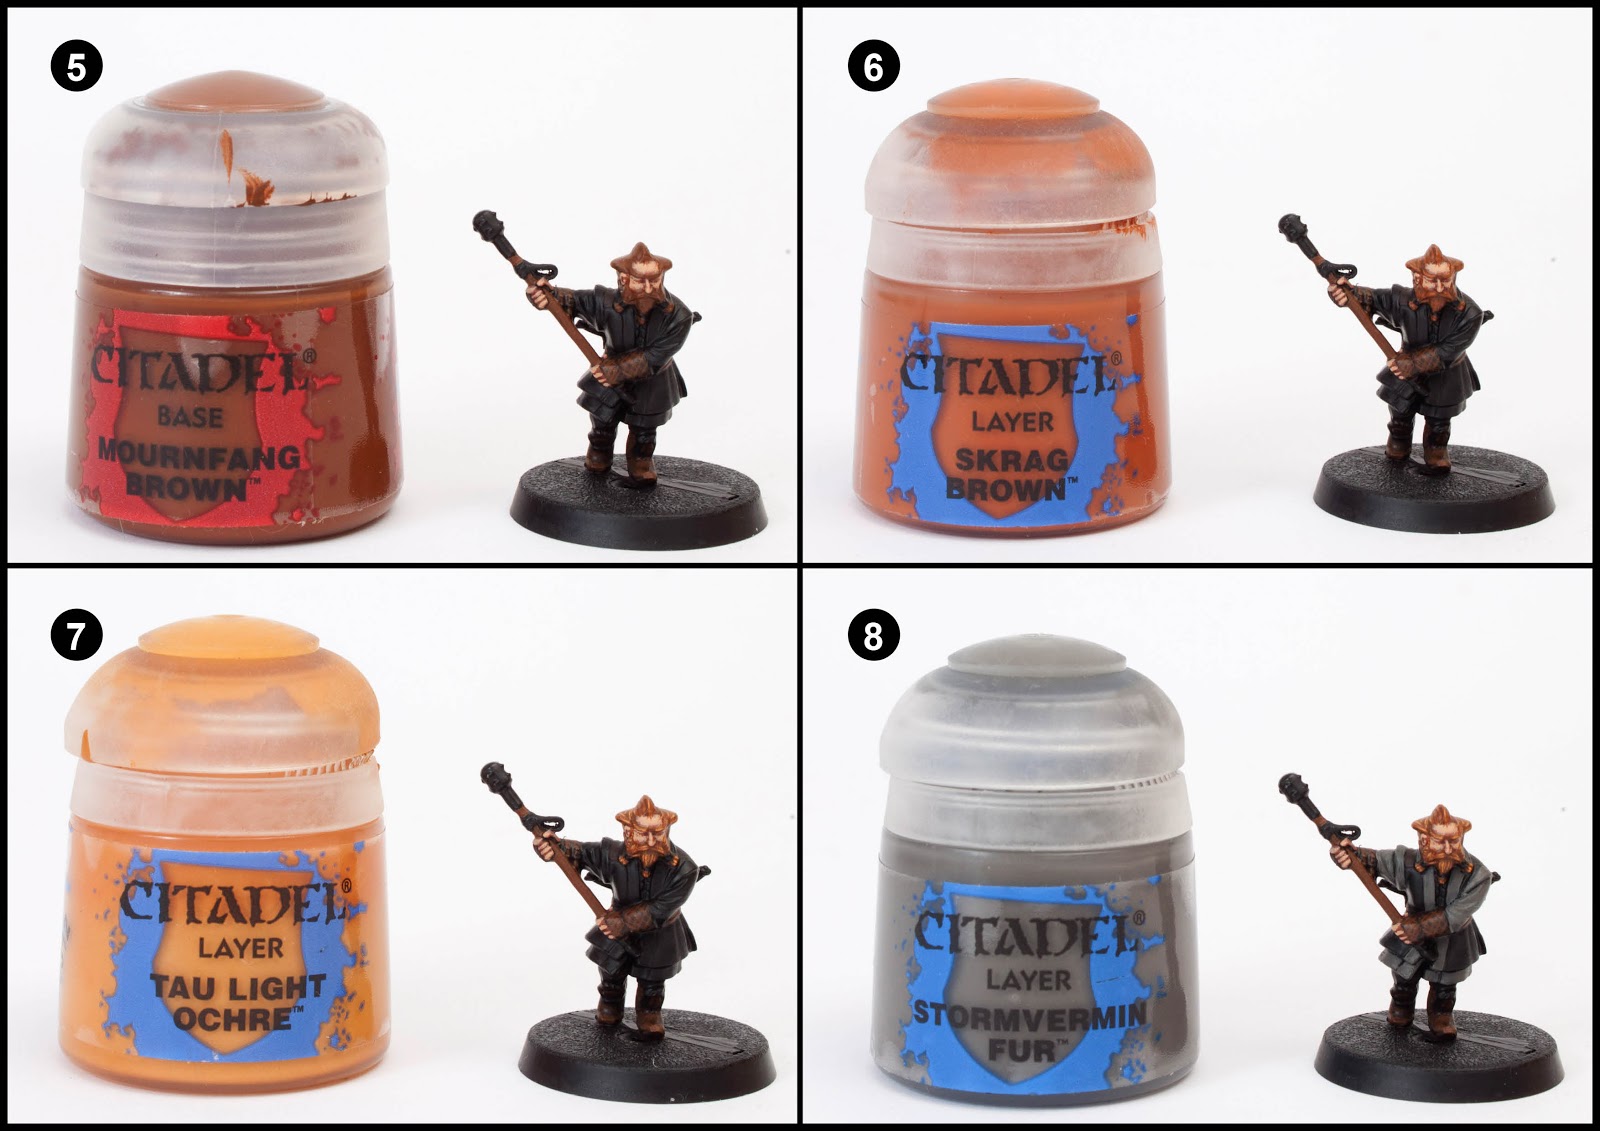
5. Paint the hair, beard and weapon’s shaft with Mournfang Brown. Highlight the boots and scabbard with this colour as well. Paint a diagonal cross pattern on the gloves using thin lines of Mournfang Brown.
6. Highlight the hair and beard using Skrag Brown. Thin lines work best.
7. Go over the previous layer’s highlights with thinner lines of Tau Light Ochre.
8. Using the picture in step 8 as a guide, paint the garments with Stormvermin Fur.
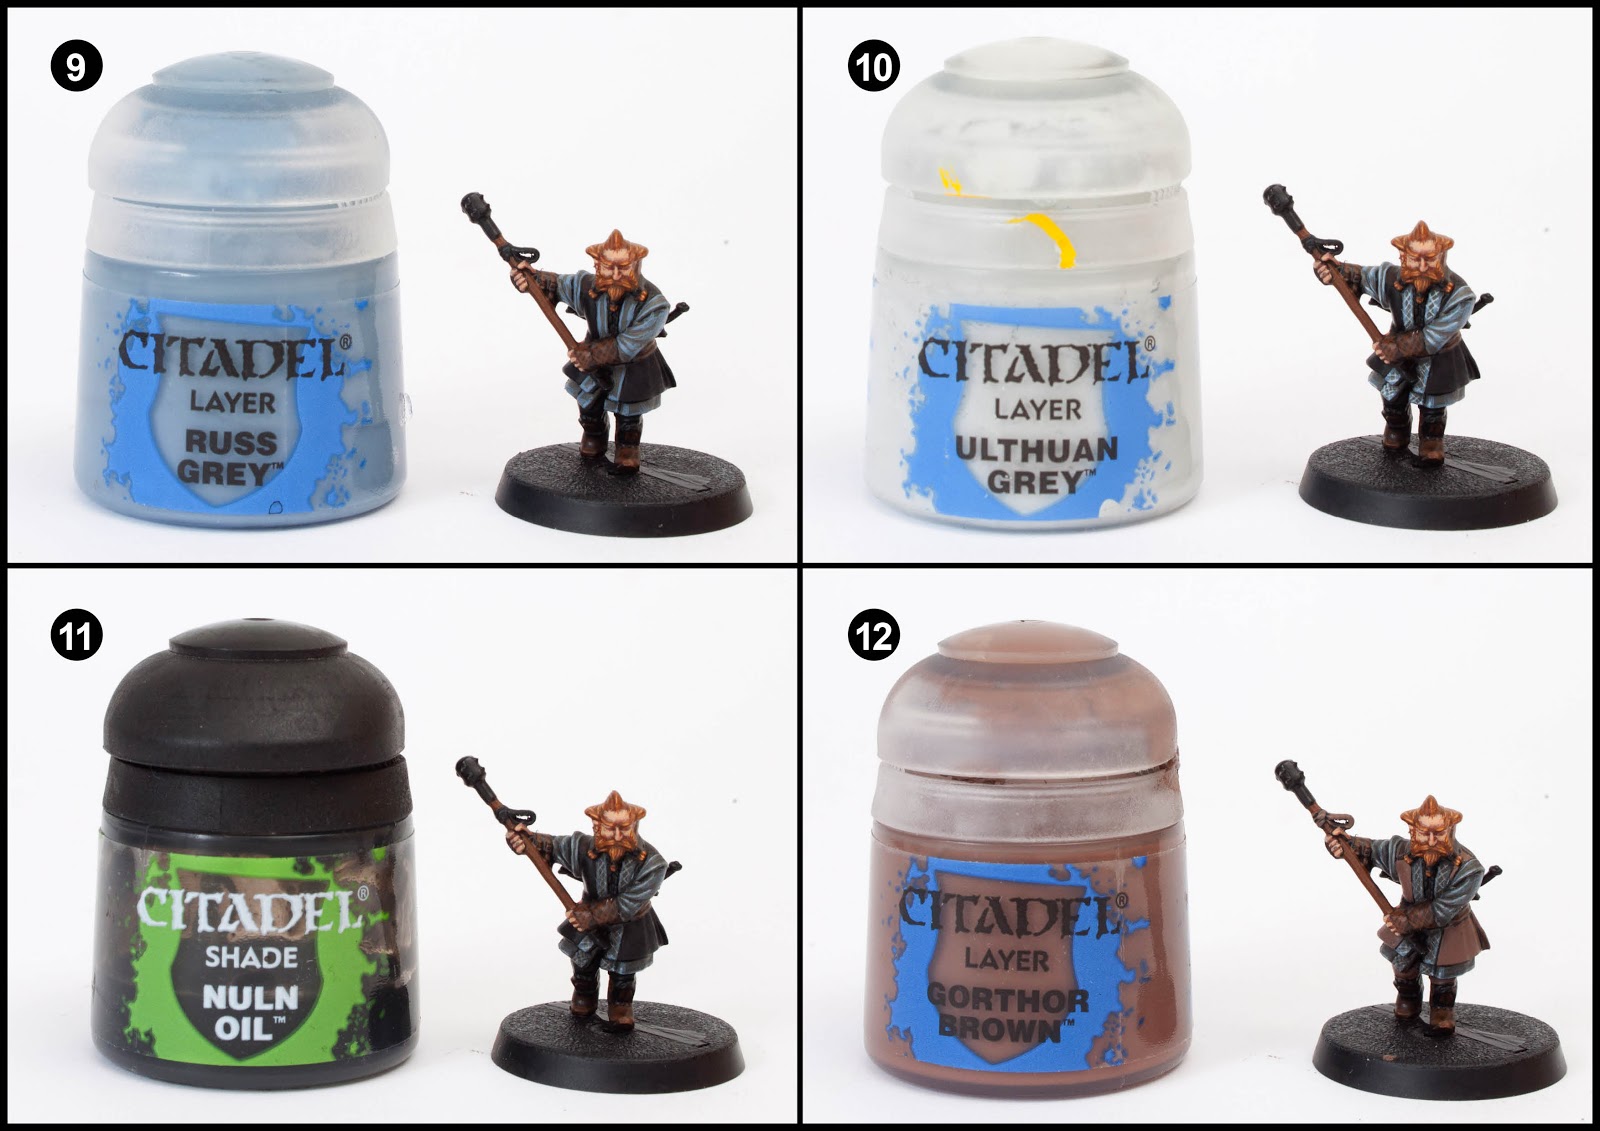
9. Highlight the grey garments using Russ Grey.
10. On the tunic’s trim paint criss-cross diagonal lines of Ulthuan Grey. Add some Ulthuan Grey highlights to the raised edges of the grey garments.
11. Wash over all the grey areas with Nuln Oil to tone it down.
12. Paint the trousers and parts of the tunic with Gorthor Brown.
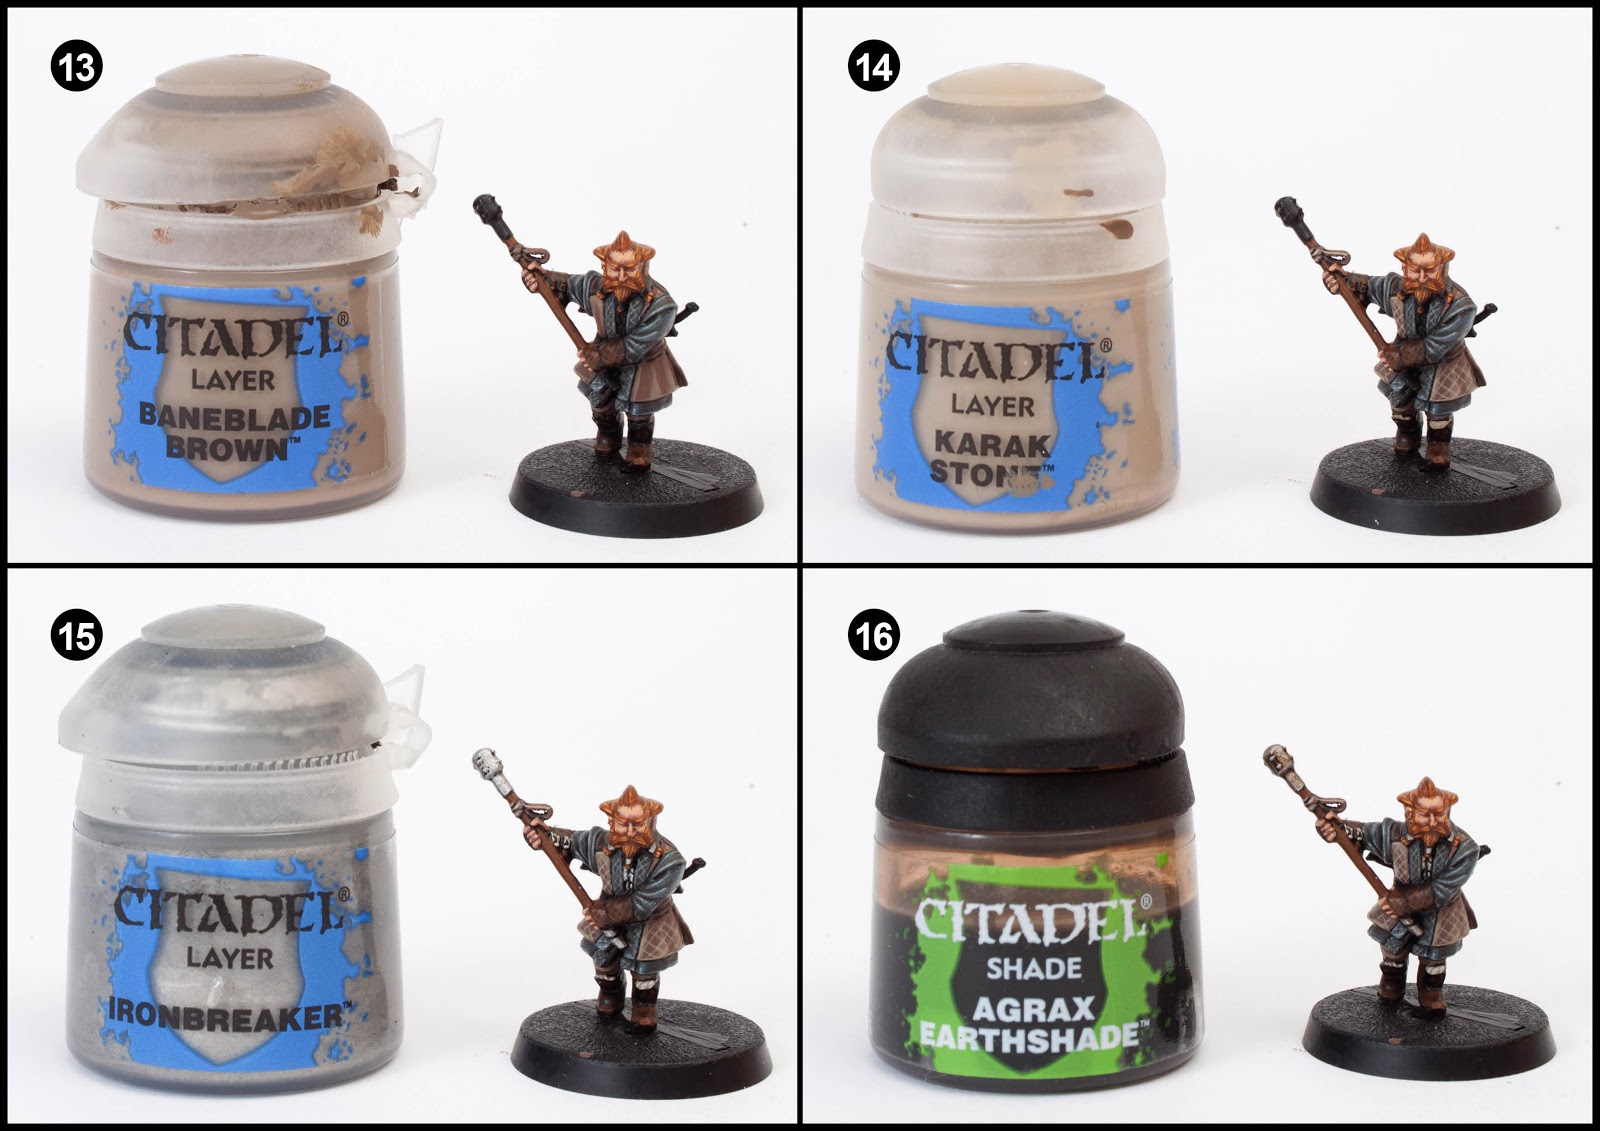
13. Highlight the tunic and trousers with Baneblade Brown. Paint the strap on the shaft (stop giggling) with Baneblade Brown.
14. Paint a criss-cross pattern on diagonal thin lines of Karak Stone on the tunic. Highlight the strap and tunic edges. Paint the fur on the boots with Karak Stone.
15. Paint the weapon’s head and pommel with Iron breaker. Pick out the buckles and beard/hair rings with Iron Breaker. Paint the chest armour with this colour and finally on the scabbard on the back paint one of the ends with a dab of silver.
16. Wash all the metal areas with Agrax Earthshade.
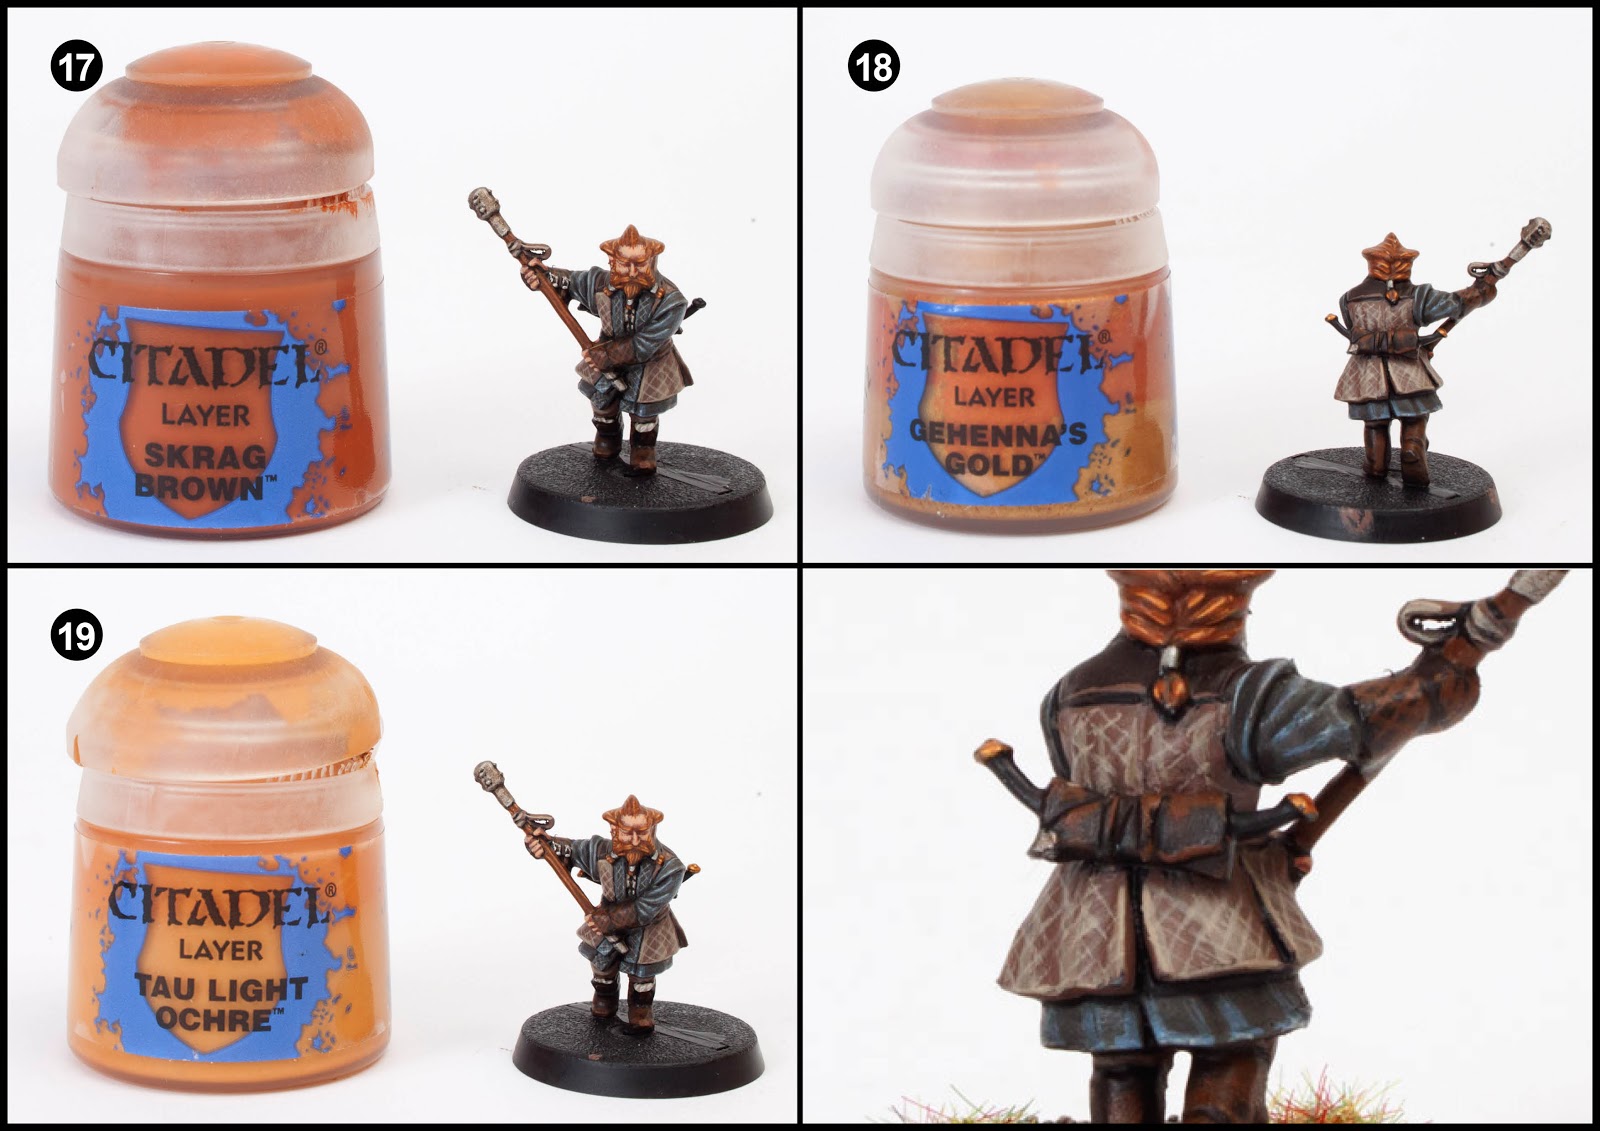
17. Paint some thin grain lines of Skrag Brown on to the shaft of the weapon.
18. Paint the two pommels of the knives sheathed on his back with Gehenna’s Gold.
19. I added some more grain lines to the shaft using Tau Light Ochre.
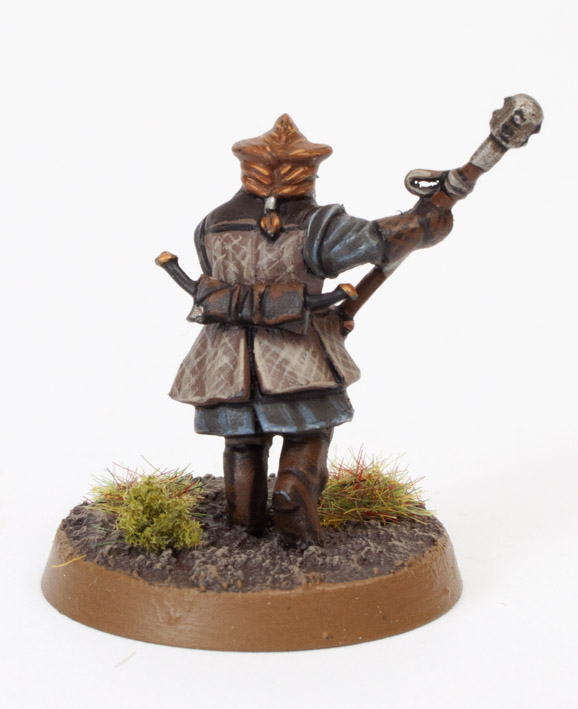
Finally base the model in a way which fits in with your collection. I used Stirland Mud texture paint highlighted with Karak Stone and the base edge was painted with XV-88. Static grass and scrub were glued on in small clumps.
For more Hobbit tutorials check out my Bilbo, Gandalf, Thorin, Gloin, Bombur, Ori, Dwalin, Balin, Kili, Dori, Fili, and Goblin tutorials. If you found this tutorial useful, let me know in the comments.
Do you like our tutorials and reviews? Here is what you can do to support us: Check out the websites of our sponsors, place your next orders at Wayland Games by clicking here or on the banner on the right. Thank you very much, we appreciate any help to keep us going!

27 Comments
Leave a Reply
Tale of Painters is the unofficial Warhammer hobby magazine run by hobbyists like you. Support our work by using the affiliate links from our partner stores for your next orders so we can continue to bring you fantastic FREE content every day:


![]()
![]()
Or support us directly:


Love this tutorial, thank you
how come you havn't posted any new tutorials for a while?
For a while? It was last Wednesday. There is one scheduled for today. 1 a week is pretty reasonable considering they're free and they take me ages to produce.
I'm looking forward to getting my life back after this project.
You can get that paint information from each of the tutorials. There was a list in white dwarfs paint splatter. I used that.
thanks i will just have to sit down and try and get info was hoping you could just email me a list of paints inks and stuff i needed i think you tutorials are mint keep up the good work helping us out who can paint but need that little extra help in details
Just copy and paste the list from each tutorial and delete the duplicates. I'm not doing it for you.
lol i said i would do it thought you might have had a link or something thats all
hi can someone give me a full list of paints i neeed to compleat the full box set of hobbit so i can just go online and order them, so i have them all as all the paints i have are dry and over 8 year old so now names have all changed thanks i have given a email address in this post thanks
craig-1974@live.co.uk
still waiting for game to get here royalmail dragging there feet lol
are you going to do a tutorial for the goblin kings throne?
No sorry.
These tutorials are extremely helpful, thank you! I've got Oin, Radagast, Nori and Fili left to paint myself. I'm mostly looking forward to the Radagast tutorial, anyways keep up the good work!
Have just received the full set of figures from a friend who has split his second boxed set up as he needed more goblins. Can't wait to get started onm them.
This is a relly useful guide, thanks. Really great painting as well.
Please do radagast next
Will you be doing tutorials for the trolls and wargs?
I haven't planned to, but never say never.
cool i really hope you do because your tutorials are great!
Yep, would love to see the tutorials for other parts to the hobbit range:)
Thank's for your fast reply!!!
No tutorial is needed indeed….
Genious!
Are you going to do a tutorial for the wooden goblin town parts too?
No sorry. They're just drybrushing baneblade brown and karak Stone over rhinox hide. They don't require a tutorial.
Love the pattern on the tunic, these painting guides have been so inspirational, thank you!
Who's next and when?
Please check back daily for the latest information on this project.
Great Stuff!, many thanks
Thank you so much!!
Great, when I've looked at this model I find it slightly uninspiring… But you've managed to give it some really nice character! Great work as always…