
Stand still, Guardsman, and listen up: in this tutorial I will show you how to paint the new Cadian Shock Troops with effective and straight-forward techniques to a beautiful tabletop standard. This painting guide is also a display case for the new Two Thin Coats paints by Duncan Rhodes, but don’t worry, you can easily follow along with Citadel paints as well.
This tutorial assumes you know the basic grips of painting Warhammer miniatures. Step-by-step I explain all the paints and techniques I used. I have a rather eclectic paint collection, so when I use a paint that is not from Games Workshop (or out of production), I’ll try to provide you with suitable alternatives from the current Citadel paint range [in brackets]. However, if you want to achieve exactly the same result as shown, I recommend expanding your paint collection. You’ll find a list of all the paints used in this tutorial at the end of the post.
How to paint Cadians
Flak armour & fatigues
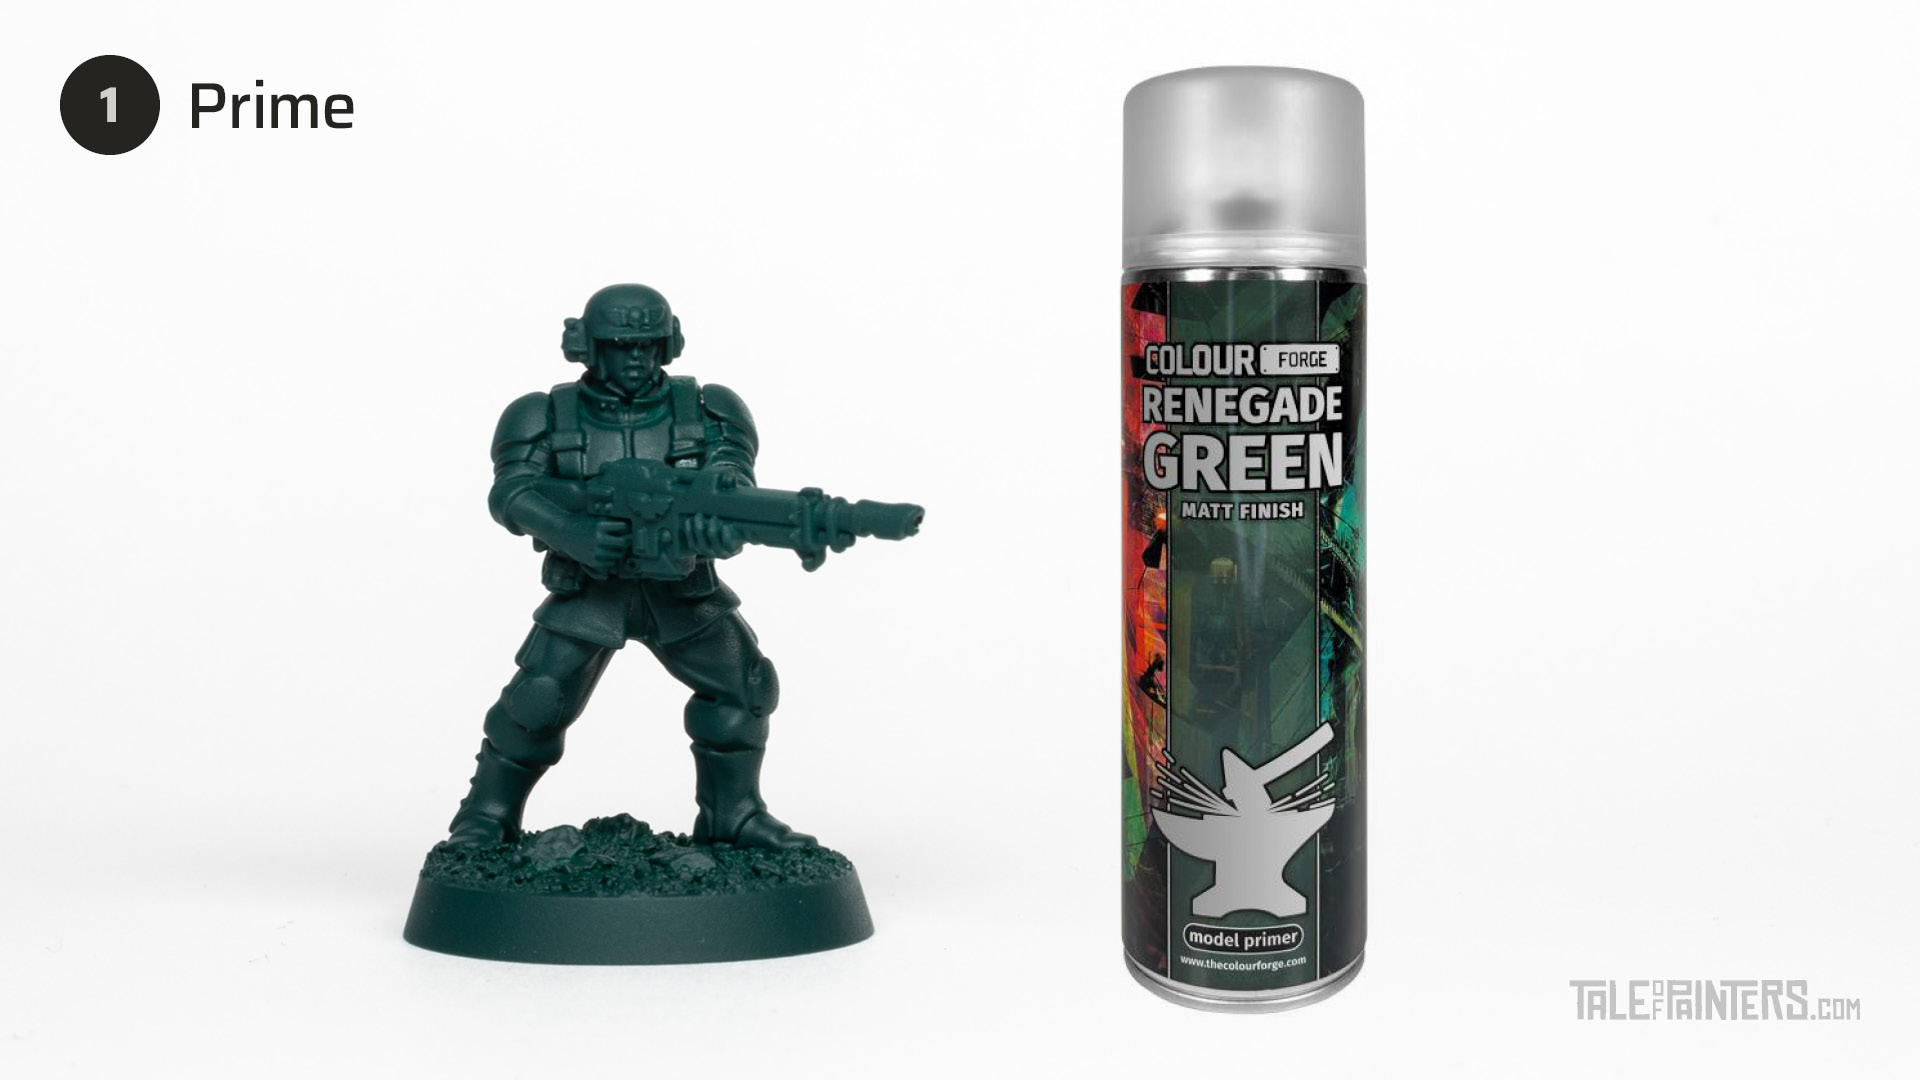
Prime the model with Renegade Green primer from Colour Forge (see our review here) or Caliban Green spray from Games Workshop.
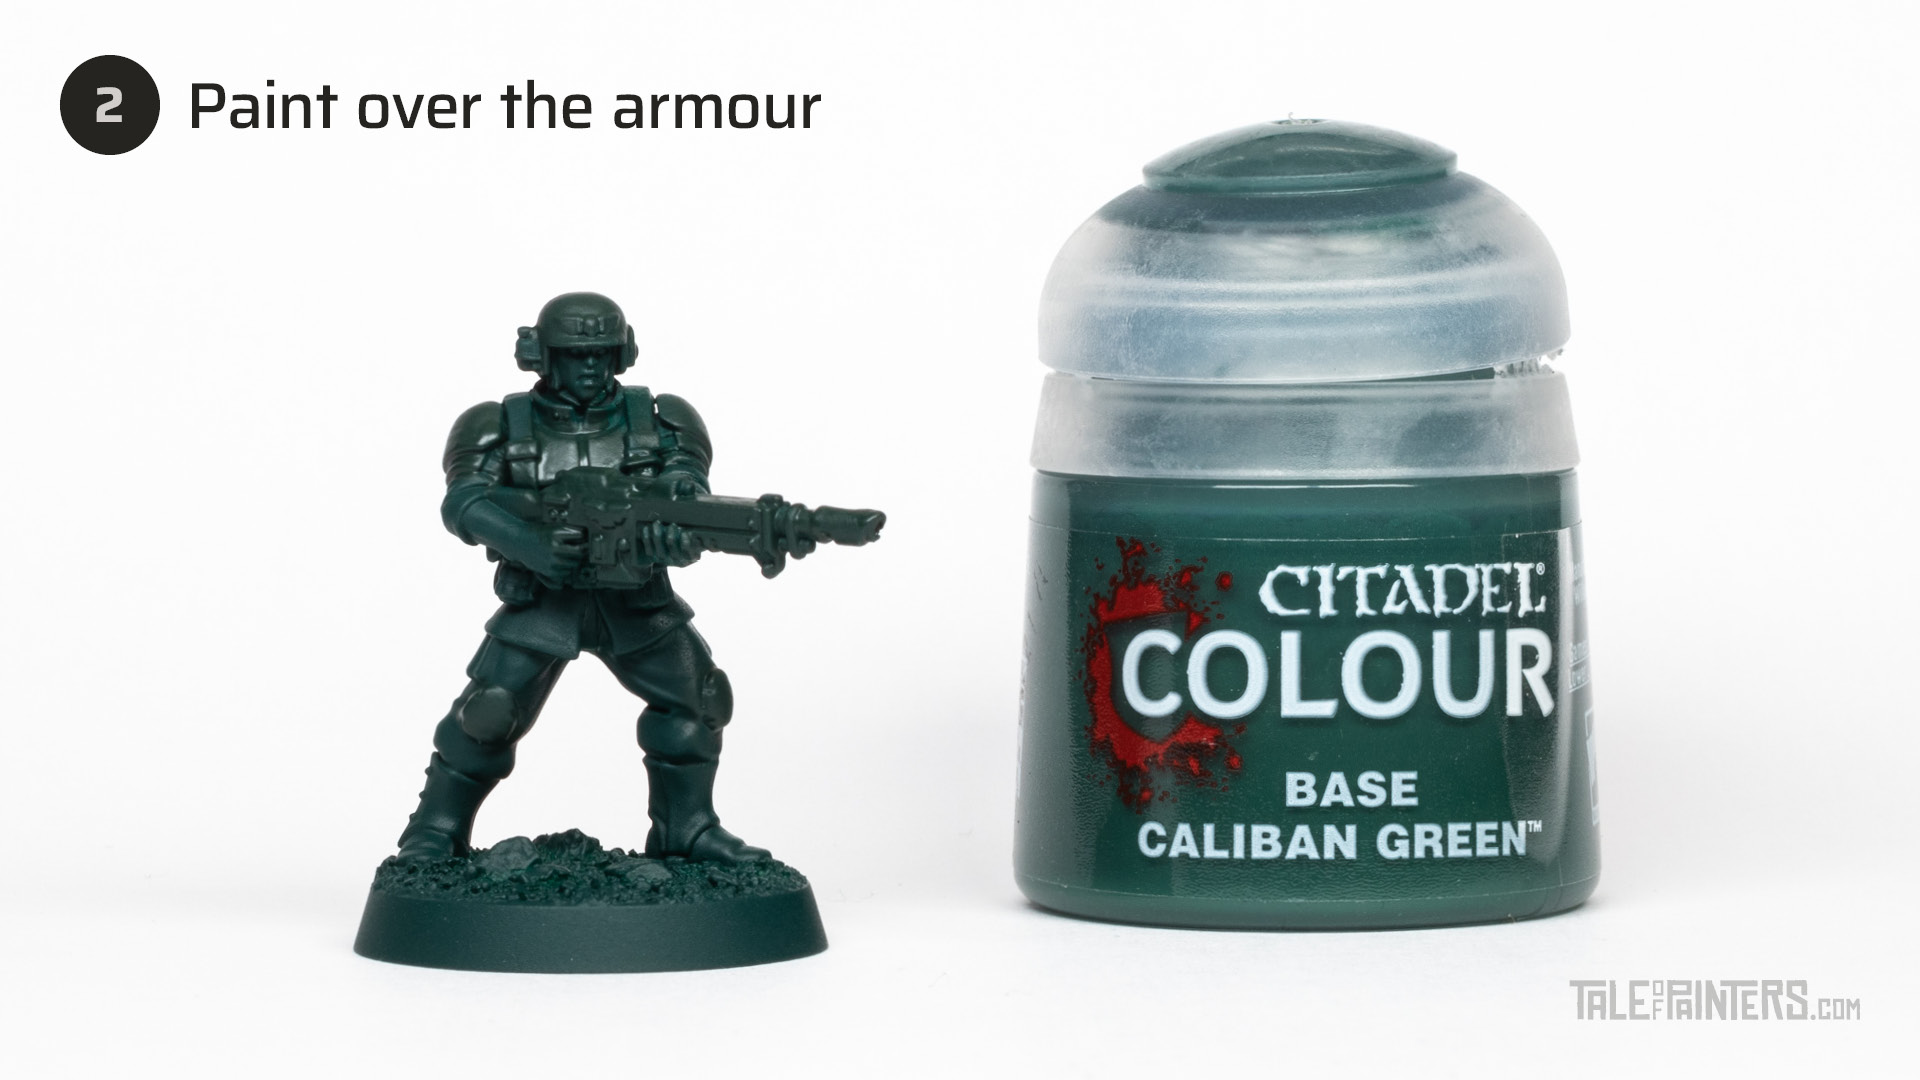
For an even finish, paint over the flak armour and lasgun casing with Caliban Green.

Apply a wash of Two Thin Coats Oblivion Black Wash [or Nuln Oil] over the armour. Make sure to soak up any excess wash with a damp brush so it won’t pool too much on flat areas such as the top of the helmet.
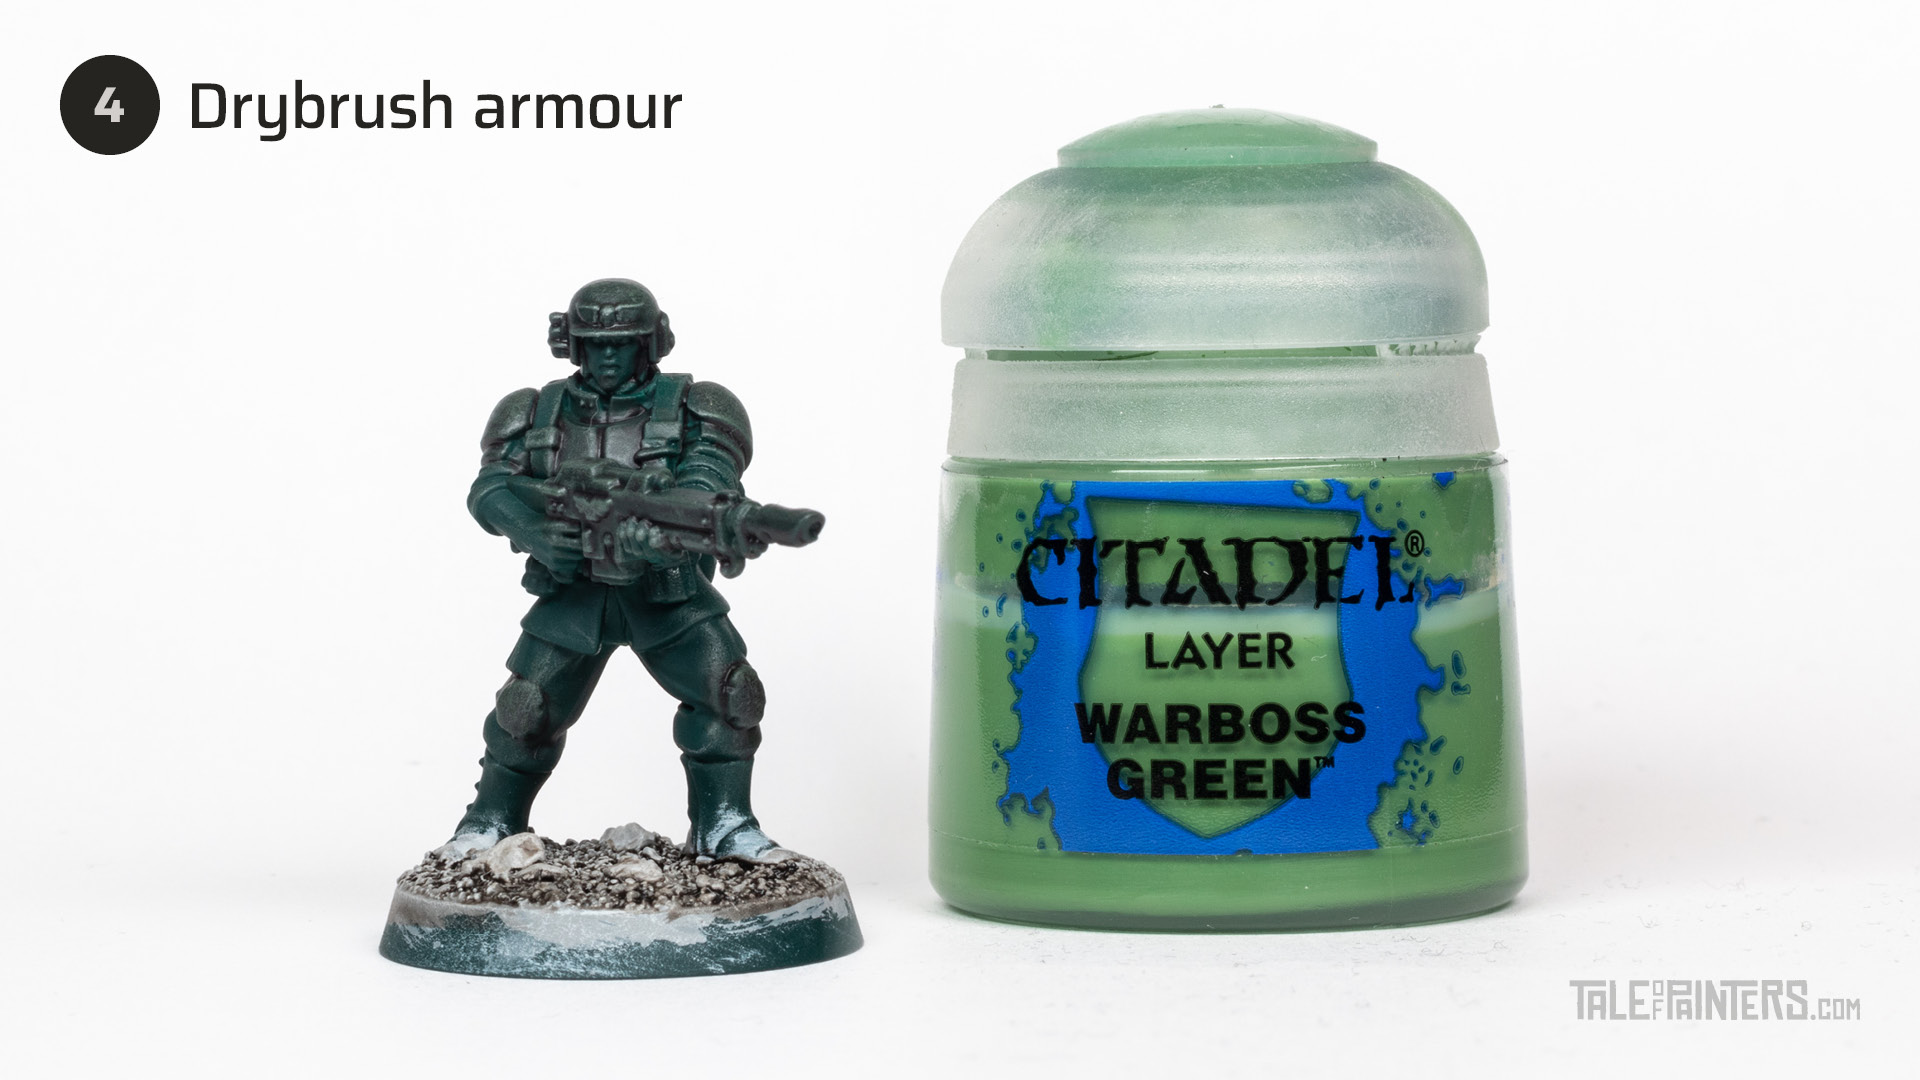
Drybrush the armour with Warboss Green.
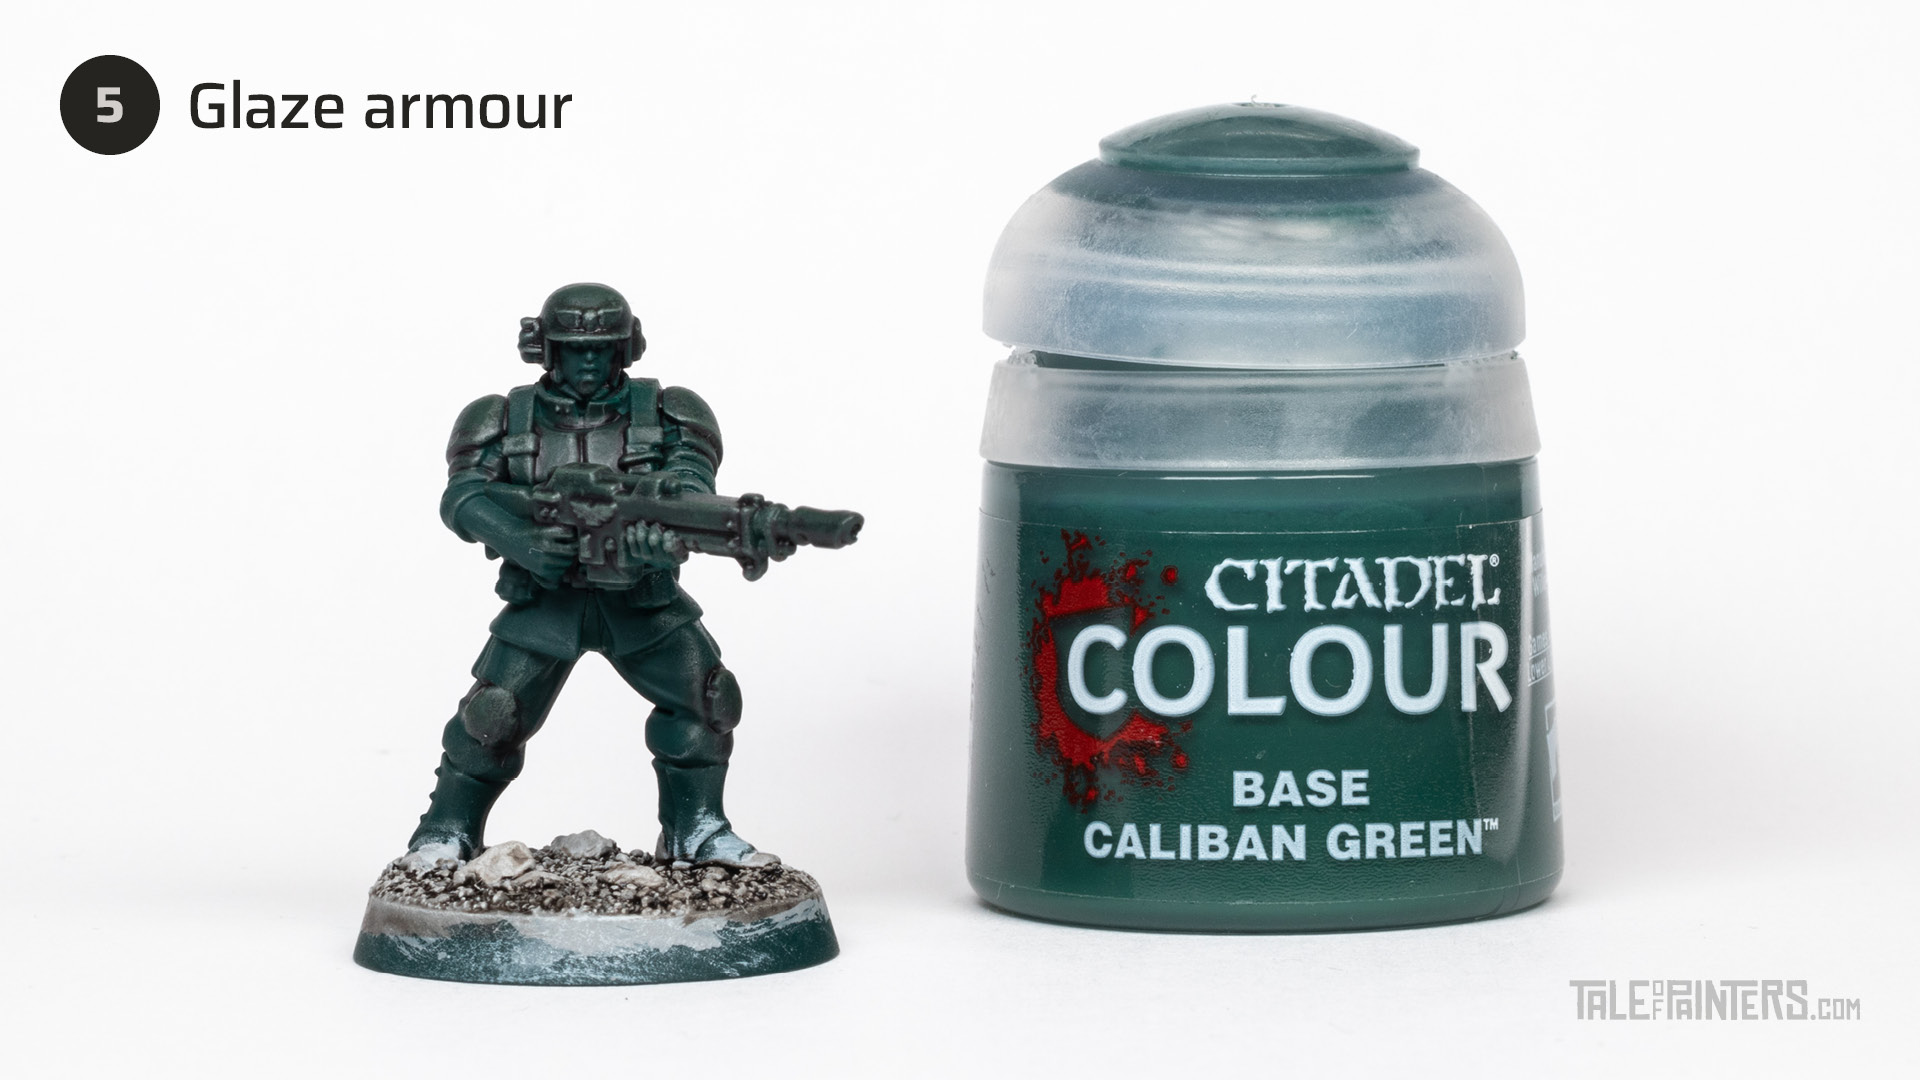
Glaze the armour with thinned Caliban Green to remove any streaks from the drybrushing, but don’t apply the glaze on the edges so you don’t remove the drybrushed highlights.
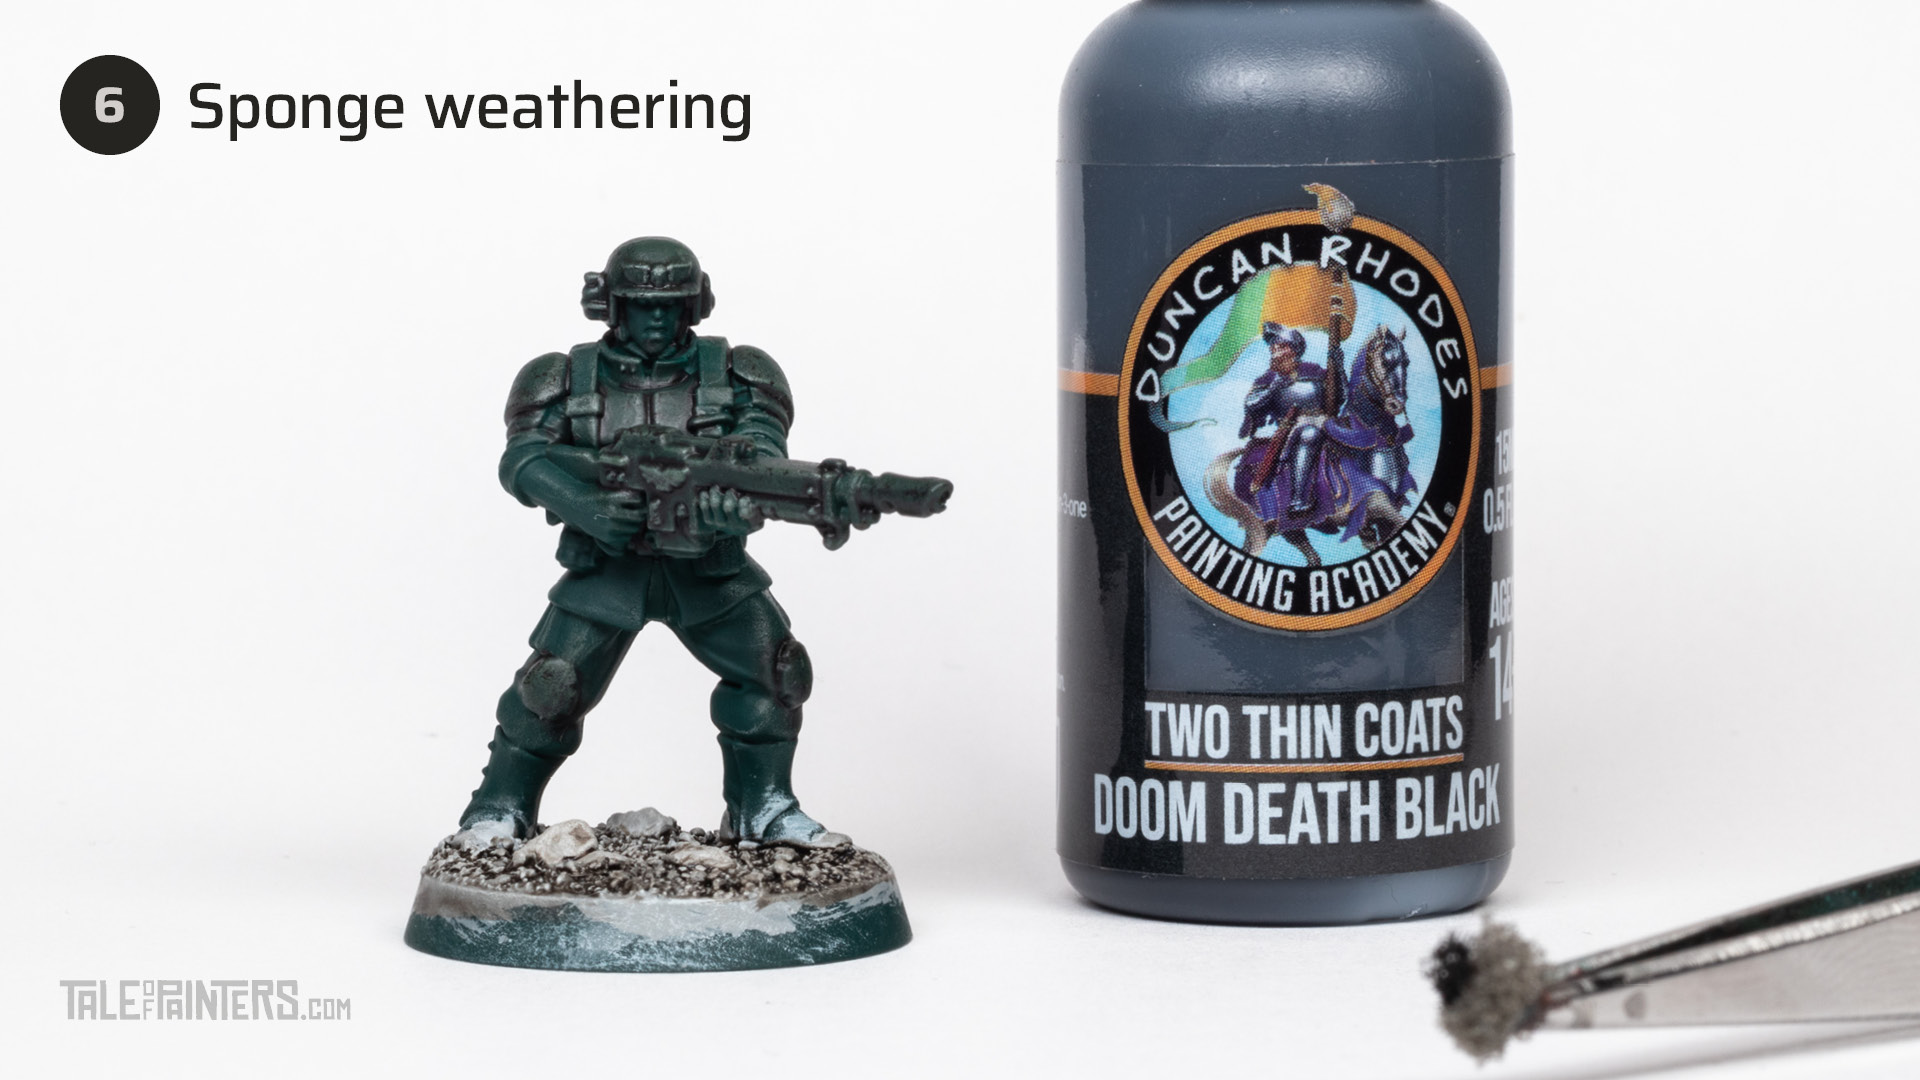
Dab a little piece of blister sponge into Two Thin Coats Doom Death Black [or Abaddon Black], wipe away the excess, and then carefully press it onto random edges of the armour to add some sponge weathering and texture.

With a fine brush, add a few small silver chips with Two Thin Coats Mythril Blade [or Stormhost Silver] to the black sponge weathering.
If you need to correct any mistakes on the dark green flak armour later on, mix a little bit of black into Caliban Green.
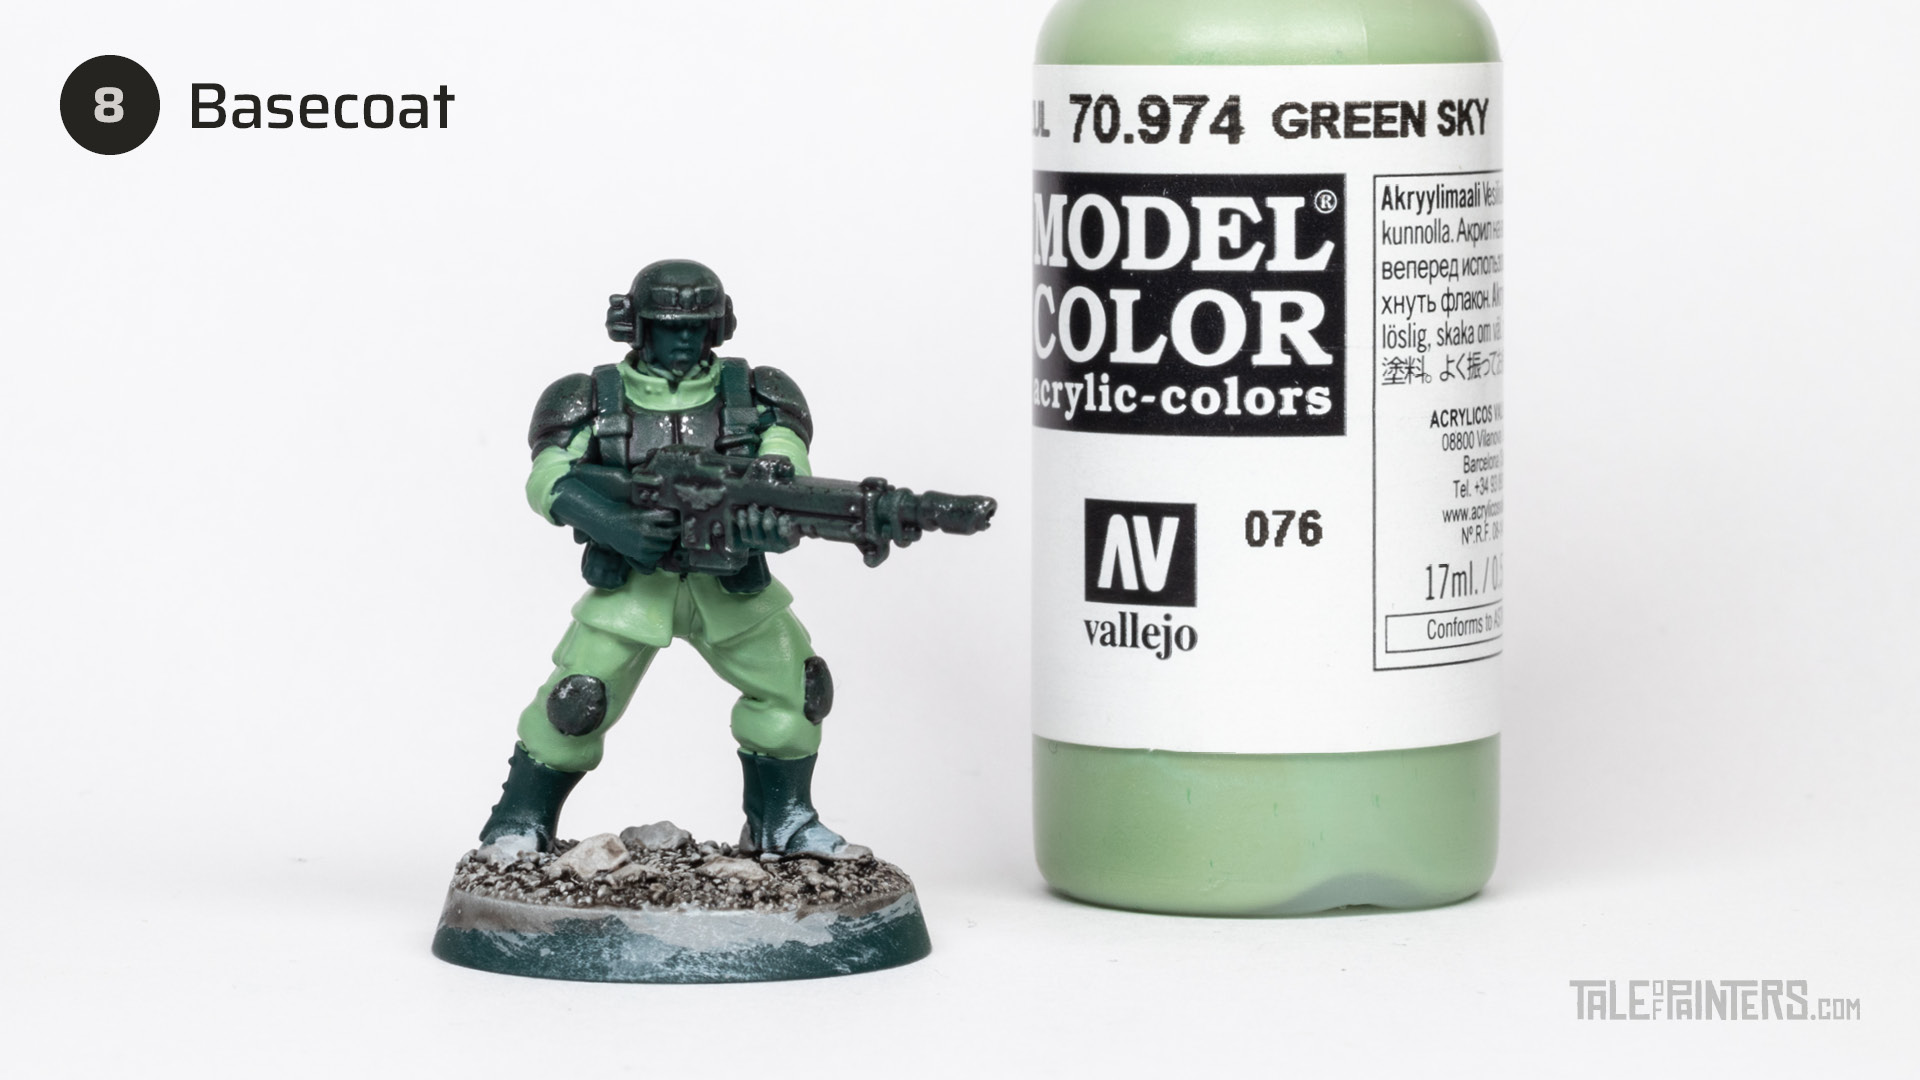
Basecoat the fatigues with Vallejo Model Color Green Sky. This paint has an amazing opacity and covers in only two slightly thinned coats. Closest Citadel Colour would be [Skarsnik Green with a little bit of Corax White].
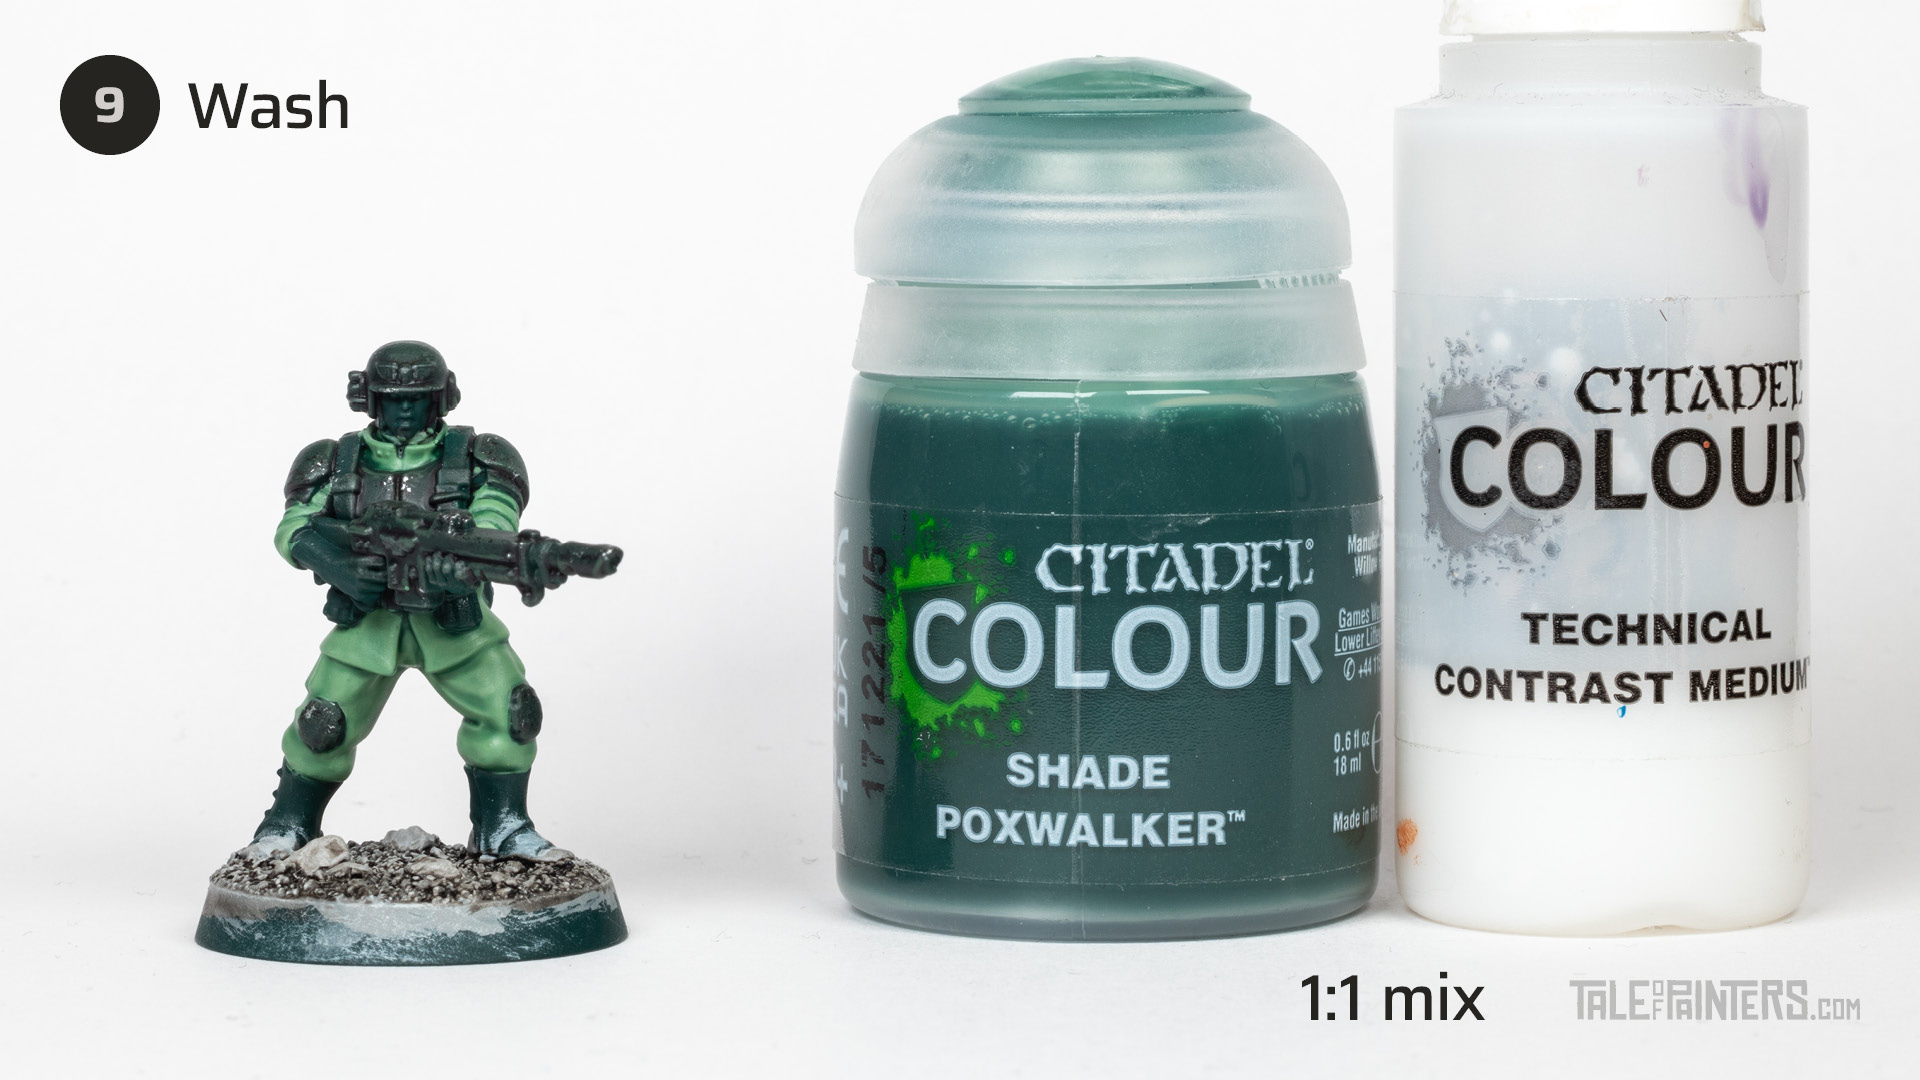
Mix Poxwalker Shade paint 1:1 with Contrast Medium and apply it generously all over the fatigues. Wait for a moment for the wash to settle, then soak up any excess with a clean damp brush.
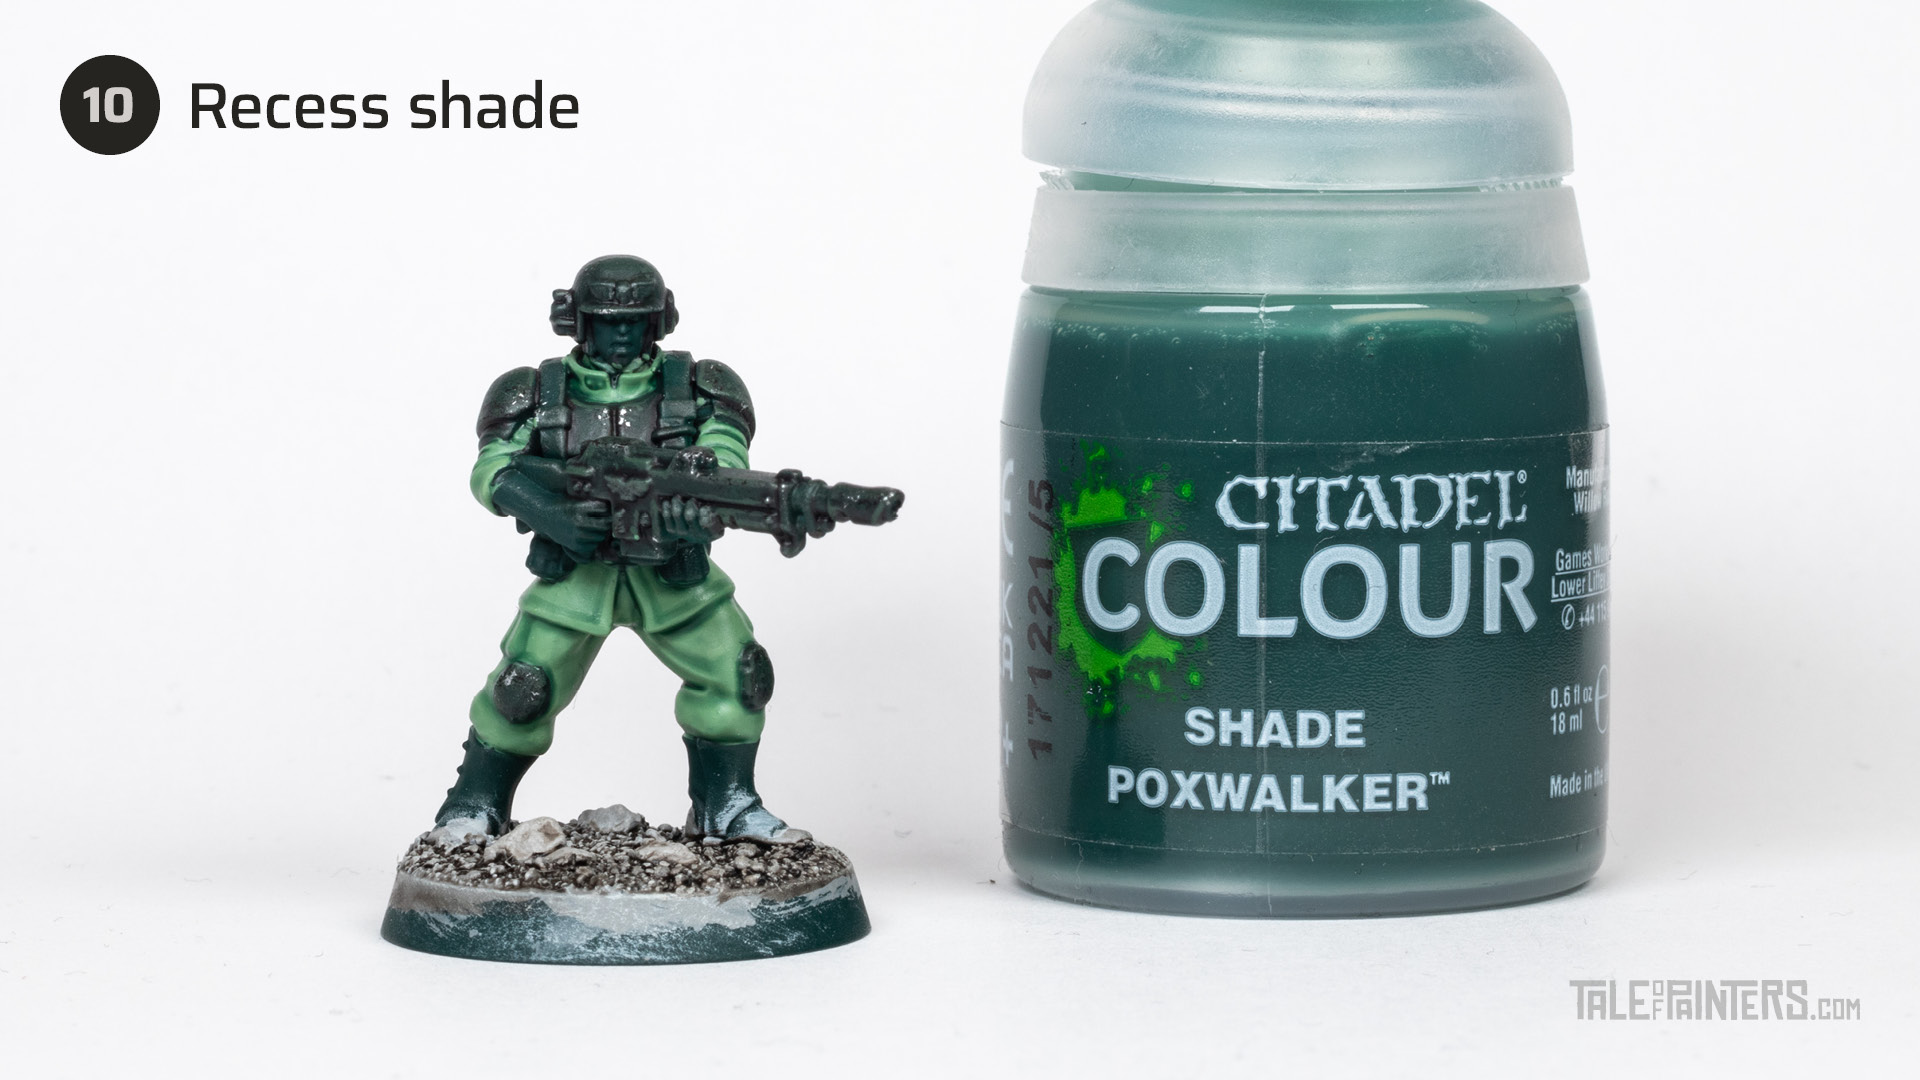
Once dry, deepen the shading by painting pure Poxwalker directly into the most prominent folds and creases and where the fatigues meet the armour and other details.
How to paint the details

Basecoat the backpack, straps, pouches, and gaiters with Two Thin Coats Ancient Forest [or Gorthor Brown].
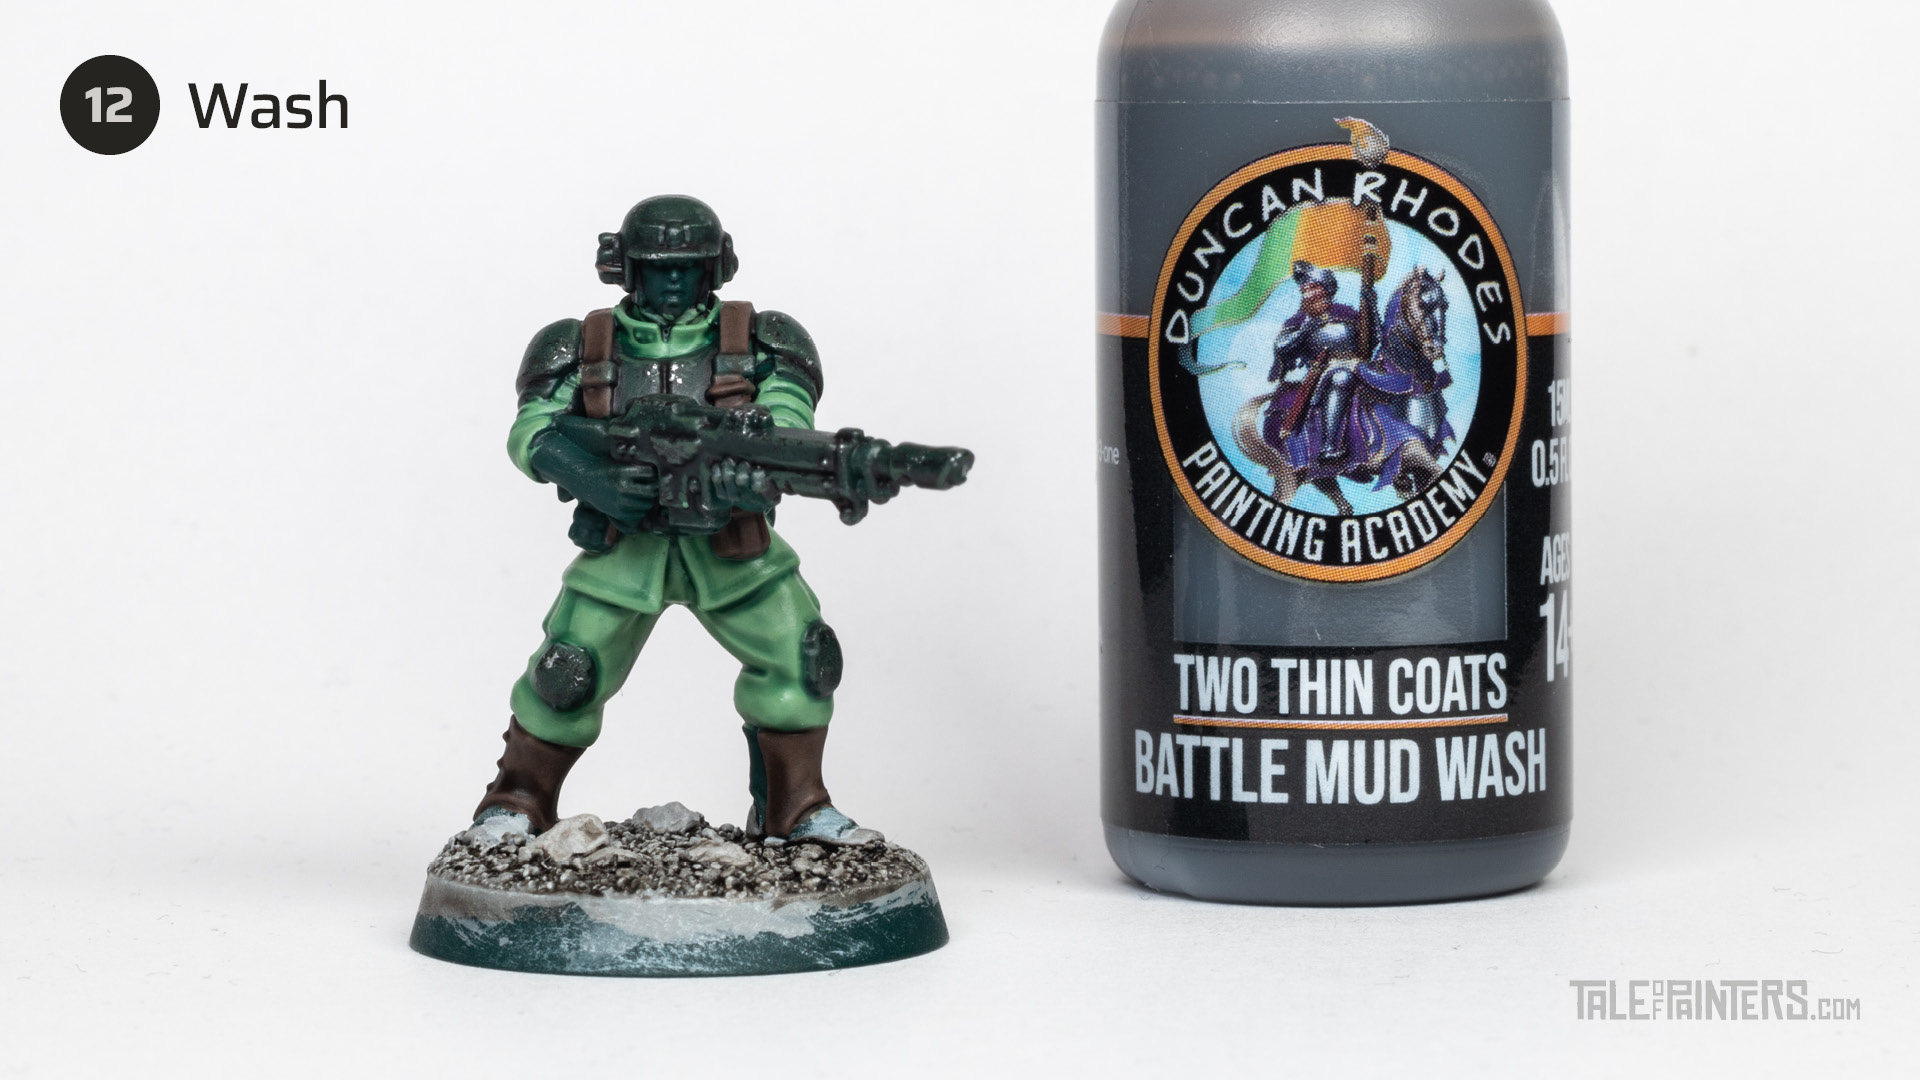
Wash the brown leather with Two Thin Coats Battle Mud Wash [or Agrax Earthshade].
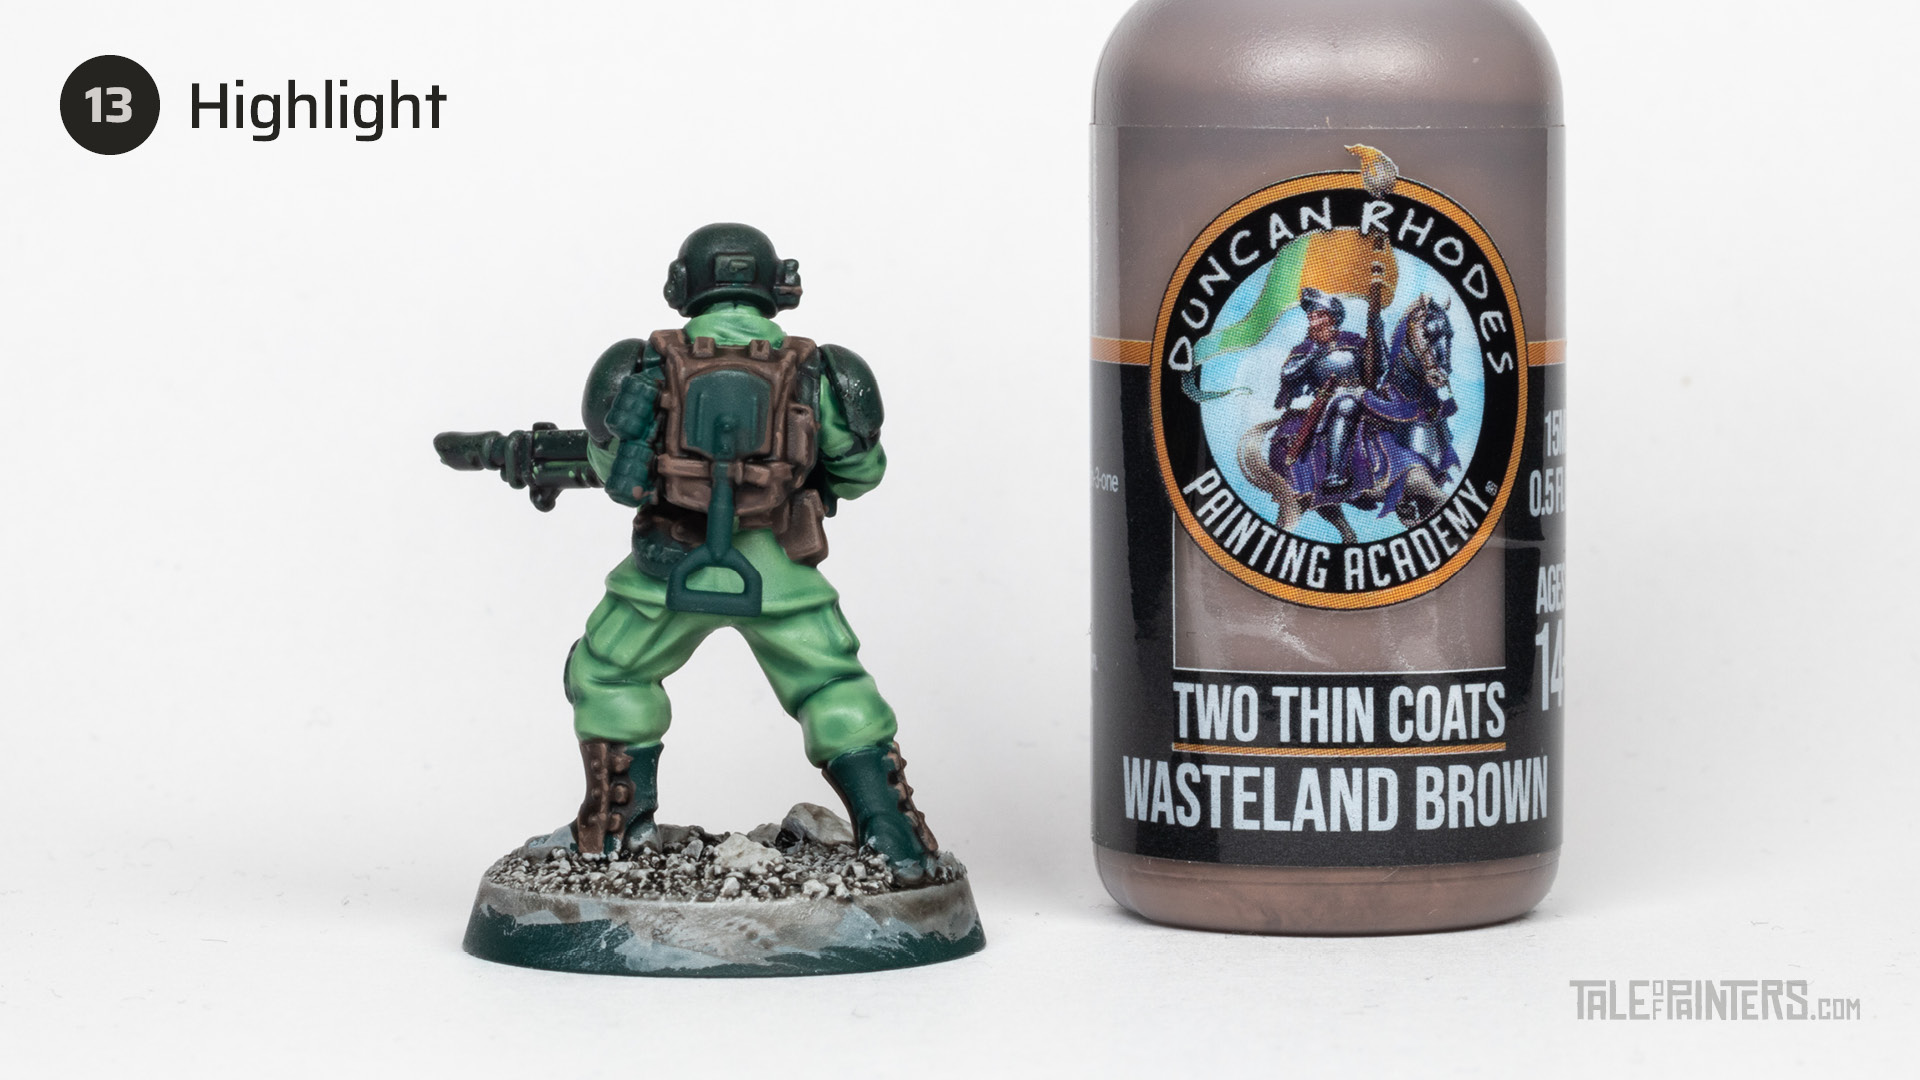
Highlight the leather with Two Thin Coats Wasteland Brown [or a Gorthor Brown / Karak Stone mix]. I kept the highlights slightly irregular to mimic a worn appearance.
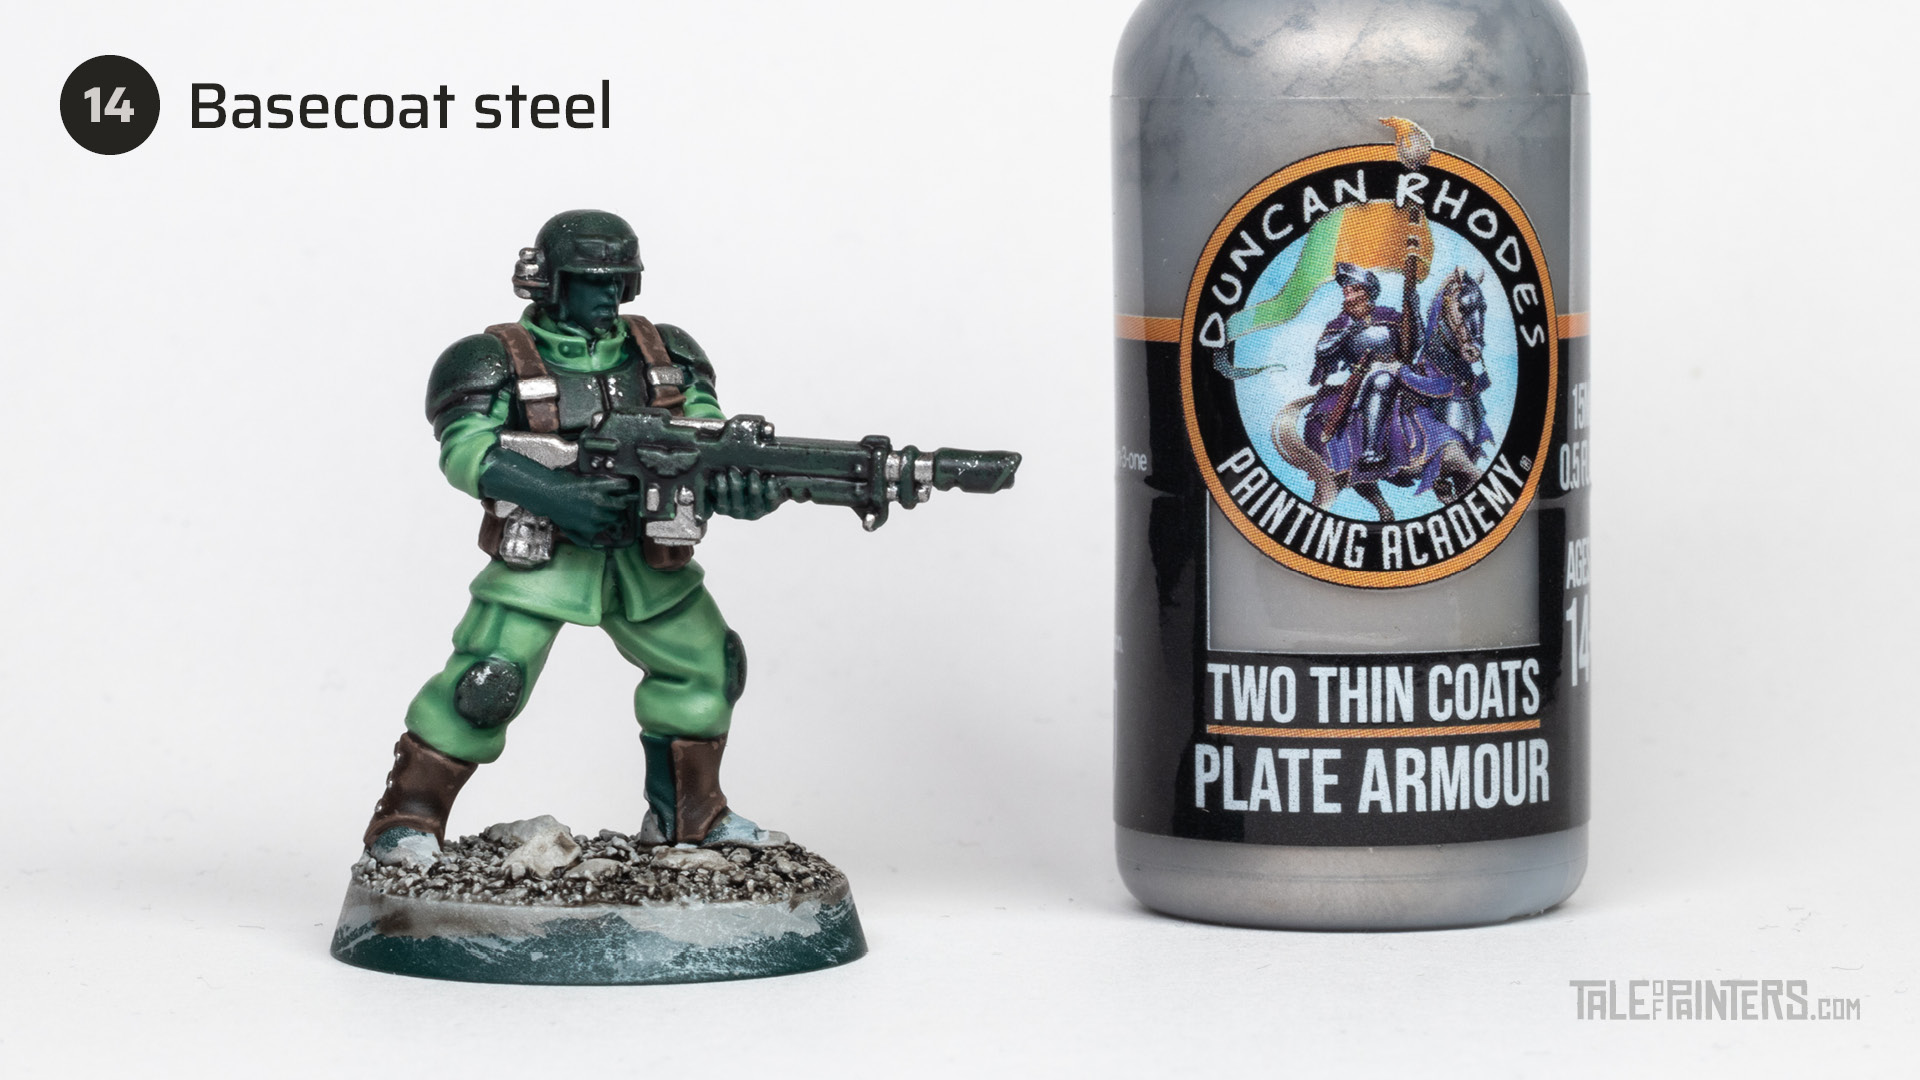
Basecoat all of the steel with Two Thin Coats Plate Armour [or Iron Hands Steel].
Wash the metal with Two Thin Coats Oblivion Black Wash [or Nuln Oil].

Basecoat the black leather of the boots with Two Thin Coats Death Reaper [or Corvus Black].
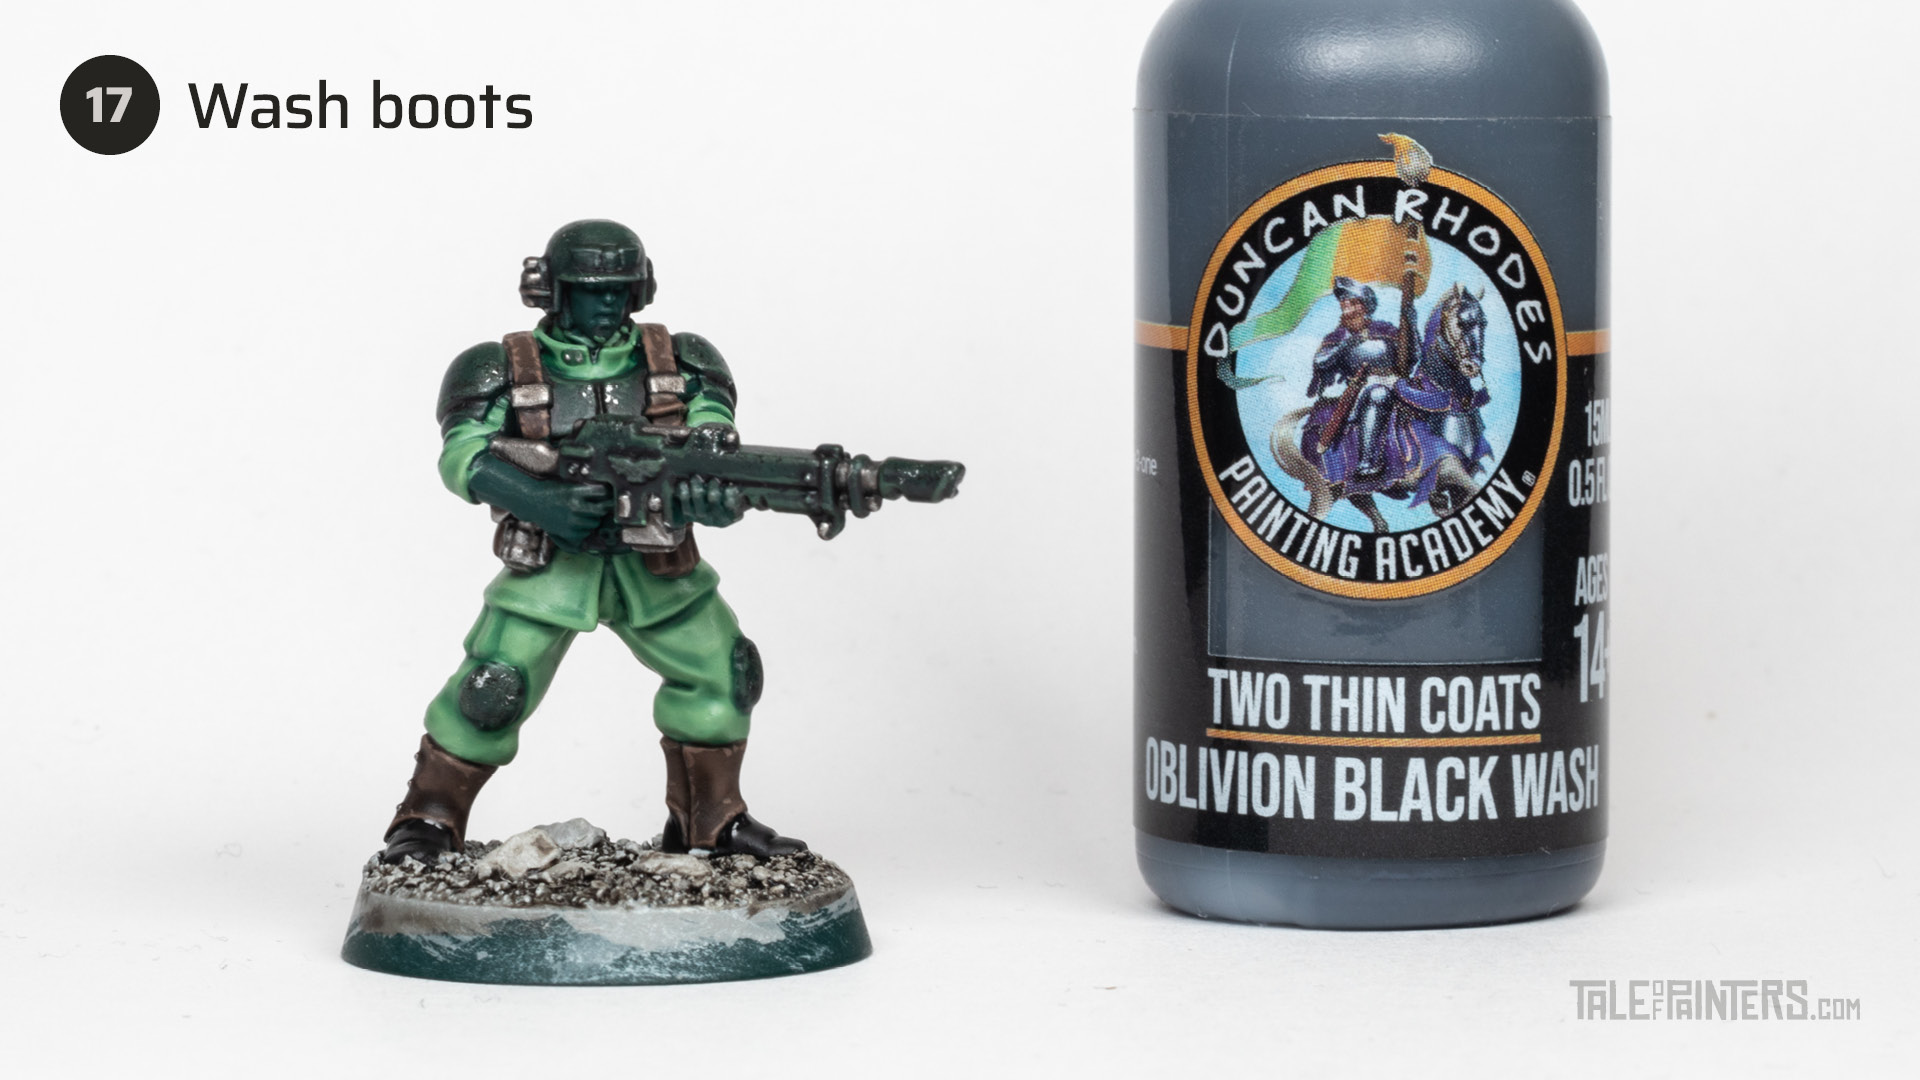
Wash the boots with Two Thin Coats Oblivion Black Wash [or Nuln Oil].
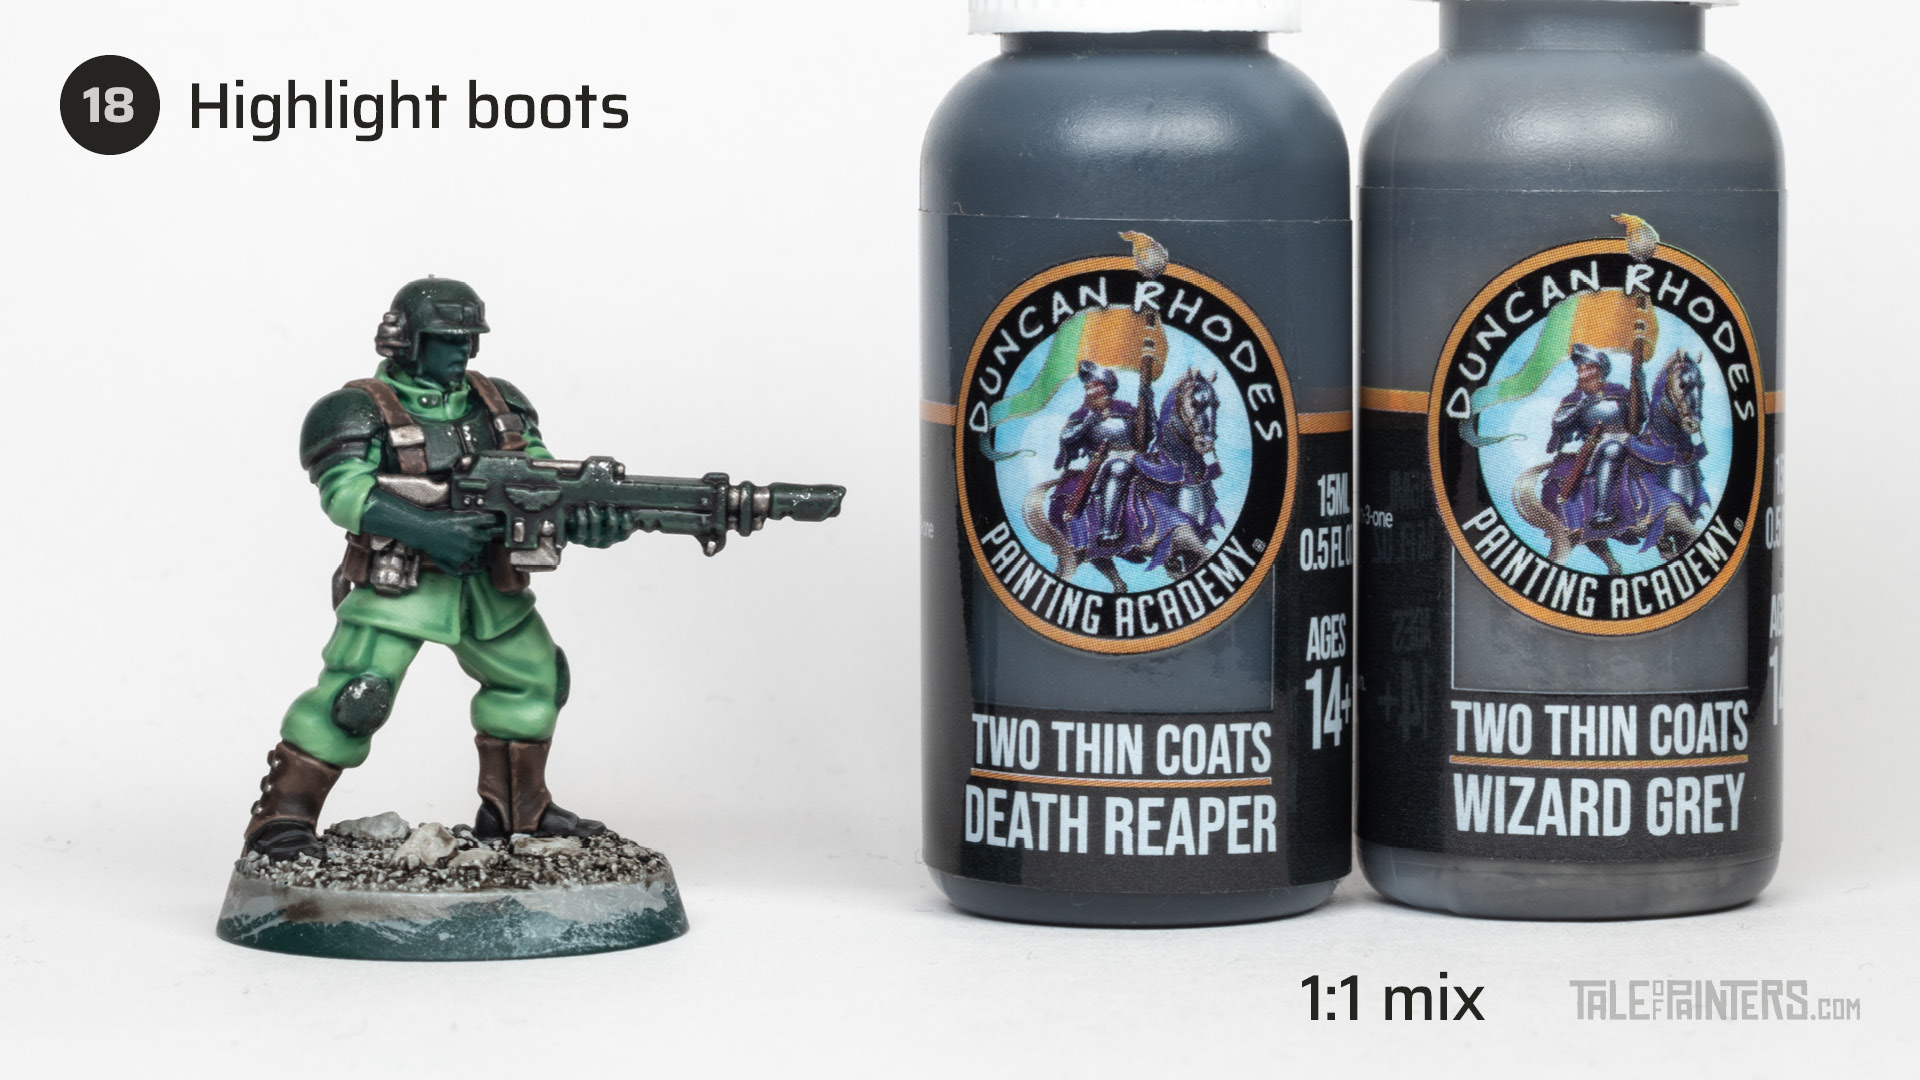
Highlight the boots with a 1:1 mix of Two Thin Coats Death Reaper and Two Thin Coats Wizard Grey [or just use Eshin Grey].
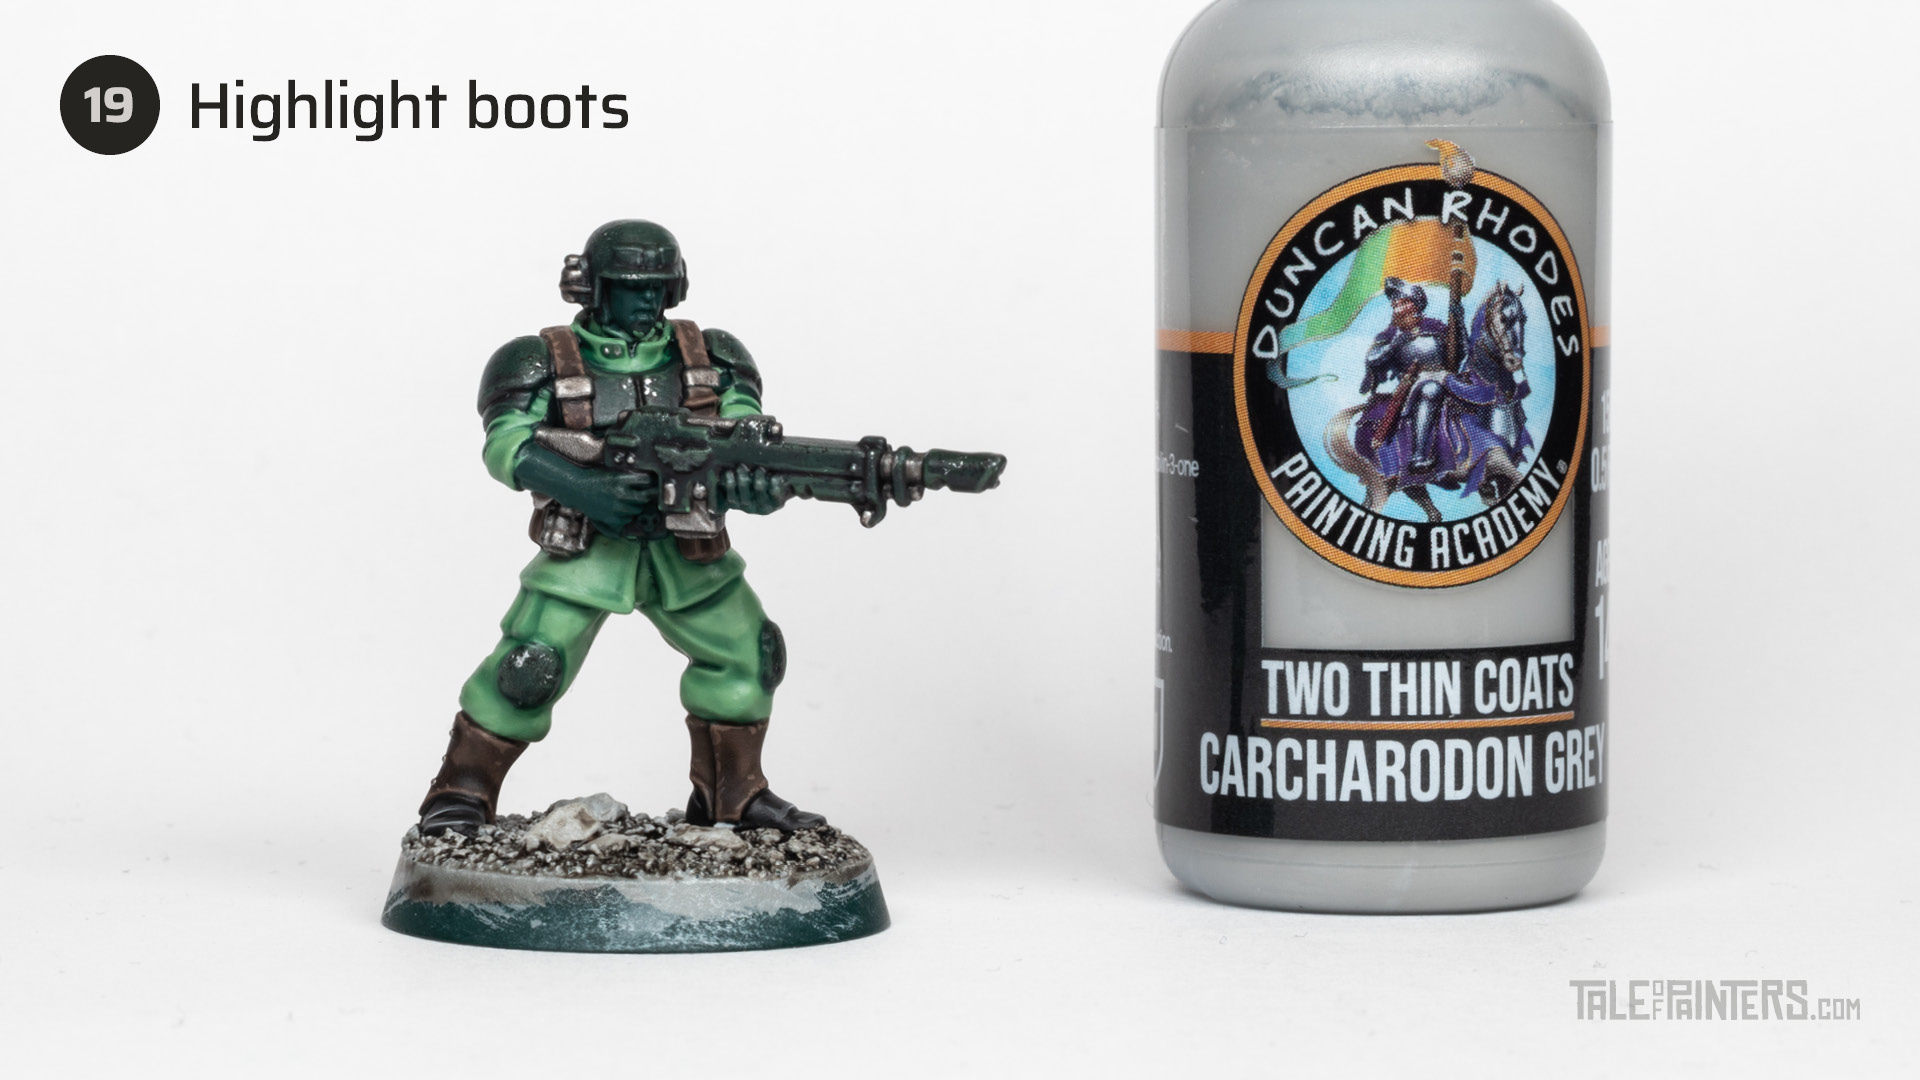
Apply a sharp highlight of Two Thin Coats Carcharodon Grey [or Dawnstone] to give the boots a polished look.
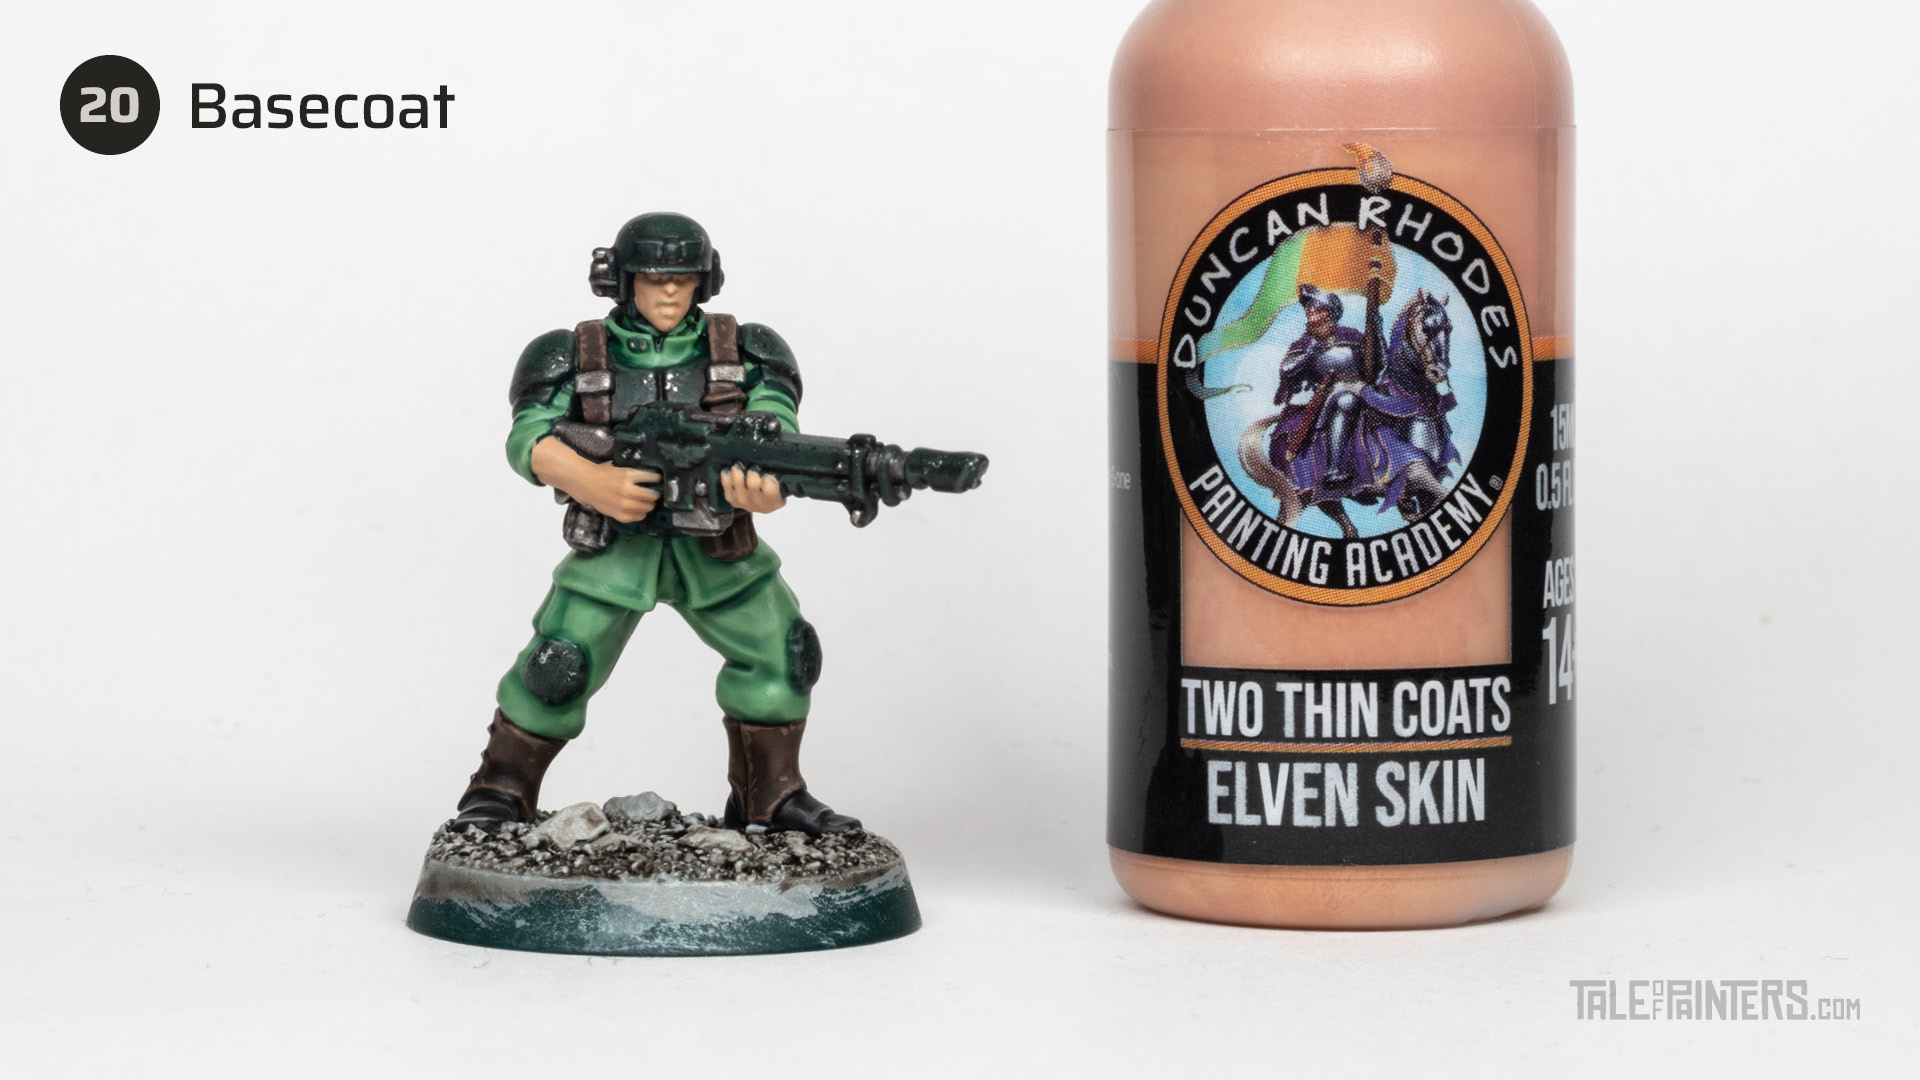
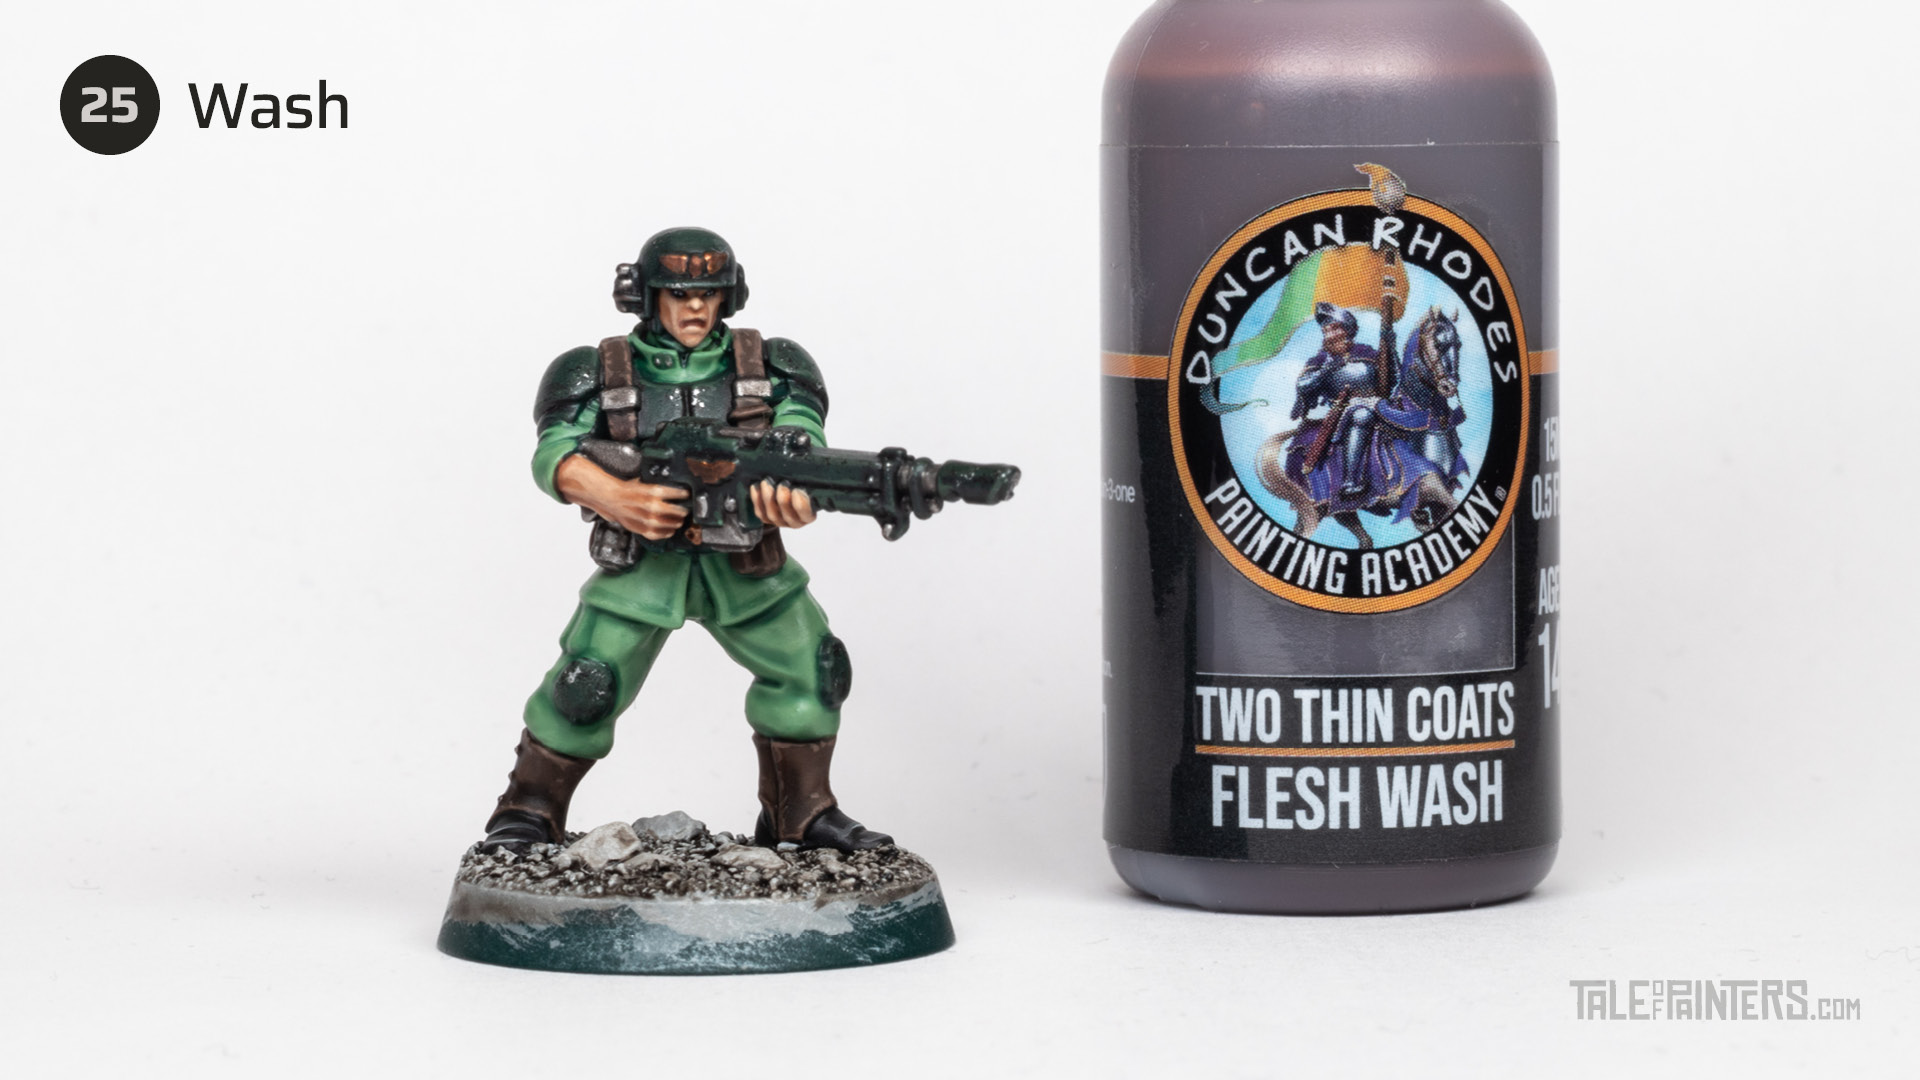
Basecoat the flesh with Two Thin Coats Elven Skin [or Kislev Flesh].
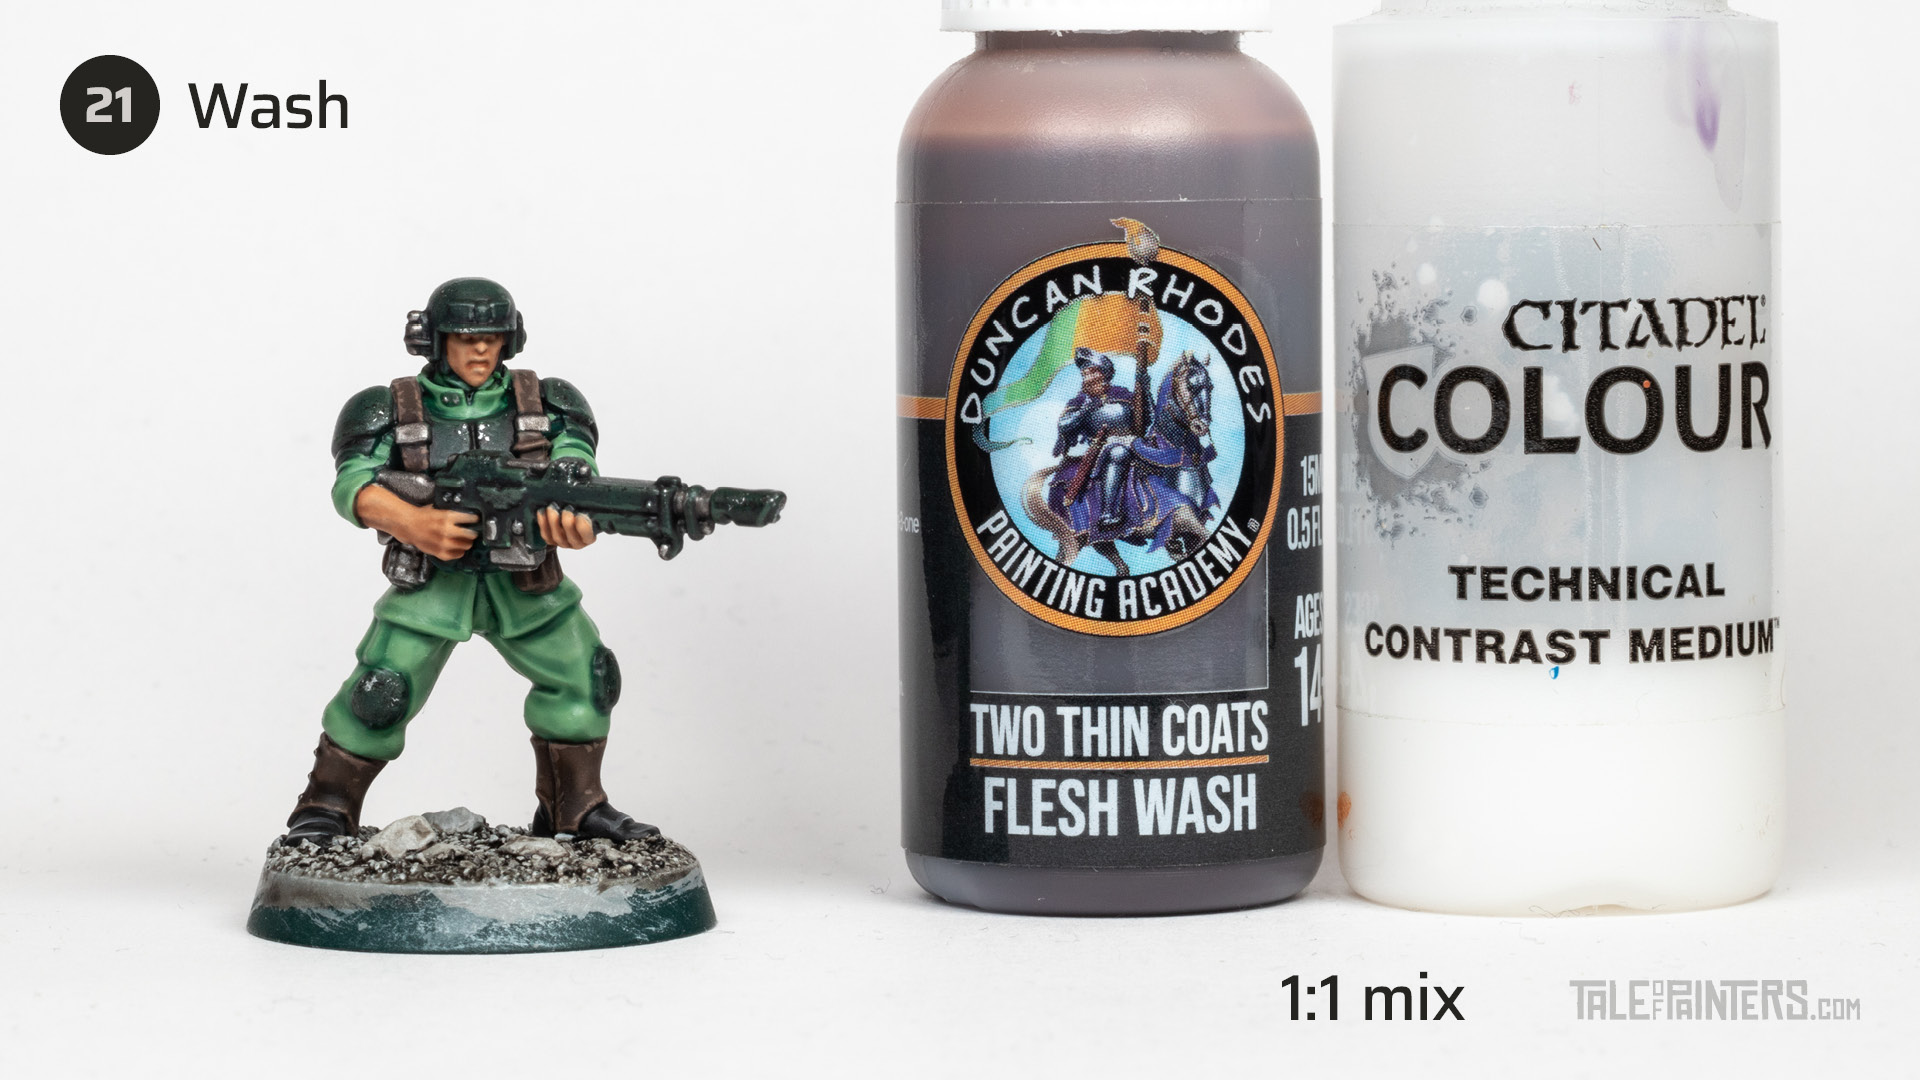
Mix Two Thin Coats Flesh Wash 1:1 with Contrast Medium and apply it all over the skin [when using Reikland Fleshshade you probably don’t need extra thinning].
At this stage, I also painted the eyes. Learn an easier way to paint eyes in this tutorial.
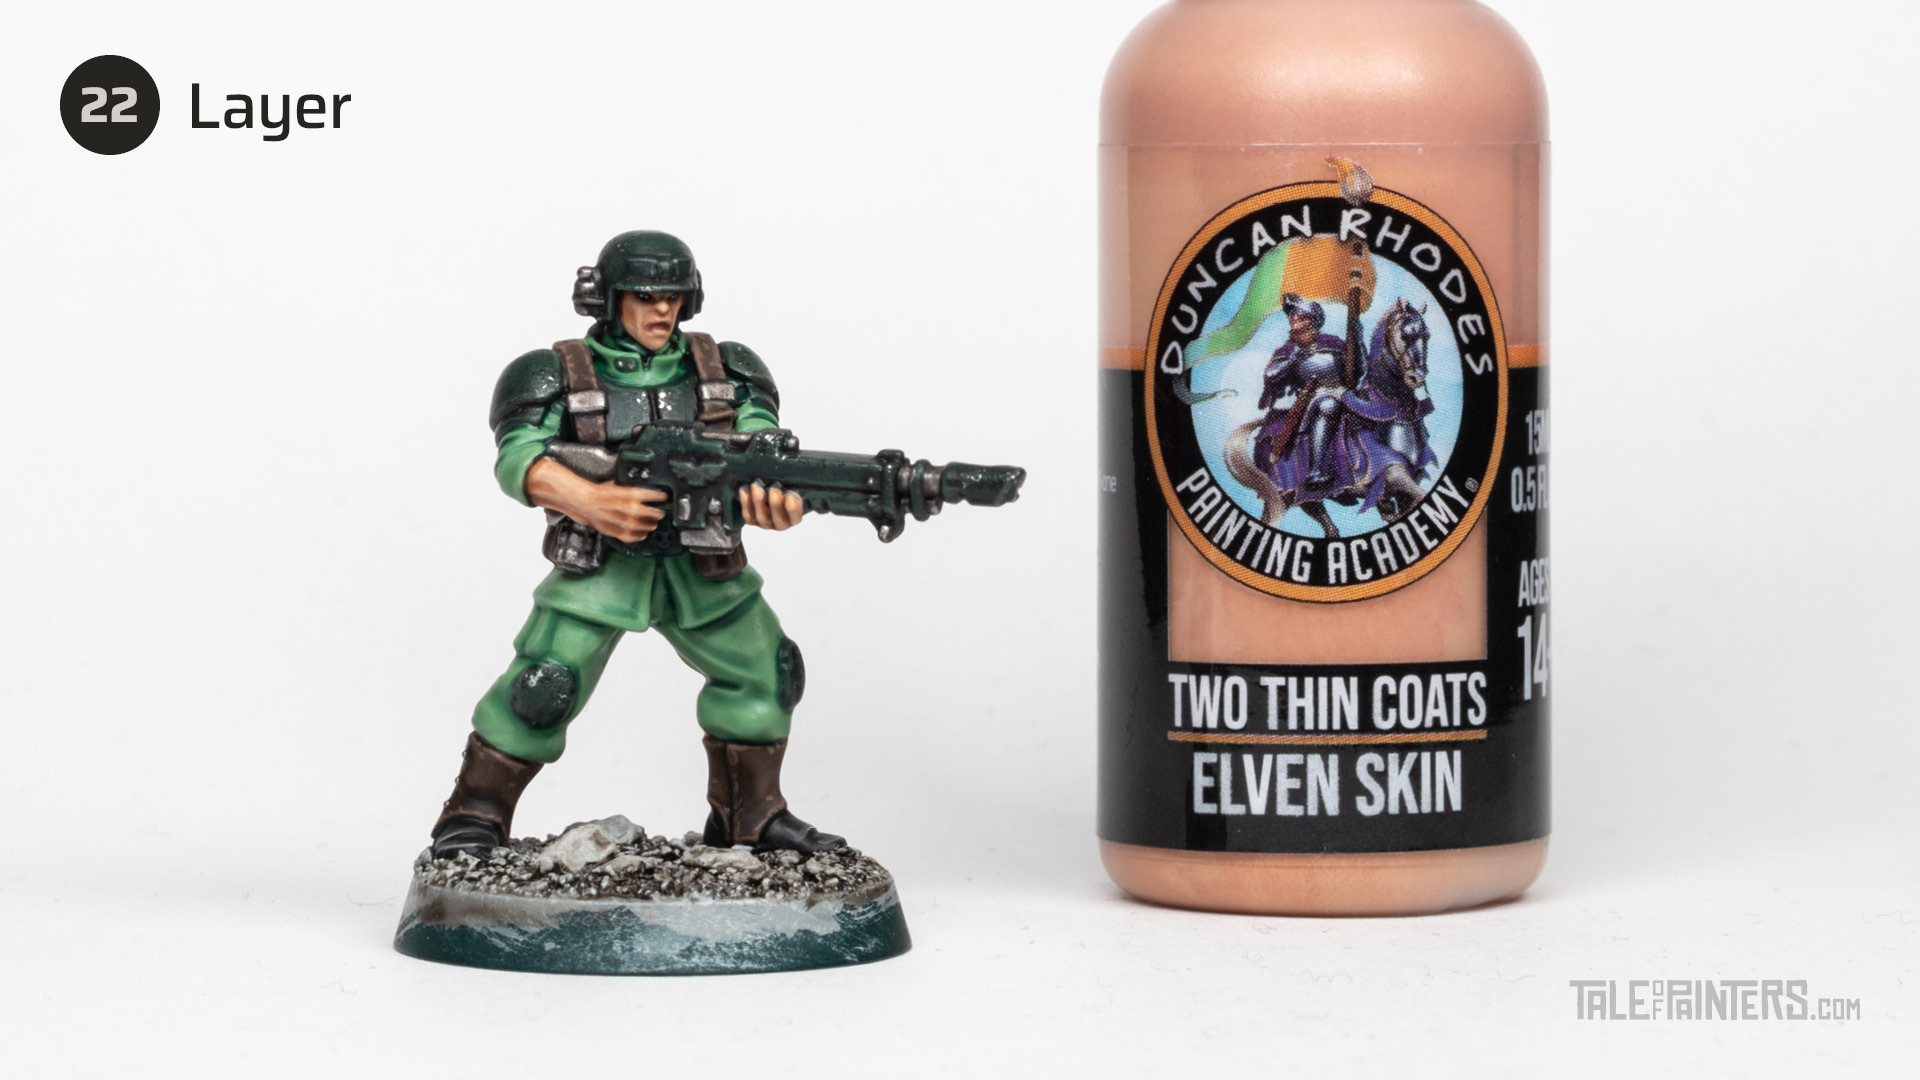
Layer the skin with Two Thin Coats Elven Skin [or Kislev Flesh] while leaving the recesses in the darker colour.
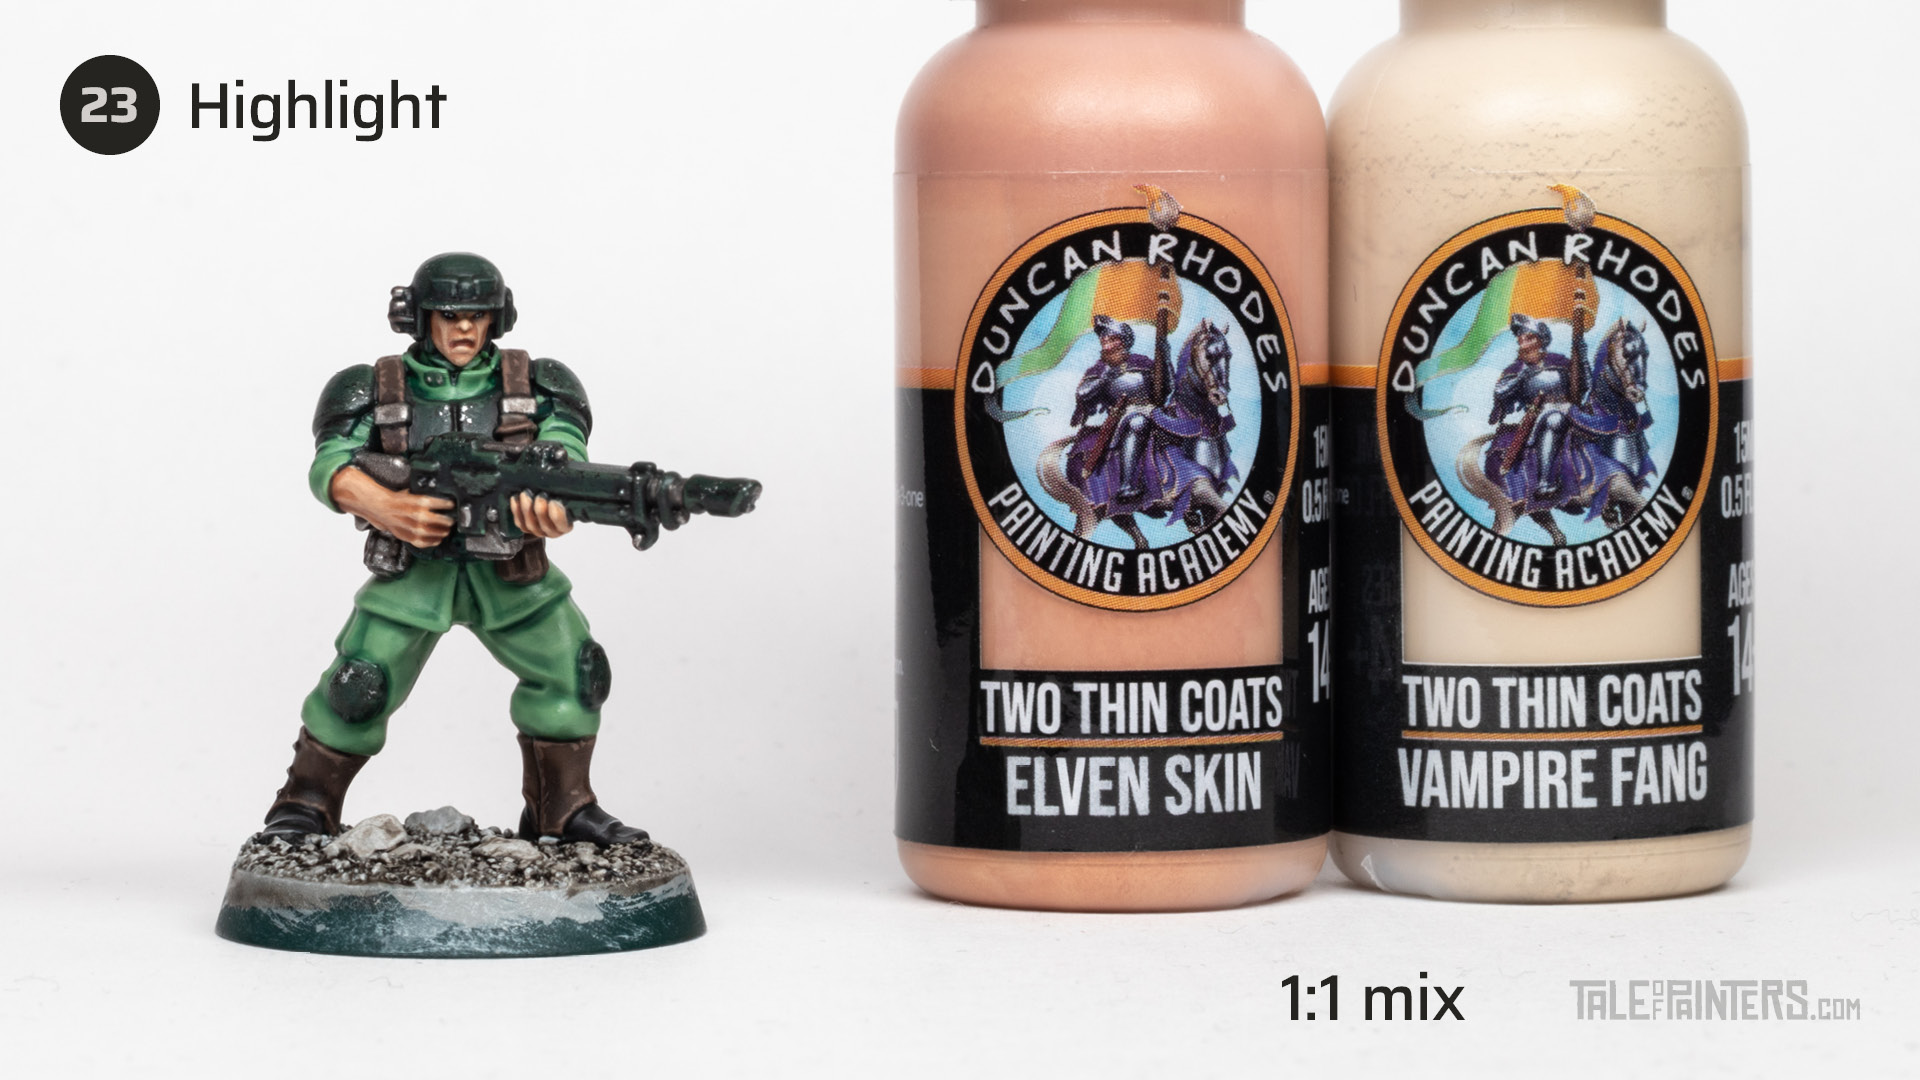
Mix Two Thin Coats Elven Skin [or Kislev Flesh] 1:1 with Two Thin Coats Vampire Fang [or Wraithbone] and pick out the most prominent features such as the brows, nose, lips, cheek, and knuckles.
Caucasian skin is only one way to paint Cadians, here on Tale of Painters you can find plenty more tutorials for painting various skin tones, for example dark skin, golden skin, or tanned skin.
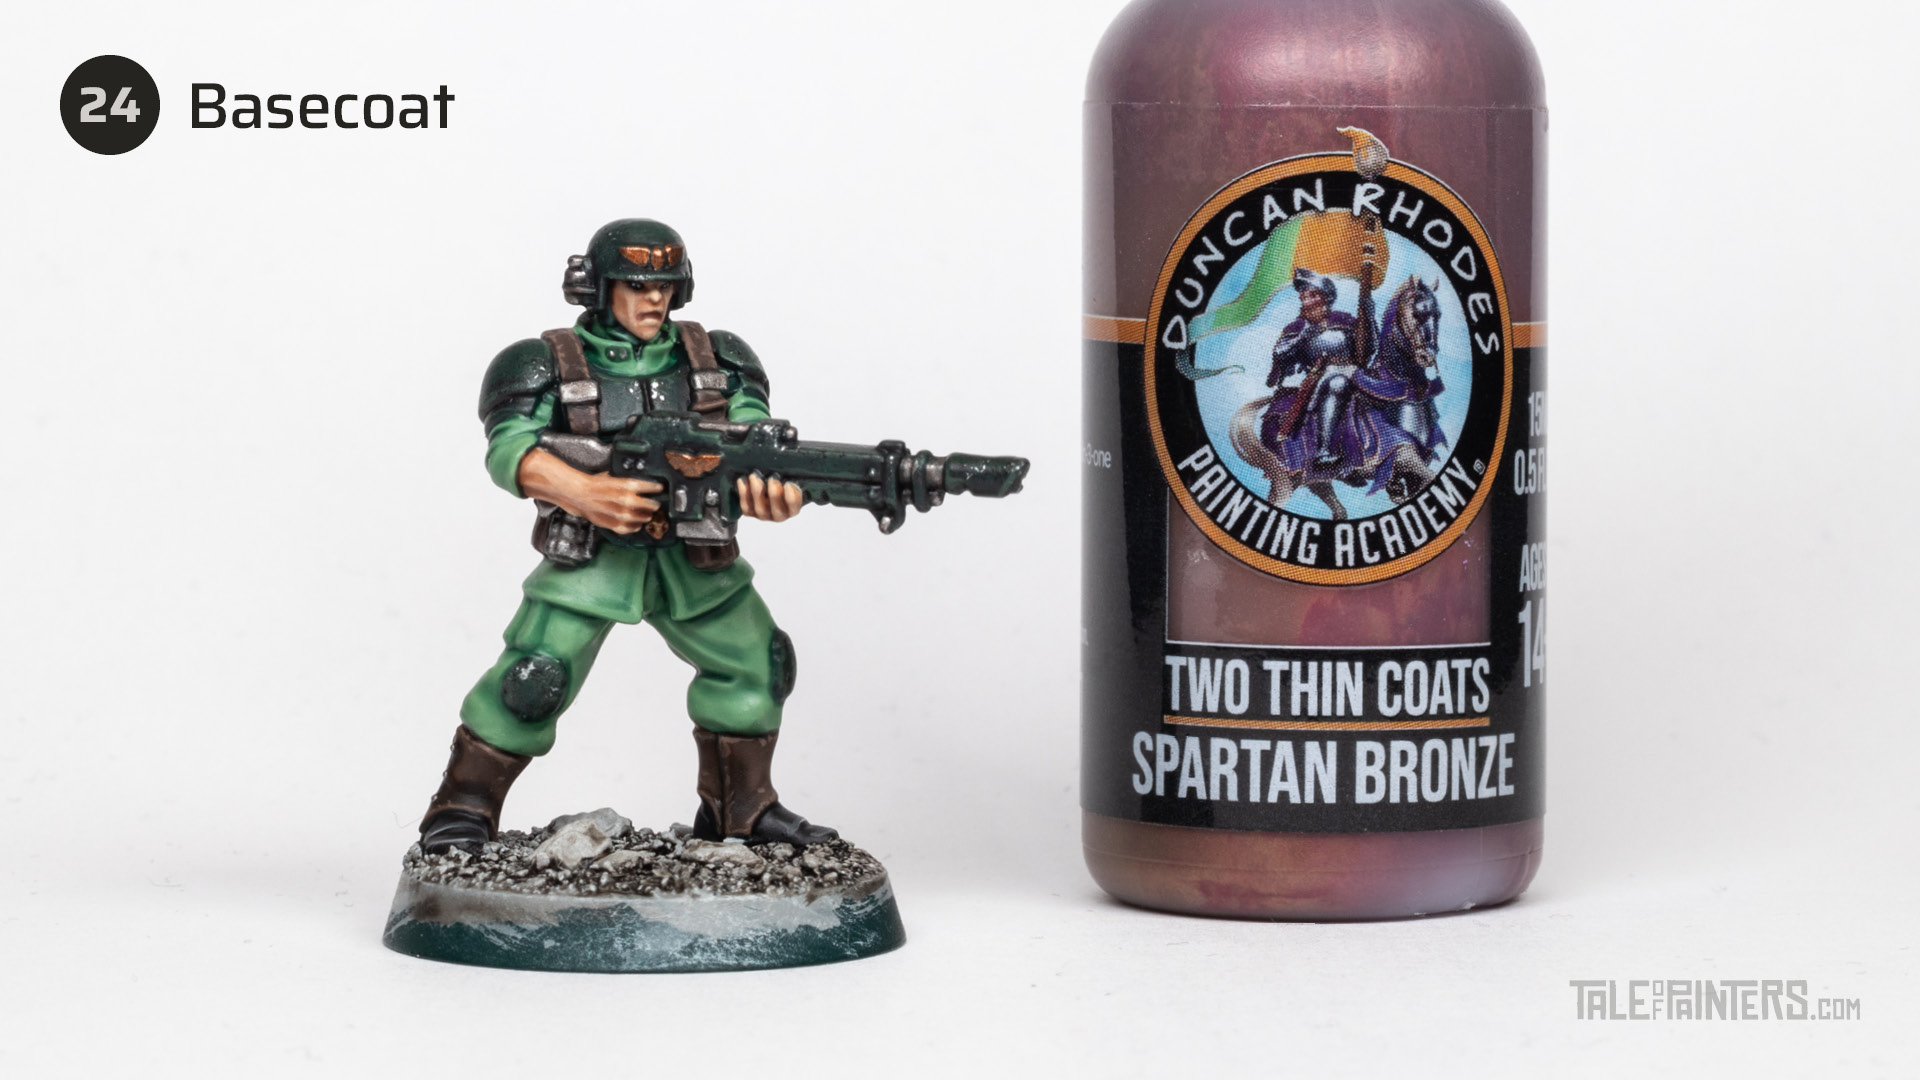
Basecoat the Imperial aequila icons with Spartan Bronze [or Brass Scorpion].
Give the brass a wash of Two Thin Coats Flesh Wash [or Guilliman Flesh].
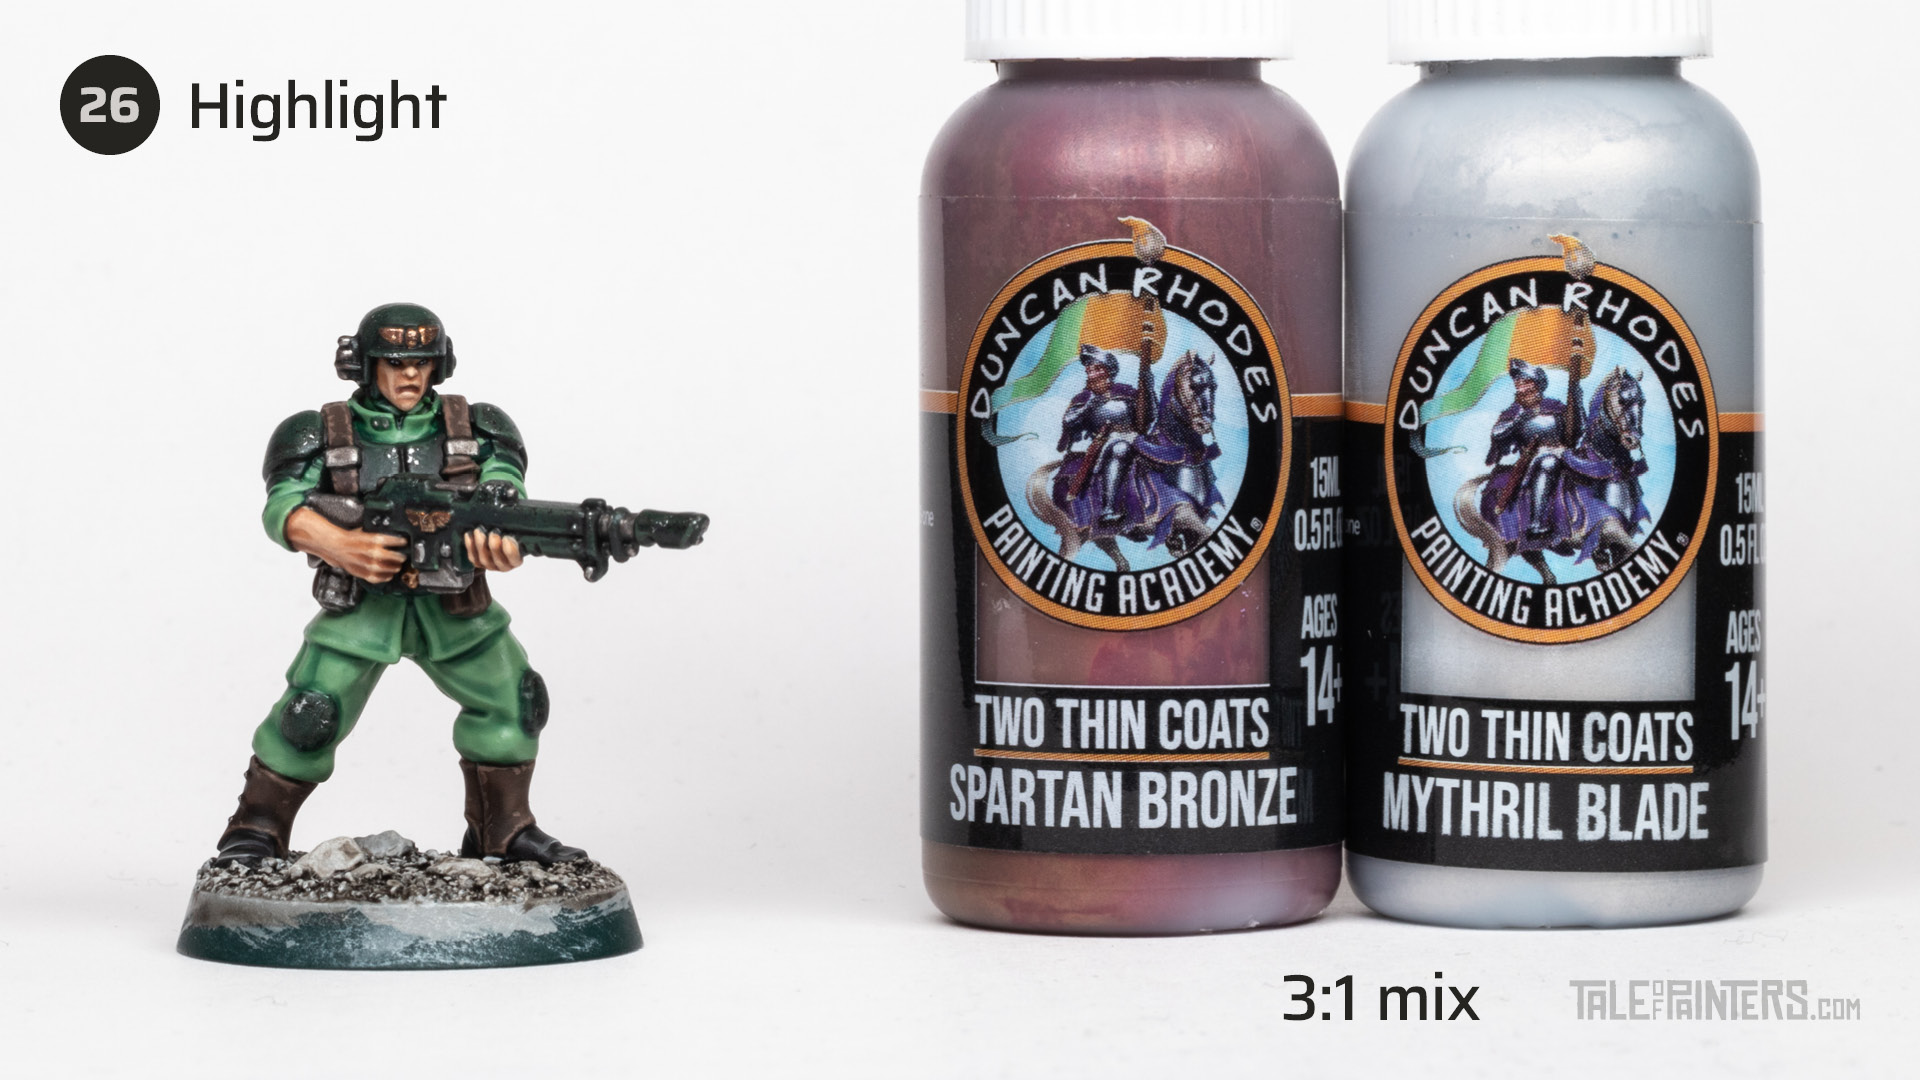
Mix Two Thin Coats Spartan Bronze with Two Thin Coats Mythril Blade at about 3:1 and use this mix to highlight the bronze.
Finishing touches
At this stage, I took a good look at the model and fixed any mistakes or uneven spots, I also decided to pick out the rivets of the lasgun and sharpest corners of the flak armour with little dots of Warpaints Goblin Green [or Skarsnik Green].
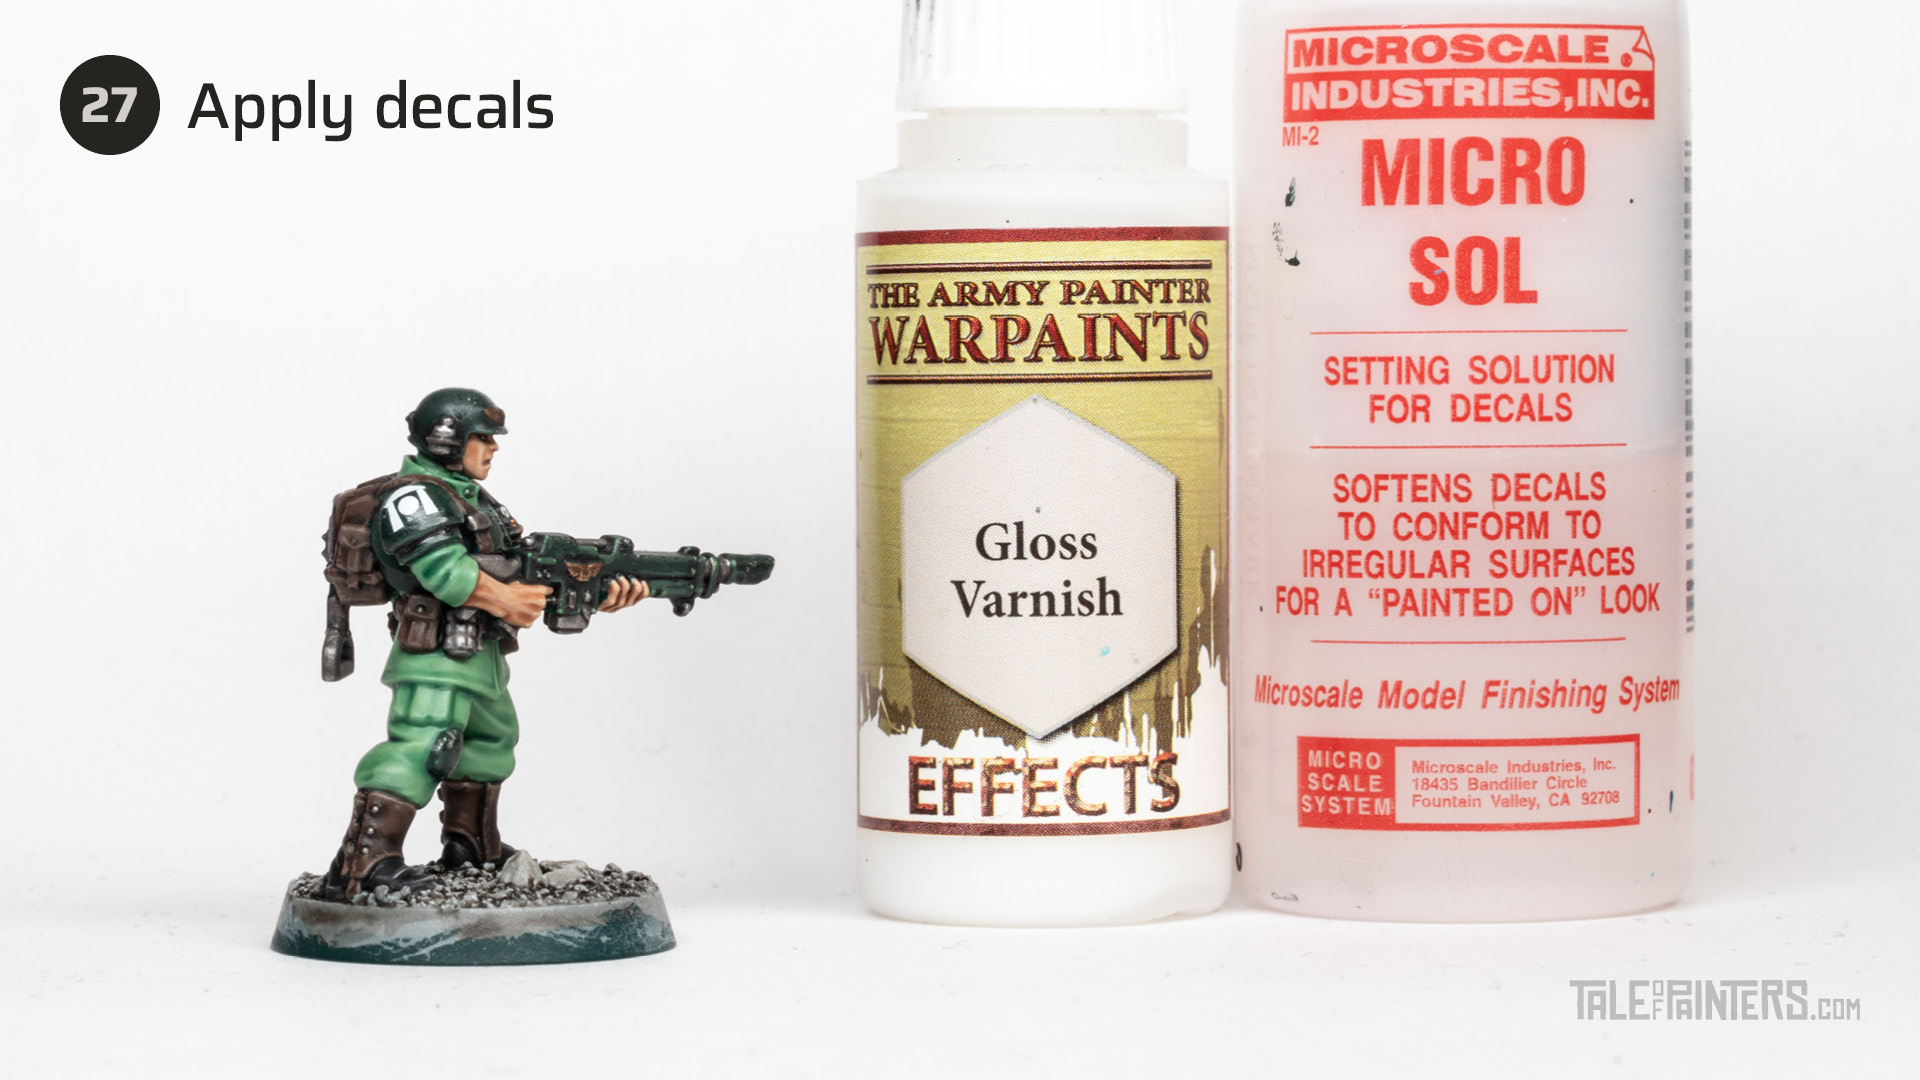
Seal the areas you want to apply a decal to with Warpaints Gloss Varnish [or ‘ardcoat], and, once dry, apply the decal and seal it with multiple coats of Microsol. More about my technique for perfectly adhering decals in this tutorial.
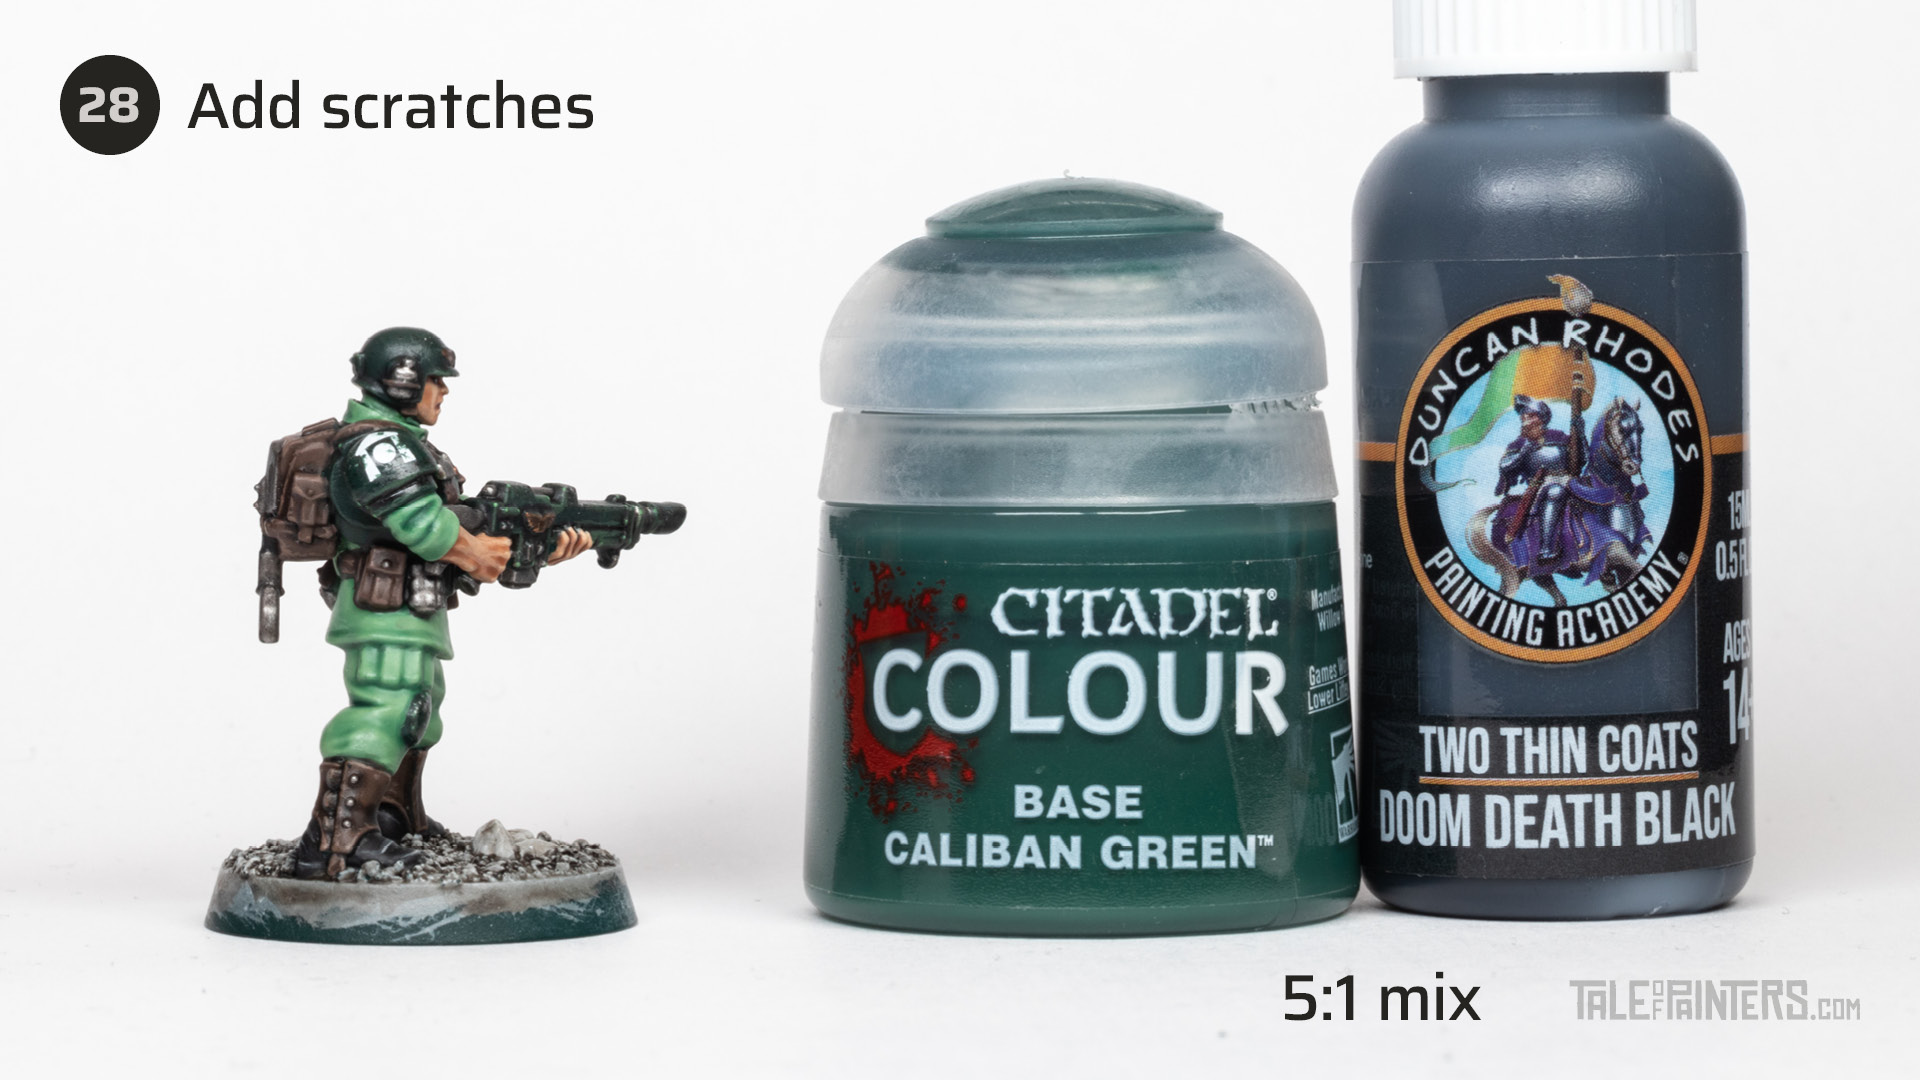
Mix a little bit of Two Thin Coats Doom Death Black [or Abaddon Black] into Caliban Green and paint some scratches over the white Cadian decals.
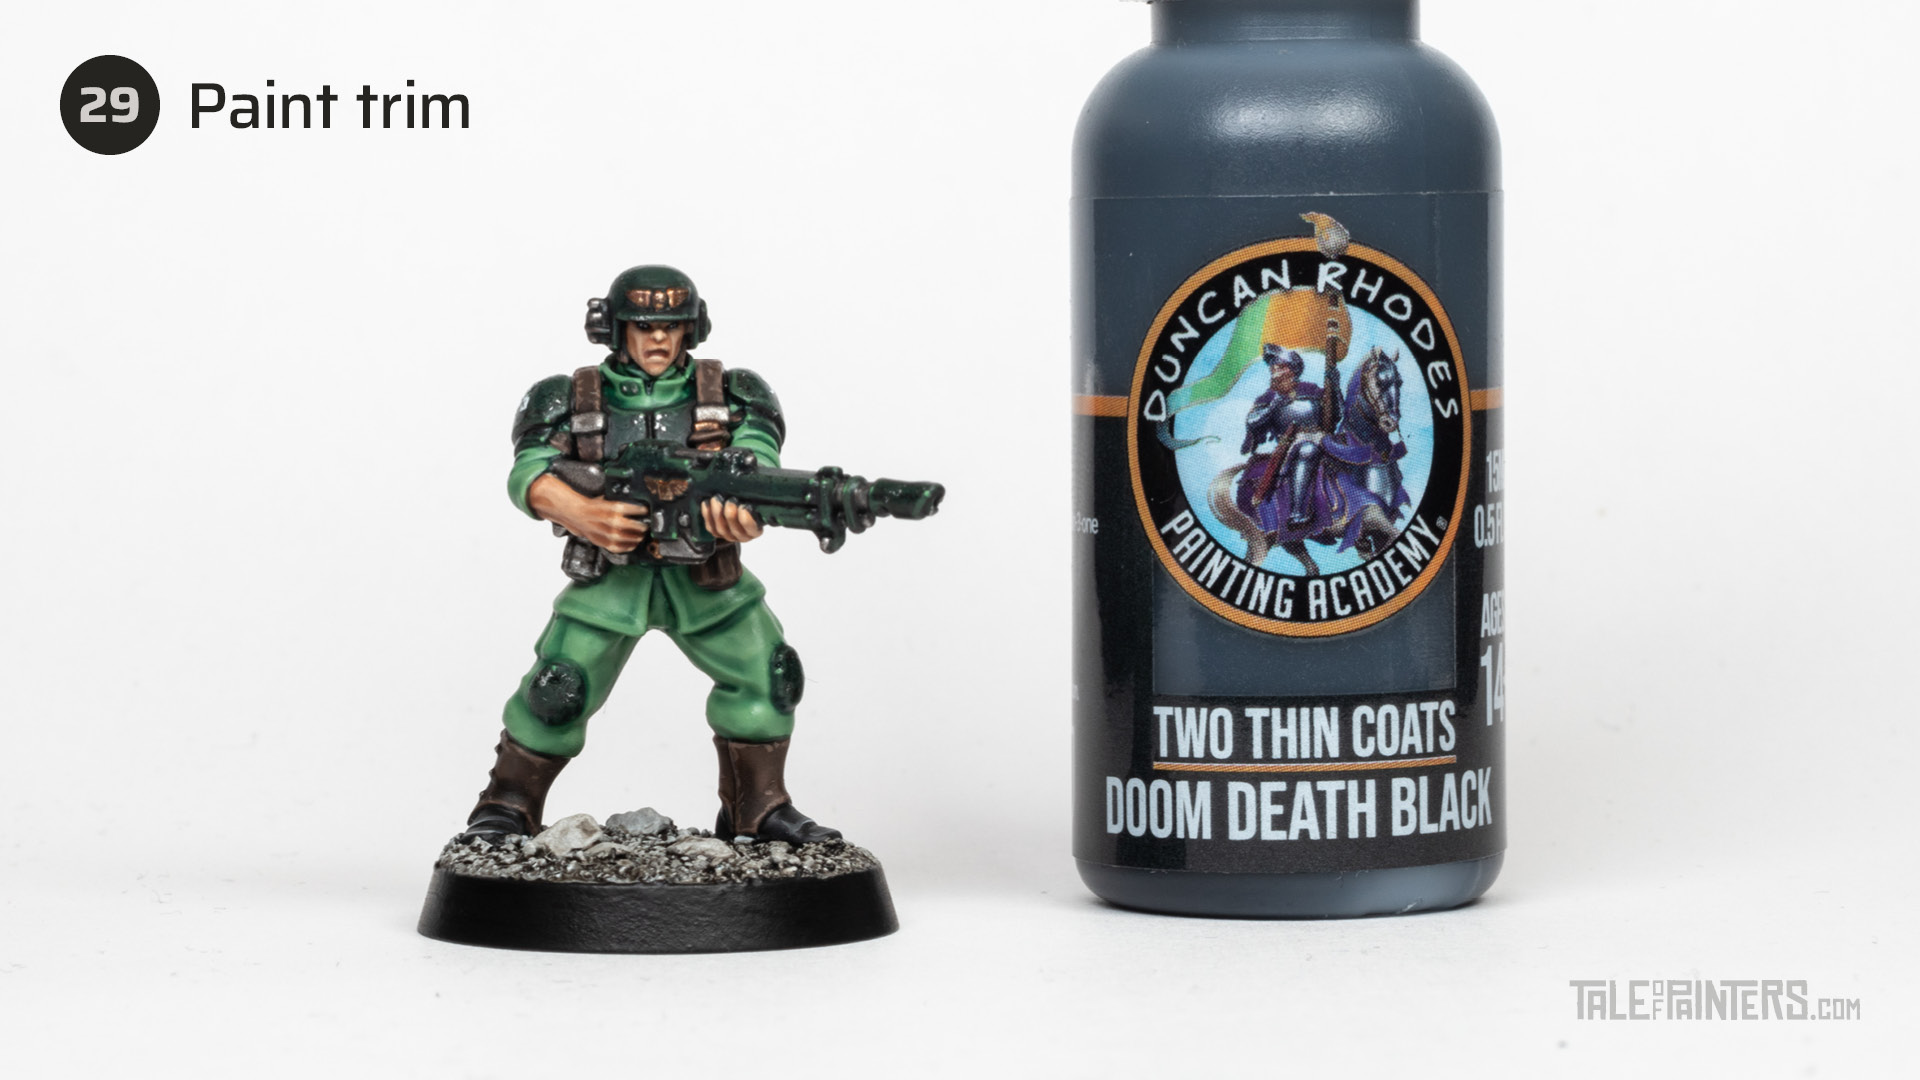
Paint the base trim with Doom Death Black [or Abaddon Black].
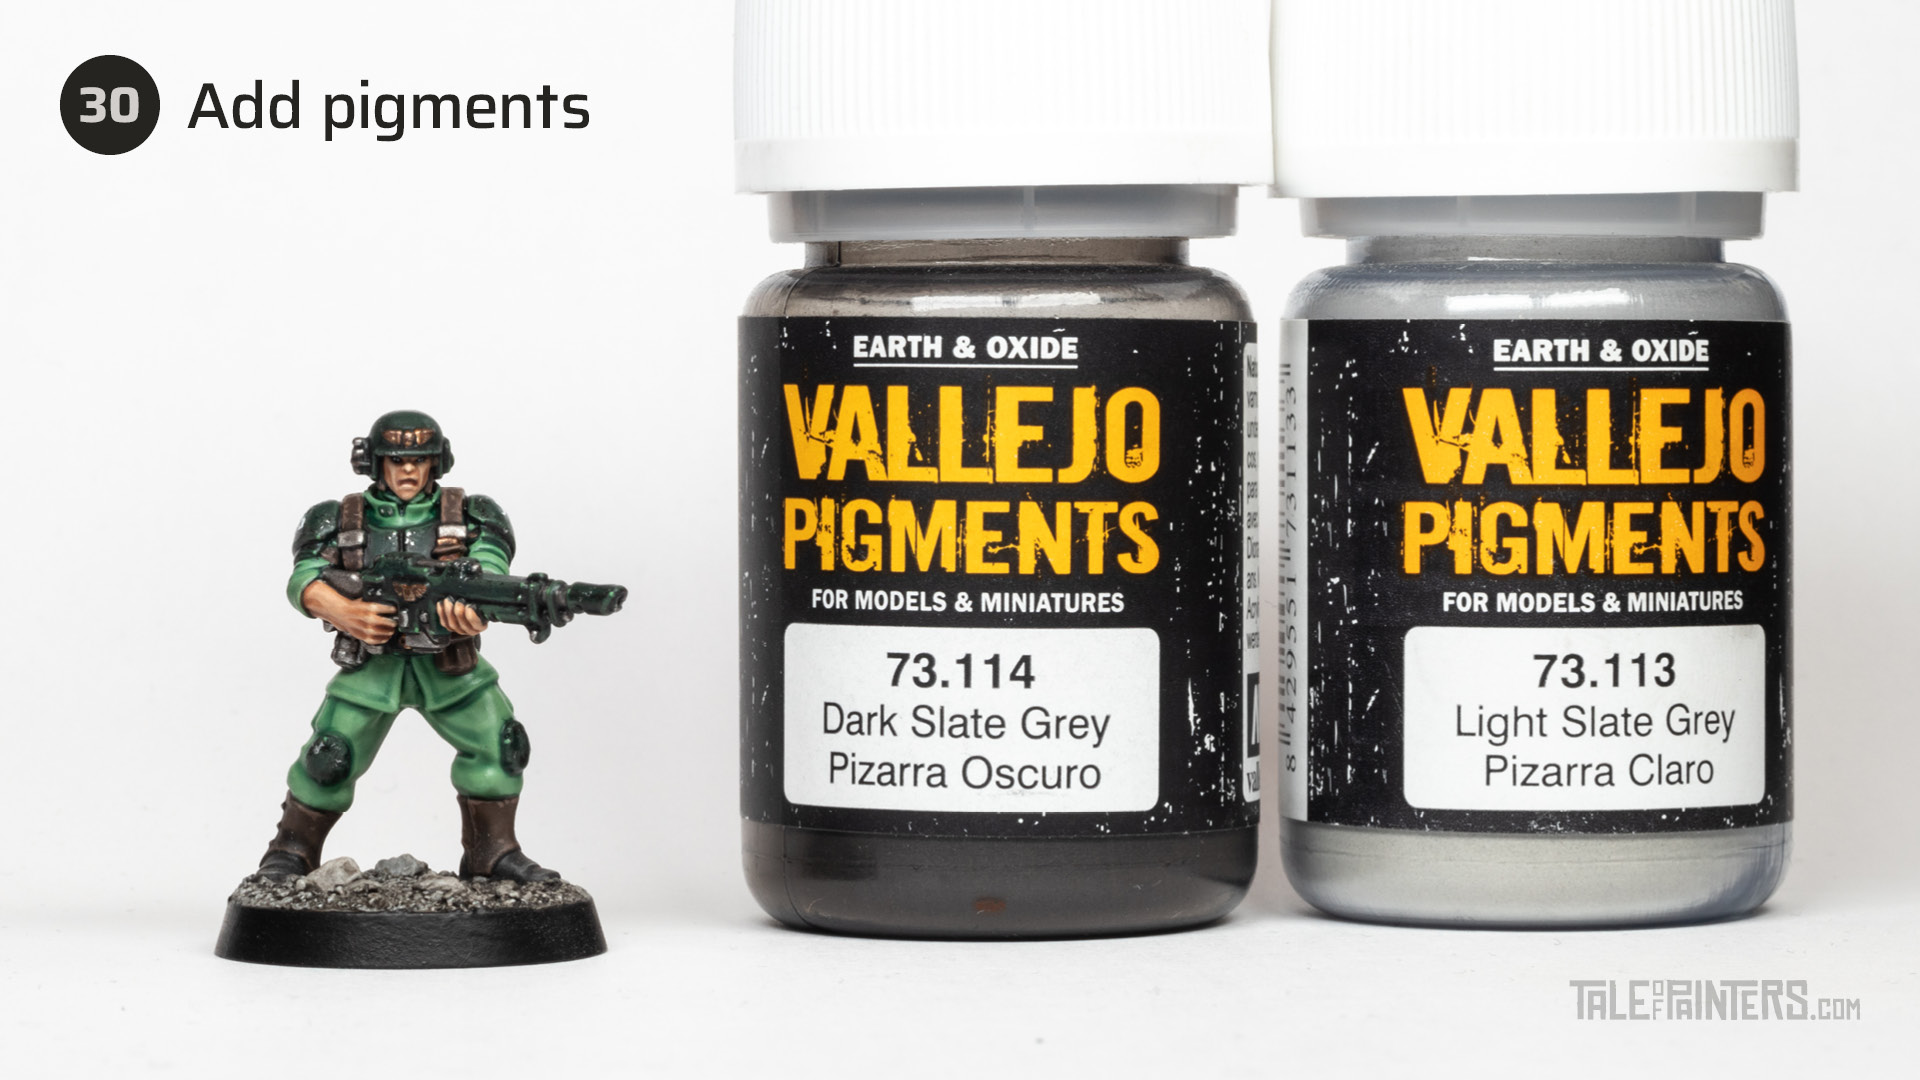
For a dusty appearance, smear the boots with Vallejo Pigments Dark Slate Grey and Light Slate Grey, then blow off the excess.
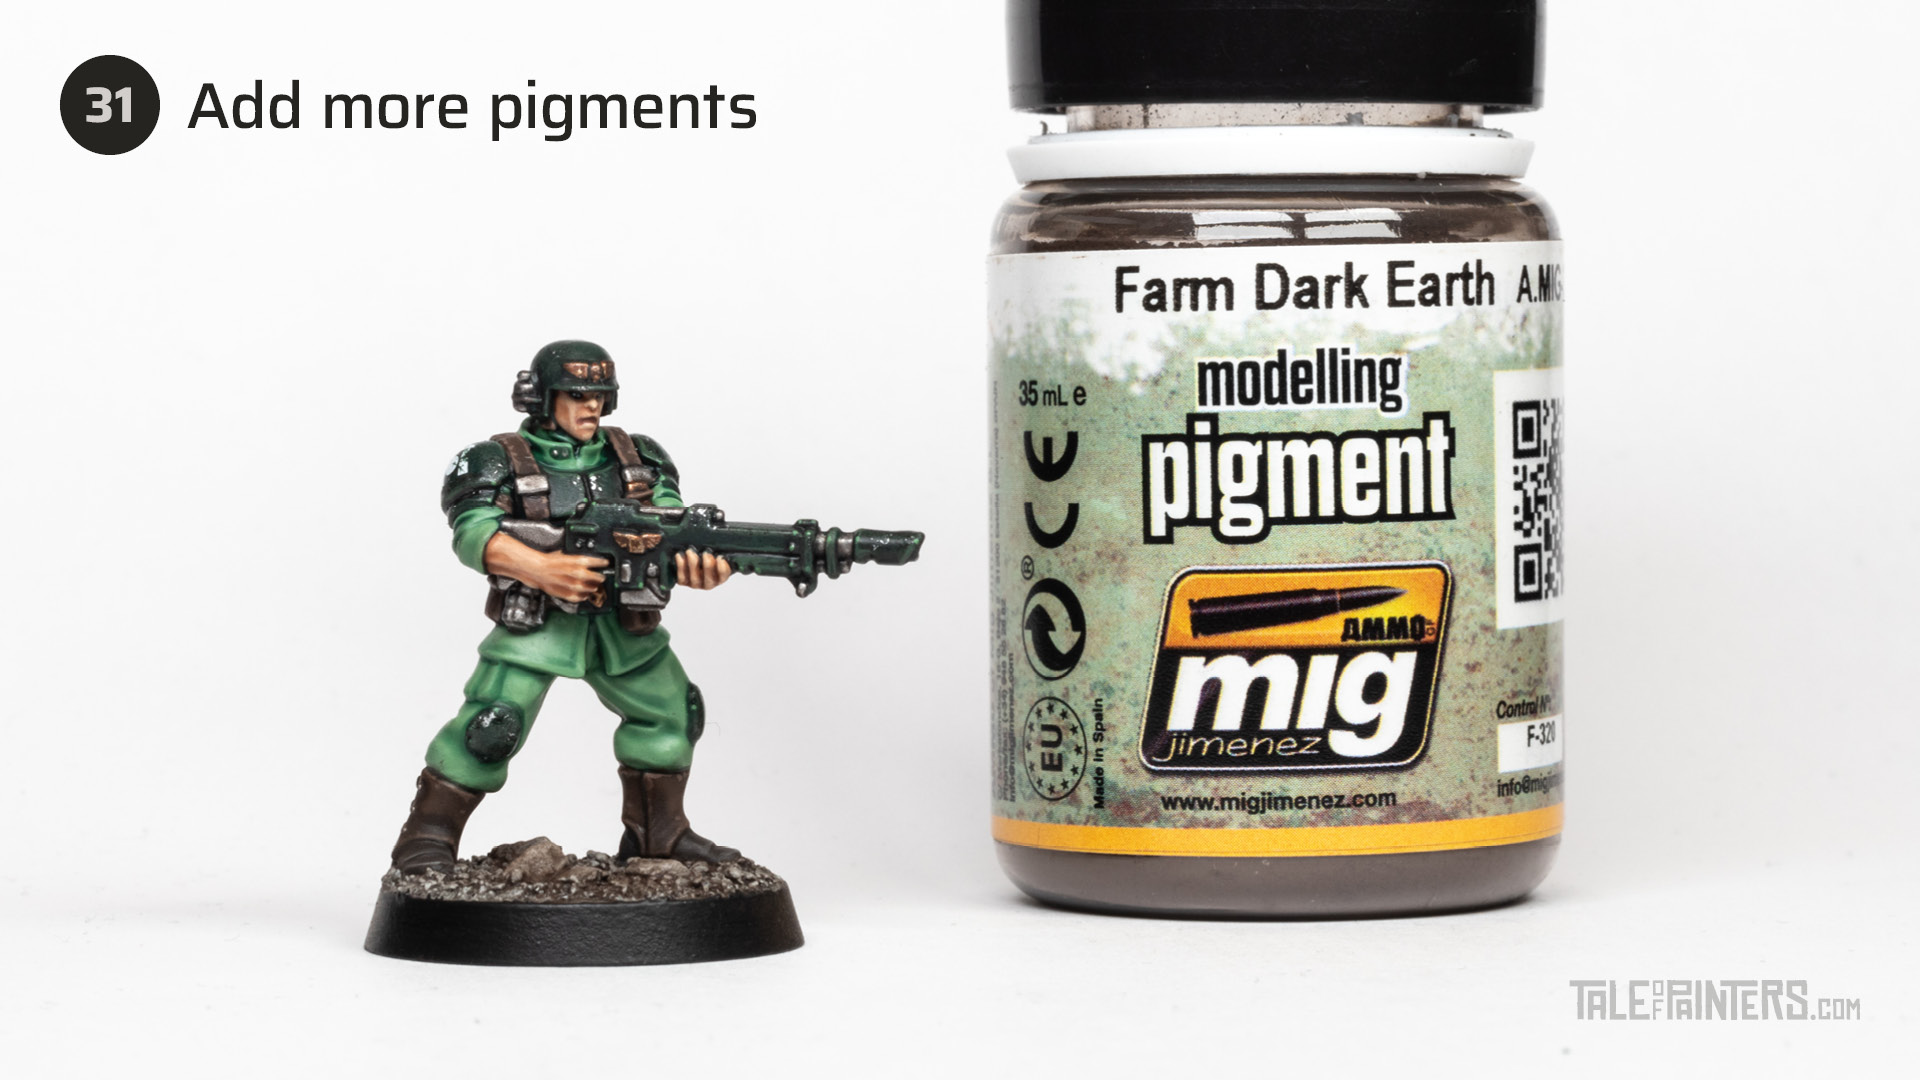
Finally, add some Farm Dark Earth pigments from mig to a few spots on the base to add some natural colour variation to the rubble.
Finally, I sealed the model with a coat of my favourite matt varnish, Mr Topcoat Premium Flat. If you struggle to find the perfect matt varnish, I’ve compiled a few of my favourites here. Remember that a varnish makes pigments wet and knocks down some of their intensity.
Painted Cadian Shock Trooper with dark green armour & green fatigues
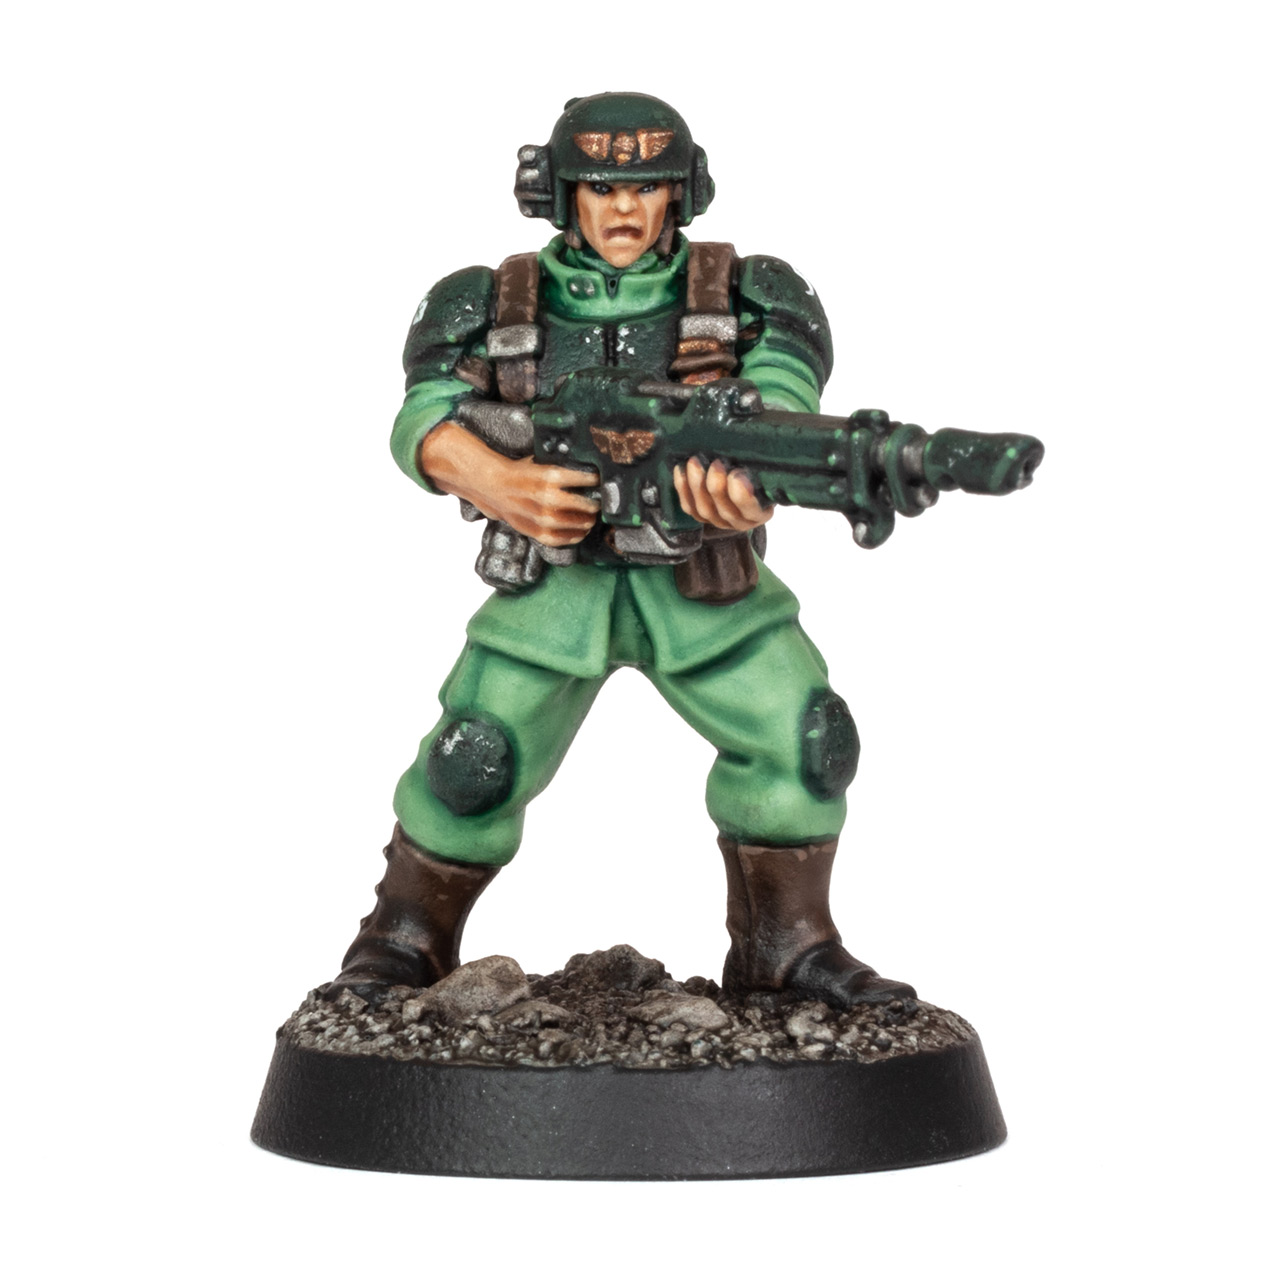

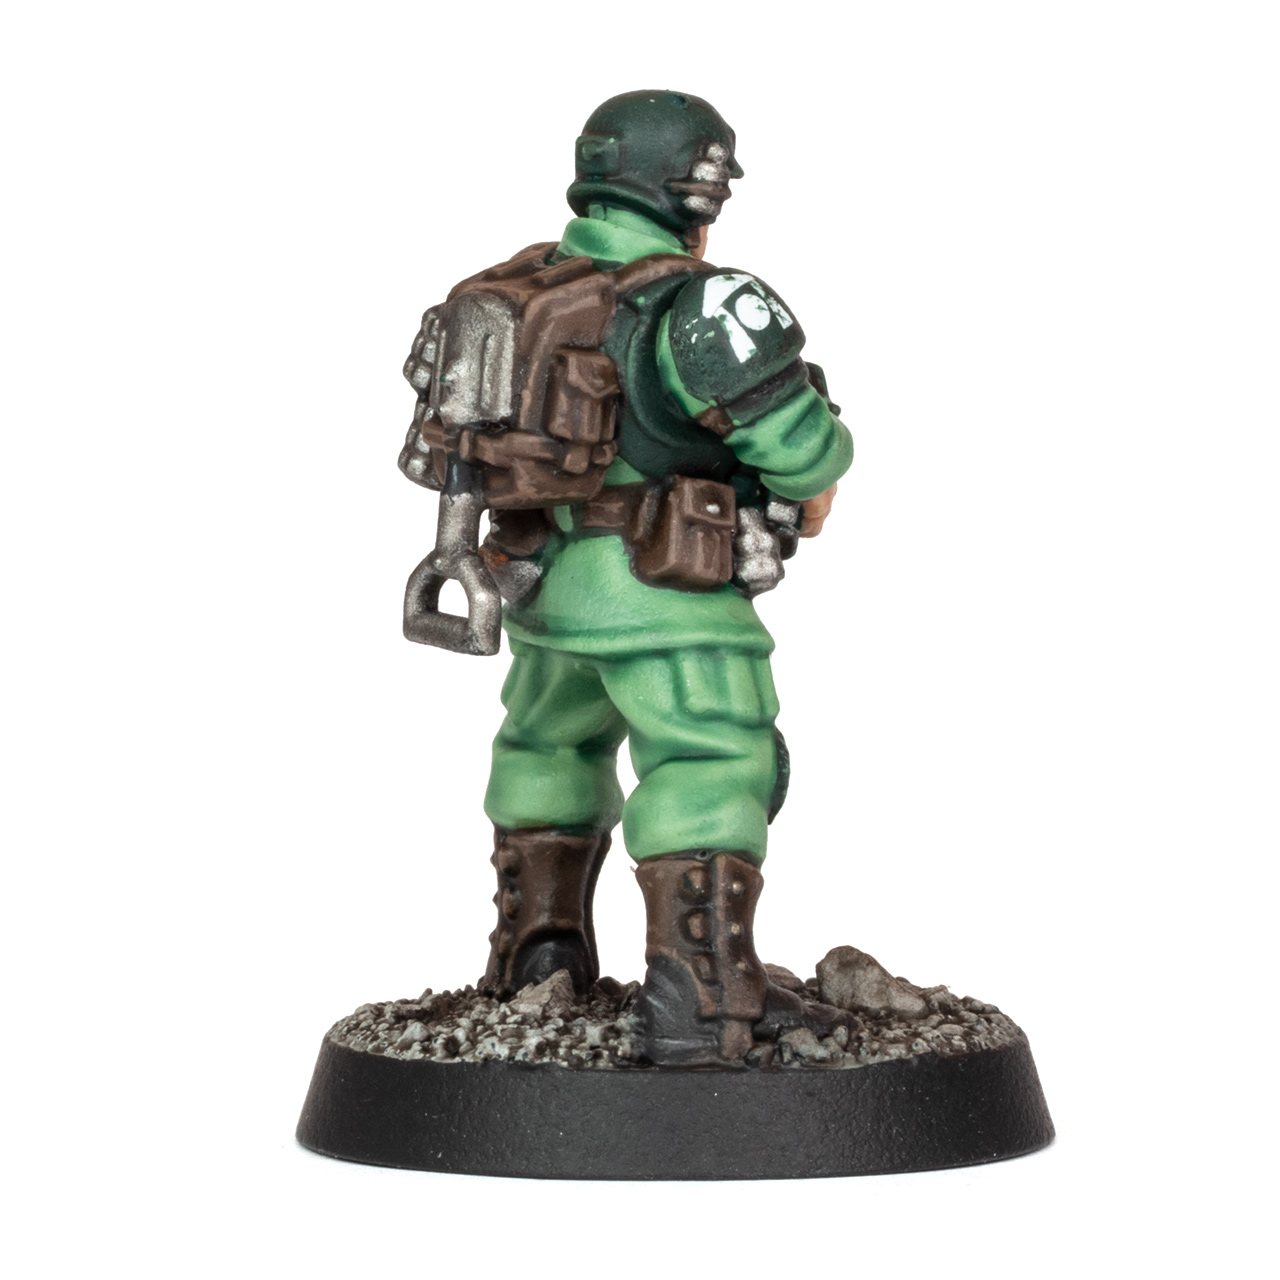
And this is the completed model. I chose effective and time-saving techniques so you can pump out a lot of infantry quickly. However, the new Cadian models are pretty detailed, so they aren’t exactly fast to paint. If you want to save a bit more time, it’s fine to skip some of the highlights and leave the eyes as dark sockets – you can’t see really make them out once the models hit the table.
Fancy painting some other Astra Militarum / Imperial Guard regiments? Then check out my Death Korps of Krieg painting guide here:
Or have a look at my Traitor Guardsmen tutorial, the paint scheme can easily be adapted for Loyalist Guardsmen:
Let me know if these tutorials have helped you out, either here in the comments or why not post the result over on our friendly painting Discord channel.
Paints you will need for this tutorial:
Citadel (Games Workshop)
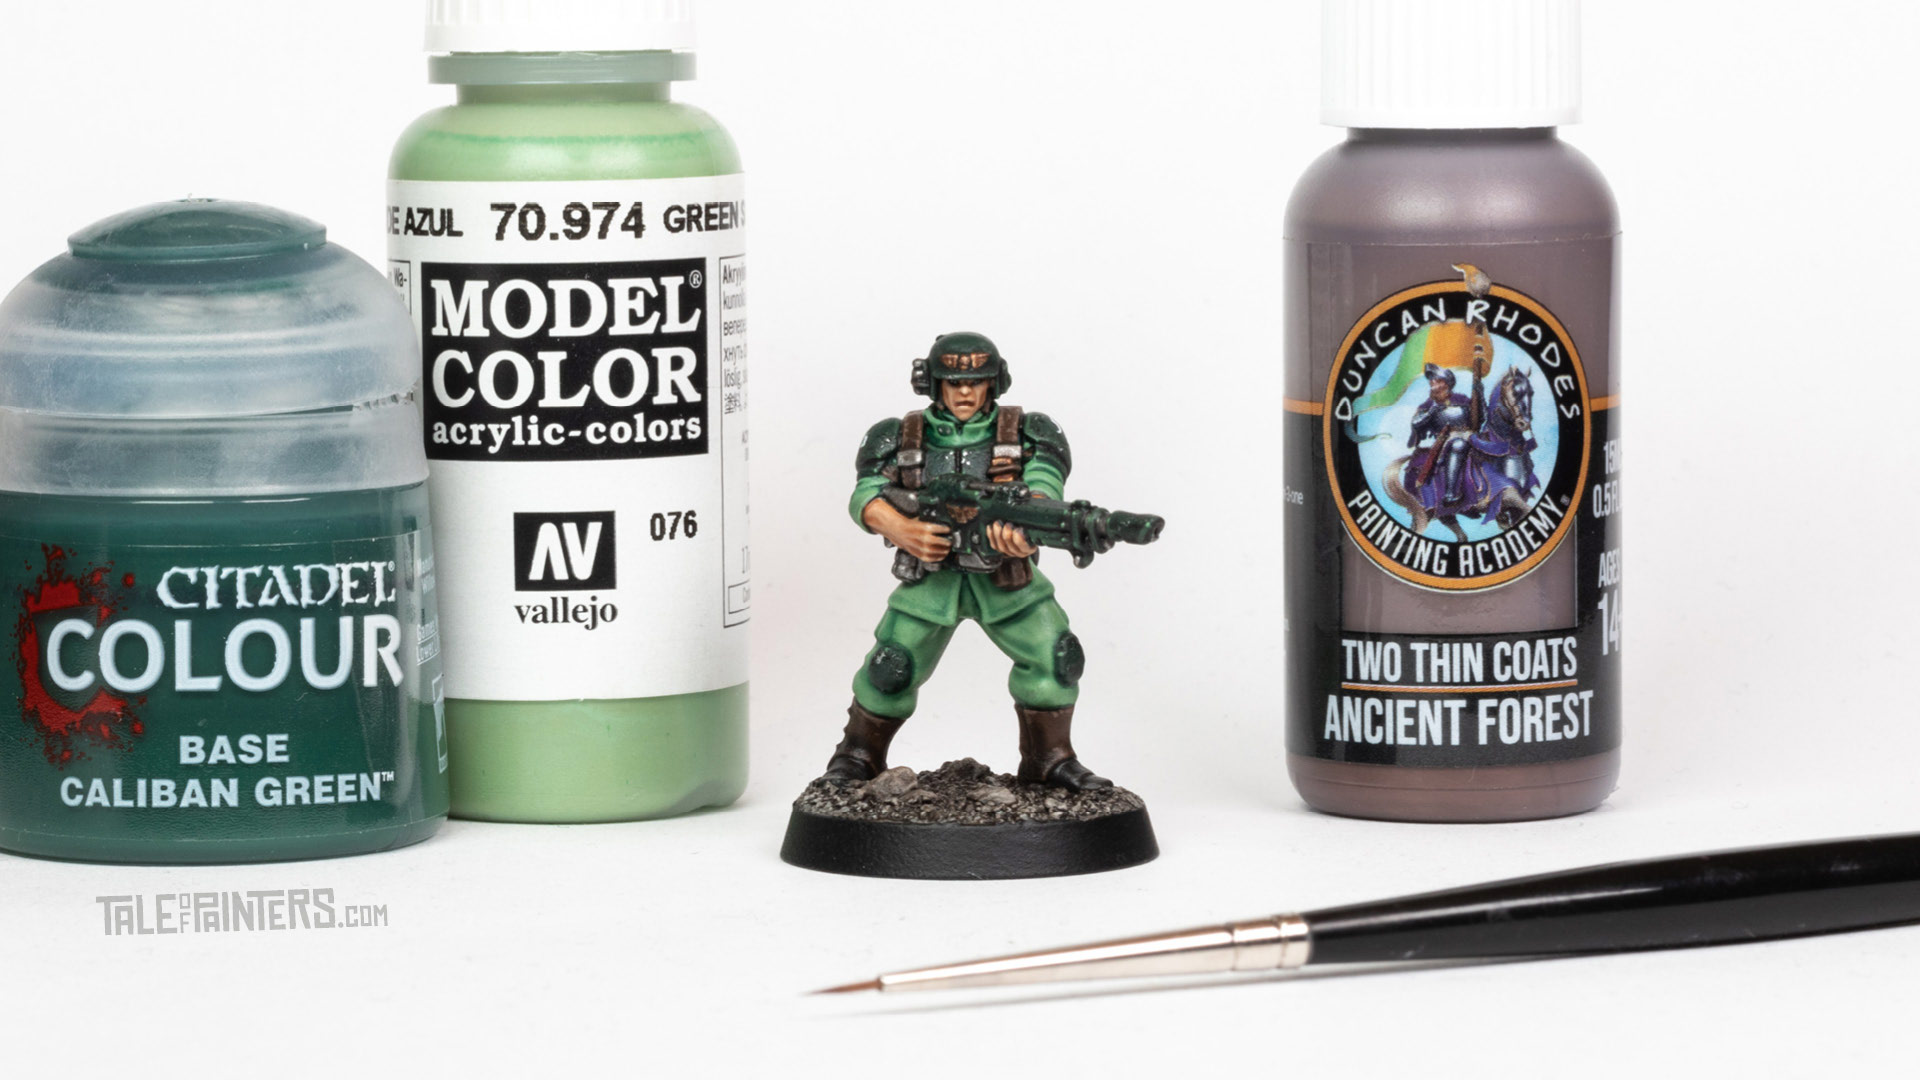
Caliban Green
Warboss Green
Poxwalker
Contrast Medium
Colour Forge
Renegade Green primer [or Caliban Green spray]
Vallejo Model Color
VMC Green Sky [or Skarsnik Green mixed with White Scar]
Two Thin Coats
Ancient Forest [or Gorthor Brown]
Wasteland Brown [or Gorthor Brown / Karak Stone]
Elven Skin [Kislev Flesh]
Vampire Fang [or Wraithbone]
Doom Death Black [or Abaddon Black]
Death Reaper [or Corbus Black]
Wizard Grey [or Eshin Grey]
Carcharodon Grey [or Dawnstone]
Plate Armour [or Iron Hands Steel]
Mythril Blade [or Stormhost Silver]
Spartan Bronze [or Brass Scorpion]
Flesh Wash [or Reikland Fleshshade or Guilliman Flesh]
Battle Mud Wash [or Agrax Earthshade]
Oblivion Black Wash [or Nuln Oil]
The Army Painter Warpaints
Gloss Varnish [or ‘Ardcoat]
Other
Vallejo Pigments Dark Slate Grey
Vallejo Pigments Light Slate Grey
mig modelling pigment Farm Dark Earth
Microscale Microsol

If you like this tutorial and want to start or expand your own Imperial Guard collection, please consider our partner stores Wayland Games, Element Games, and Taschengelddieb, which all offer a welcome discount of up to 20% over RRP. Using our links supports Tale of Painters at no extra cost to you:
Hope you enjoyed this tutorial. If so, leave a comment or reaction below, and if you got any questions, leave them here so I can answer them for you.
Tale of Painters is the unofficial Warhammer hobby magazine run by hobbyists like you. Support our work by using the affiliate links from our partner stores for your next orders so we can continue to bring you fantastic FREE content every day:


![]()
![]()
Or support us directly:


